20
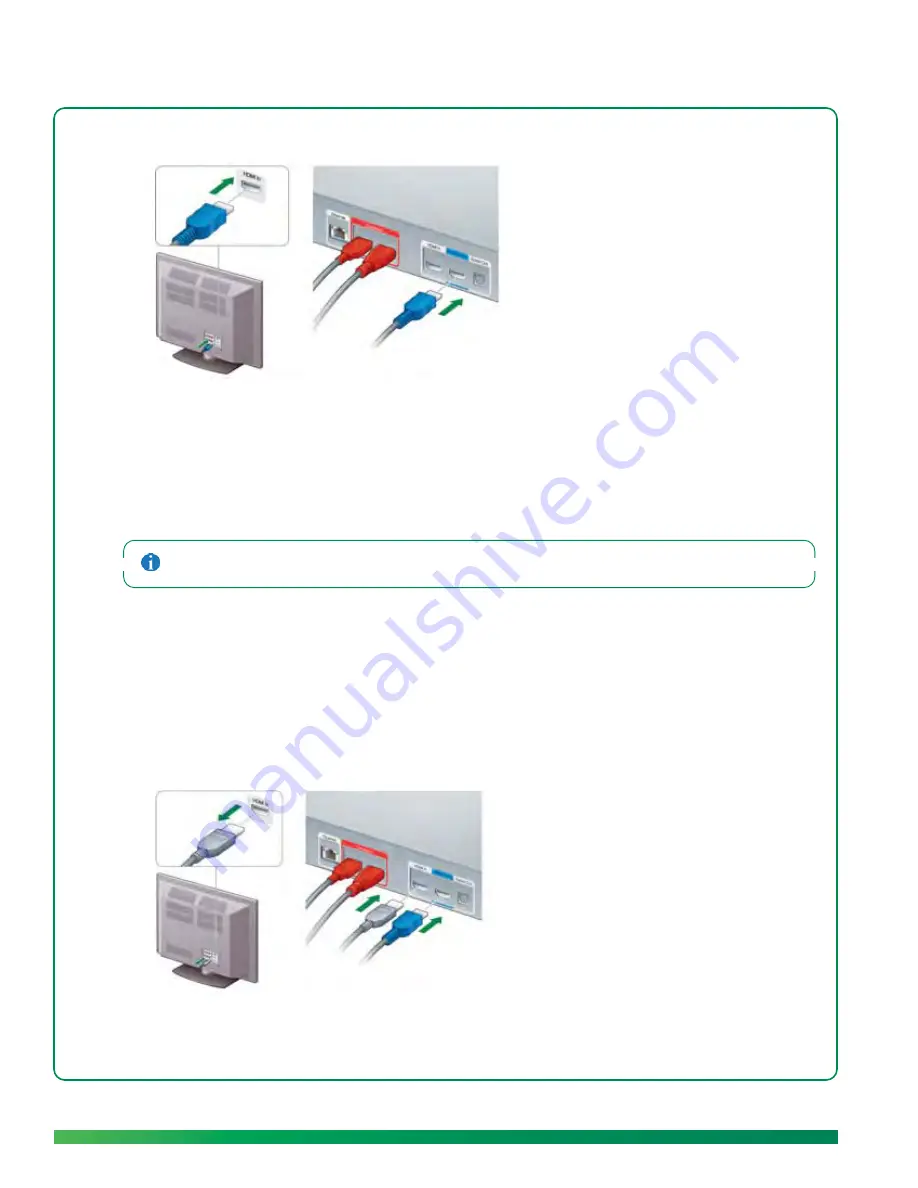
Connect the camera and the console
2.
Insert the other end of the cable into the blue
HDMI Out
port on the back of the ūmi console.
With this basic setup, when you want to use ūmi, you’ll use your TV remote to switch to the HDMI input
for the ūmi console (for example, HDMI2).
To watch TV, you switch the source back to the HDMI input for your TV service (for example, HDMI1).
Alternately, you can use umi and watch TV at the same time, without needing to switch TV input
sources. If you want to do this, follow these connection steps instead:
This connection method is sometimes called “pass-through mode.”
1.
On your TV, disconnect the HDMI cable that connects your set top box to your TV. If you have more
than one HDMI cable connected to your TV, make sure to disconnect the one from your set top
box.
2.
Insert the cable you just disconnected into the gray
HDMI In
port on the back of the ūmi console.
The ūmi console should now be connected to your set top box.
3.
Insert either end of the blue HDMI cable into any available HDMI port on your TV.
4.
Insert the other end of the cable into the blue
HDMI Out
port on the back of the ūmi console.
Summary of Contents for ?mi telepresence
Page 1: ...Welcome to Cisco ūmi telepresence User guide ...
Page 6: ...6 Contents ...
Page 12: ...12 Create your account online ...
Page 42: ...42 Calls ...
Page 50: ...50 Contacts ...
Page 62: ...62 My videos ...
Page 76: ...76 Settings ...
Page 114: ...114 Advanced topics ...
Page 118: ...118 Glossary ...


