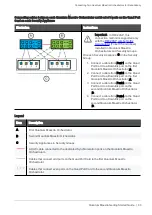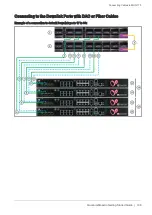
Connecting Two Quantum Maestro Orchestrators for Redundancy
Quantum Maestro Getting Started Guide | 94
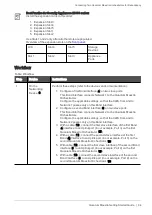
Best Practice for Security Appliances 23000 series:
Install the expansion cards in this order:
1. Expansion Slot 3
2. Expansion Slot 4
3. Expansion Slot 5
4. Expansion Slot 1
5. Expansion Slot 2
Use Slots 1 and 2 only after all other slots are populated.
Overview of the expansion slots on the
LCD
Slot 4
Slot 5
Storage
Devices
Slot 1
Slot 2
Slot 3
Appliance
Ports
Workflow
Step
Device
Instructions
1
On the
Networking
Device (
3
)
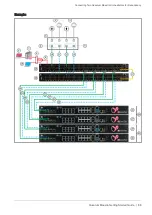
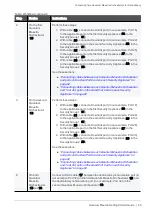
Perform these steps (refer to the device vendor documentation):
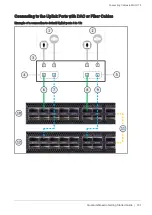
1. Configure a first Bond interface (
4
) on two slave ports.
This Bond interface connects Network 1 to the Quantum Maestro
Orchestrators.
Configure the applicable settings, so that the traffic from and to
Network 1 passes only on this Bond interface.
2. Configure a second Bond interface (
5
) on two slave ports.
This Bond interface connects Network 2 to the Quantum Maestro
Orchestrators.
Configure the applicable settings, so that the traffic from and to
Network 2 passes only on this Bond interface.
3. With a cable (
10
), connect the first slave interface of the first Bond
(
4
) interface to an Uplink port (in our example, Port 3) on the
first
Quantum Maestro Orchestrator (
15
).
4. With a cable (
11
), connect the second slave interface of the first
Bond (
4)
interface to an Uplink port (in our example, Port 3) on the
second
Quantum Maestro Orchestrator (
16
).
5. With cable (
12
), connect the first slave interface of the second Bond
interface (
5
) to an Uplink port (in our example, Port 9) on the
first
Quantum Maestro Orchestrator (
15
).
6. With cable (
13
), connect the second slave interface of the second
Bond interface (
5
) to an Uplink port (in our example, Port 9) on the
second
Quantum Maestro Orchestrator (
16
).
Table: Workflow

