39
Configuring Print Settings
1
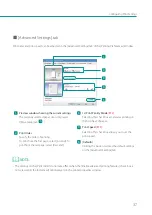
[ Light
Clicking this button cleans the print head.
9
[ Special Settings]*
Configure special settings of this printer by
clicking this button.
Normally, do not use this button.
2
[ Strong Cleaning]
Clicking this button cleans the print head more
thoroughly than [Light Cleaning].
3
[ Print Head Position Adjustment]*
Clicking this button adjusts the print head
position.
10
[ Cutter Adjustment]*
Clicking this button allows to adjust the cutting
position of the auto cutter.
4
[ Output Setting Value]
Clicking this button outputs the current settings
of this printer.
11
[ Manual Cut]
Cut the paper at the desired position by clicking
this button.
5
Clicking this button puts the printer into the
sleep mode.
12
[ Moving The Printer]*
Clicking this button makes preparations for
moving the printer indoors.
6
[ Sleep Timer Setting]*
Set the time that elapses before the printer
enters sleep mode and the time that elapses
before the printer is turned off, by clicking this
button.
13
[ Shipping The Printer]*
Clicking this button prepares the printer to be
transported.
7
[ Ink Refresh]
Clicking this button allows ink to flow in the print
head and ink path to maintain the ink quality.
(LX-P1300 only)
14
[ Add Custom Paper Type]*
Allows the user to adjust ink jetting amounts and
register them along with the paper type of new
paper.
8
[ Start Status Monitor]
Clicking this button displays the status monitor.
* Items displayed on the [Utility] tab of the printer properties window.
IMPORTANT
• The settings that can be configured on the [Utility] tab of the printer properties window are different from those
that can be configured on the [Utility] tab of the printing preferences window.
• When configuring settings on the [Utility] tab, the printer must be powered and connected to the computer.


