32
Proprietary Information: Not for use or disclosure except by written agreement with Calix.
© 2001-2008 Calix. All Rights Reserved.
b.
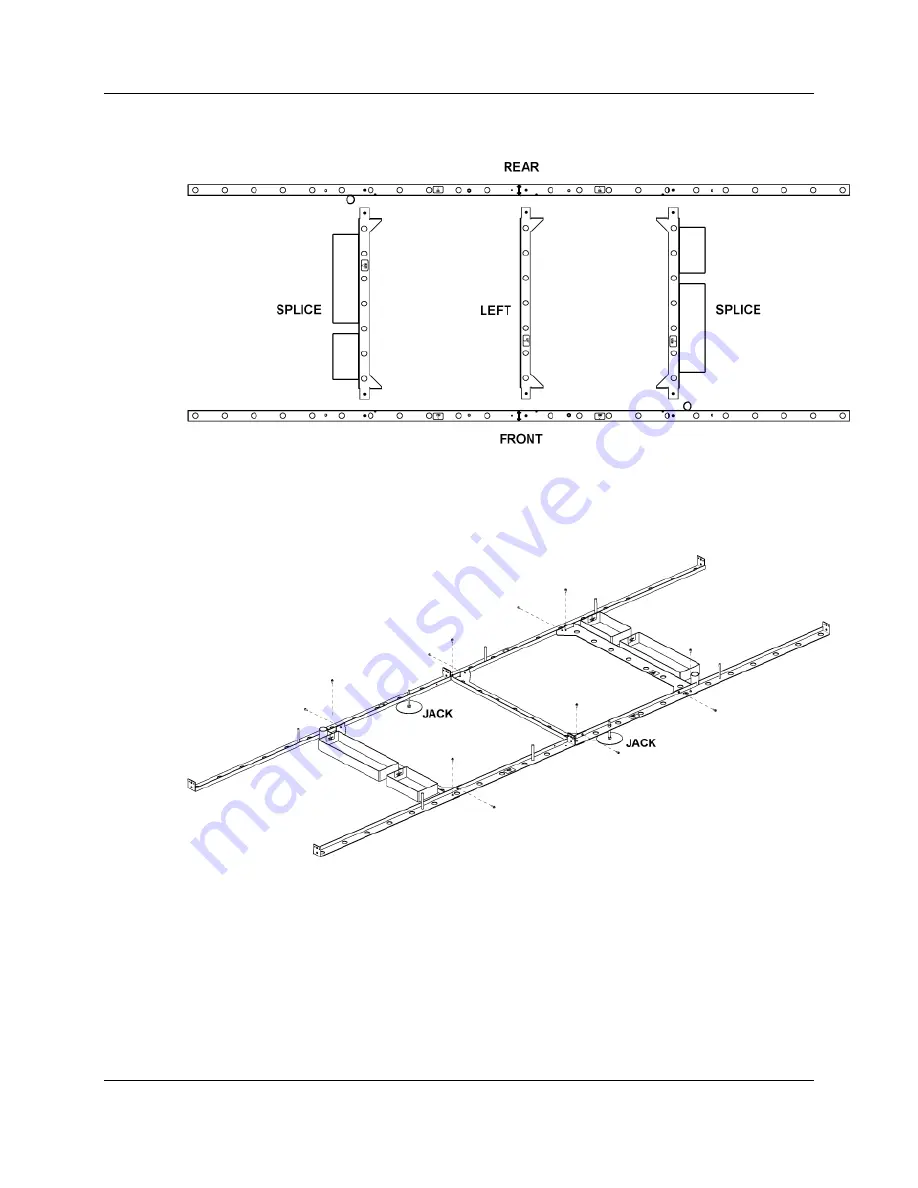
Place the Left bracket between the Splice brackets, with the labeled arrow (Left)
pointing to the left as shown.
c.
Align the screw holes on the Splice and Left brackets with the counterpart holes on
the Front and Rear brackets.
d.
Install 12 supplied screws into the threaded screw holes to connect the brackets
together. Use two screws at each junction point as shown.
4.
Install the two support jacks into the threaded holes under the Front and Rear brackets
as shown.
5.
Tighten all screws to complete the template assembly.


