43
1
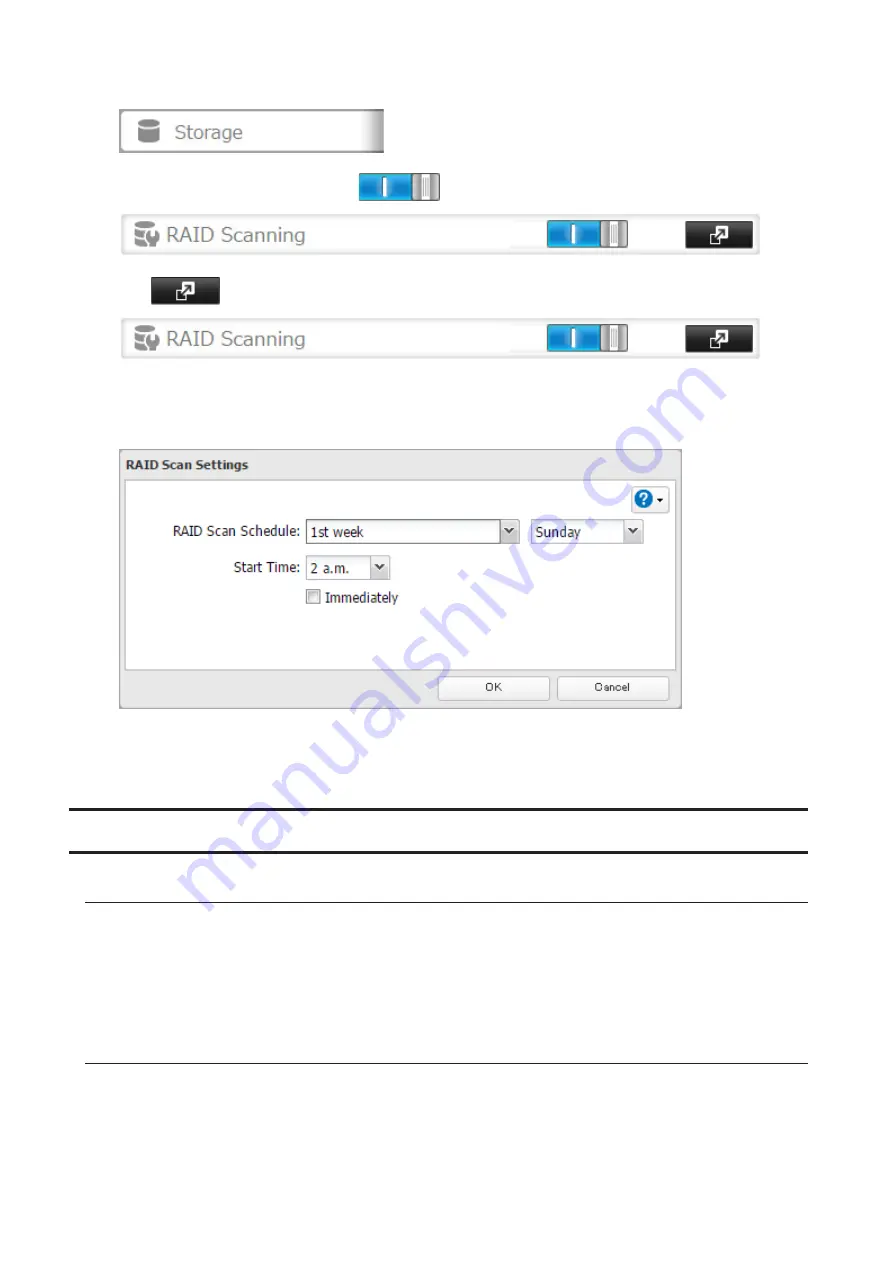
In Settings, click
Storage
.
2
Move the RAID scanning switch to the
position to enable RAID scanning.
3
Click
to the right of "RAID Scanning".
4
Click
Edit
.
5
Select when to run the scan and click
OK
.
Notes:
• Select the "Immediately" checkbox to run a RAID scan immediately.
• To stop a RAID scan, click
Cancel RAID Scan
.
Adding an External Drive
Connecting an External Drive
Your TeraStation includes USB ports (the number of ports depends on your model), and you can connect external
drives to these ports. Once connected, they appear as shared folders on the TeraStation. Formatted drives are
detected automatically. Unformatted drives should be formatted in Settings.
After a USB drive is recognized, Windows adds "usbdisk x" under the TeraStation in "Network", where "x" is the USB
port where the drive is connected.
Compatibility
The following USB devices are supported by the TeraStation:
• USB storage devices
• Card readers (except for card readers that can recognize two or more memory cards)
Buffalo external USB drives are recommended.
Supported file systems for external drives are below:
Summary of Contents for TeraStation 5010
Page 8: ...7 For Customers in Taiwan 175 ...
Page 75: ...74 3 Click Edit 4 Click Add 5 Click Browse under Replication Source ...
Page 87: ...86 18Click Time Machine ...
Page 88: ...87 19Click Select Backup Disk 20Select the TeraStation then click Use Disk ...
Page 97: ...96 3 Click Create New Job 4 Select backup settings such as date and time to run 5 Click Add ...
Page 103: ...102 4 Click the Options tab 5 Click Edit ...
Page 137: ...136 3 Click Edit ...
Page 138: ...137 4 Select or enter the desired MTU size and click OK ...


