117
2
Click
to the right of "SNMP".
3
Click
Edit
.
4
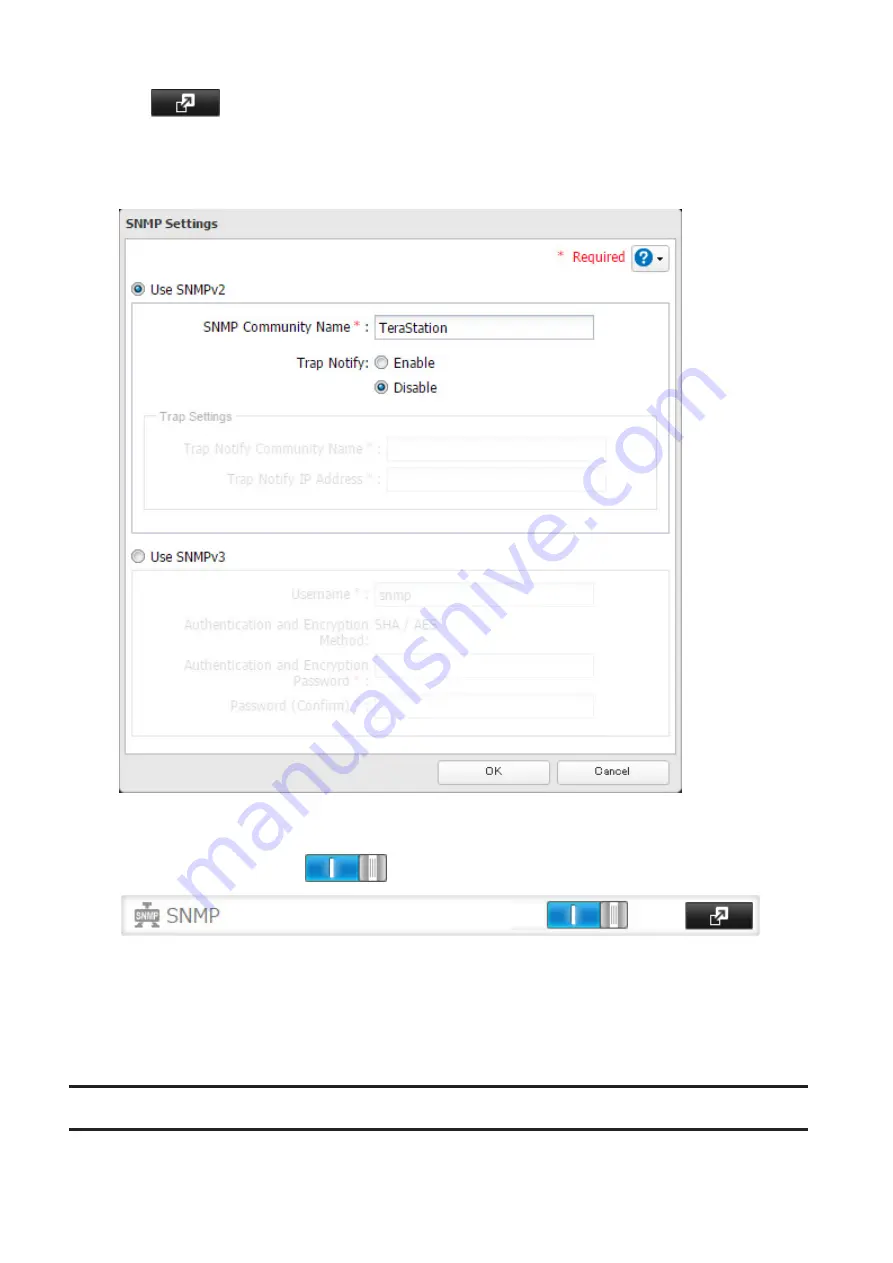
Choose whether to use SNMP version 2 or version 3.
5
Configure the desired settings, then click
OK
.
6
Move the SNMP switch to the
position to enable SNMP.
7
SNMP has been configured for the TeraStation. For further use, configure your SNMP-compatible network
management software using the Buffalo-specific MIB (management information base) file. The MIB file is
available from the Buffalo website.
Depending on which SNMP client software you use, the procedure for configuring the software will differ. For
more detailed information on configuring the client software, refer to its help or included manual.
Saving and Applying Settings
The TeraStation's settings can be saved to a USB drive and restored to another TeraStation of the same series. Use
this function to back up and copy settings to a new TeraStation.
Summary of Contents for TeraStation 5010
Page 8: ...7 For Customers in Taiwan 175 ...
Page 75: ...74 3 Click Edit 4 Click Add 5 Click Browse under Replication Source ...
Page 87: ...86 18Click Time Machine ...
Page 88: ...87 19Click Select Backup Disk 20Select the TeraStation then click Use Disk ...
Page 97: ...96 3 Click Create New Job 4 Select backup settings such as date and time to run 5 Click Add ...
Page 103: ...102 4 Click the Options tab 5 Click Edit ...
Page 137: ...136 3 Click Edit ...
Page 138: ...137 4 Select or enter the desired MTU size and click OK ...


