


6. EM GUI orientation
How to access the layer adjustments
Adjustments to layers are performed in the “Adjust” panel:
1. Select the layer from the list
Or,
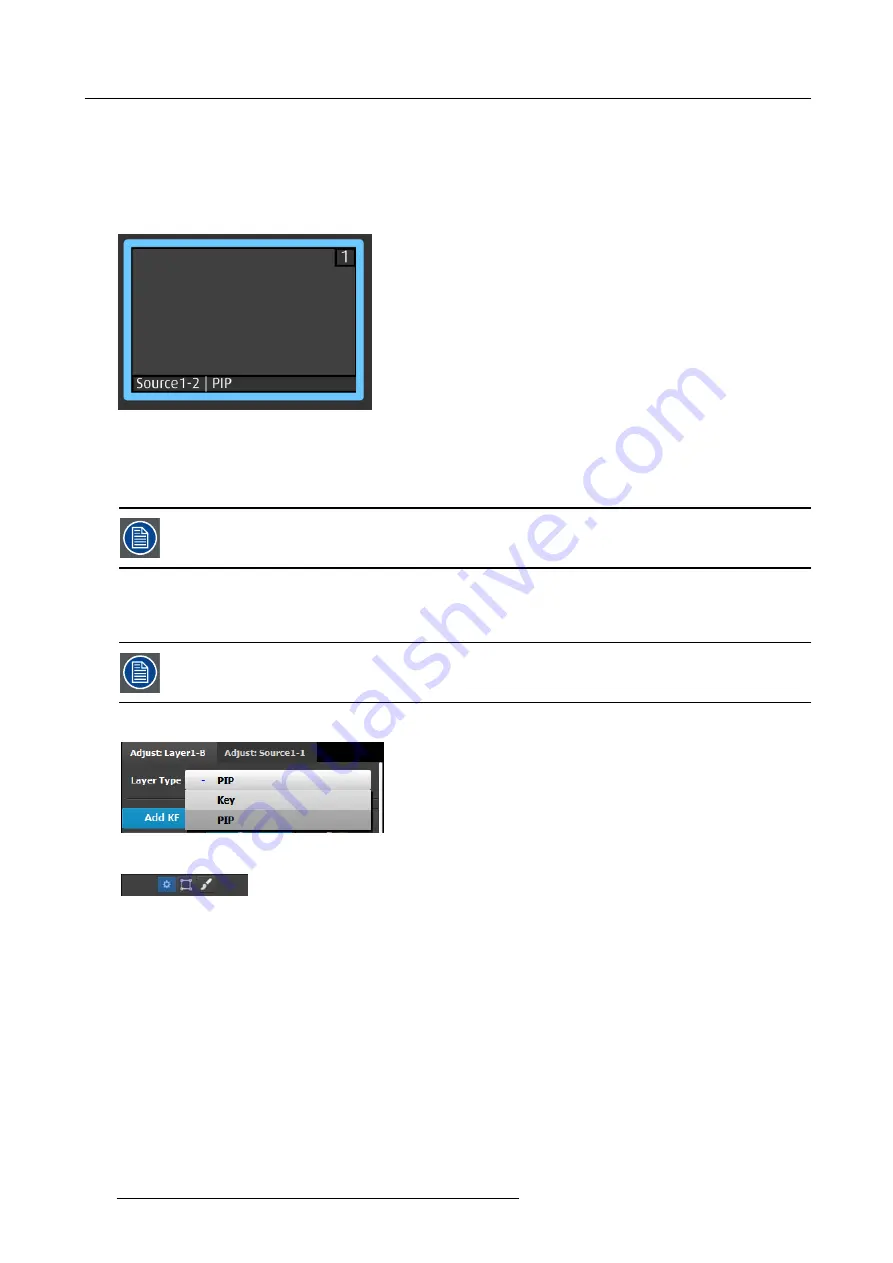
Select the layer from the preview canvas.
The layer is selected.
Image 6-59
When the layer is selected and is visible on the canvas, it will have a blue highlight around the layer.
2. Click on the Adjust tab that is on the top of the adjustment area.
The layer adjustment panel is displayed.
It is possible to select multiple layers by clicking on the each targeted layer once Multiple Select is set to ON.
Layer adjustment panel description
The Layer adjustment panel allows access to general layer adjustments and takes effect only if a layer is selected.
Layer adjustments are performed on individual layers. When multiple layers are selected, the adjustments are
disabled.
The upper part of the panel is always visible:
This part includes:
•
Layer type
: Layer can be a PIP or a Key. The available
adjustments depend on the selected mode.
•
Keyframes
: There are 2 KeyFrames per layer.
The lower part of the panel provides menus for layer sizing and color adjustments
•
Main adjustment : Border and Shadows
•
Layer Window adjustment: Size, Position, Mask
•
Layer Color Effects adjustment: Brightness, Contrast,
Gamma, Hue, Saturation, Monochrome, Invert
PIP / KEY selection
The
fi
rst selection is the choice for the layer type: PIP or a Key. Depending on the selection, the rest of the menu will adapt.
Keyframes
In a PIP “move,” Keyframe is a point where an action or a change occurs. For example, a PIP movement is described by two
keyframes. The
fi
rst keyframe is the state of the PIP at the initial point of the movement. The second keyframe is the point where
the PIP moves to. The size and color attributes can also change during the move.
By default, the initial position and state of the layer is keyframe 1. The user can change the size, and change the border and shadow
parameters before de
fi
ning Keyframe2. After changes are done to Keyframe1, the second keyframe can be added by pressing
the “Add KF” button. A new position and size can be de
fi
ned and adjustments to the border and shadow parameters to de
fi
ne the
second Keyframe.
172
R5905948 EVENT MASTER DEVICES 17/07/2017
Summary of Contents for S3 series
Page 1: ...Event Master Devices User s Guide R5905948 05 17 07 2017 ...
Page 9: ...Table of contents Index 531 R5905948 EVENT MASTER DEVICES 17 07 2017 5 ...
Page 10: ...Table of contents 6 R5905948 EVENT MASTER DEVICES 17 07 2017 ...
Page 20: ...2 Safety 16 R5905948 EVENT MASTER DEVICES 17 07 2017 ...
Page 66: ...4 Hardware orientation 62 R5905948 EVENT MASTER DEVICES 17 07 2017 ...
Page 90: ...5 Front Panel Menu orientation 86 R5905948 EVENT MASTER DEVICES 17 07 2017 ...
Page 264: ...8 Updating firmware 260 R5905948 EVENT MASTER DEVICES 17 07 2017 ...
Page 268: ...9 General operation example Image 9 3 264 R5905948 EVENT MASTER DEVICES 17 07 2017 ...
Page 285: ...9 General operation example Image 9 25 R5905948 EVENT MASTER DEVICES 17 07 2017 281 ...
Page 288: ...9 General operation example 284 R5905948 EVENT MASTER DEVICES 17 07 2017 ...
Page 316: ...10 Controller orientation 312 R5905948 EVENT MASTER DEVICES 17 07 2017 ...
Page 326: ...11 Controller Configuration 322 R5905948 EVENT MASTER DEVICES 17 07 2017 ...
Page 352: ...12 Controller Operation 348 R5905948 EVENT MASTER DEVICES 17 07 2017 ...
Page 418: ...13 E2 Maintenance 414 R5905948 EVENT MASTER DEVICES 17 07 2017 ...
Page 488: ...16 EC 200 Maintenance 484 R5905948 EVENT MASTER DEVICES 17 07 2017 ...
Page 494: ...17 Environmental information 490 R5905948 EVENT MASTER DEVICES 17 07 2017 ...
Page 512: ...A Specifications 508 R5905948 EVENT MASTER DEVICES 17 07 2017 ...
Page 527: ...C Troubleshooting C TROUBLESHOOTING R5905948 EVENT MASTER DEVICES 17 07 2017 523 ...
Page 528: ...C Troubleshooting 524 R5905948 EVENT MASTER DEVICES 17 07 2017 ...


