


6 0
C h a p t e r 4 • 3 D E f f e c t s I n s t a l l a t i o n
I n s t a l l i n g a n d U s i n g t h e A v i d E x p a n s i o n C h a s s i s
Setting the SCSI ID
You need to assign the 3D Effects boards a SCSI ID. To set the SCSI ID:
1. Close the 3D Effects cover. You’ll need to place the support rod in the up
position and latch it in place before you can lower the cover.
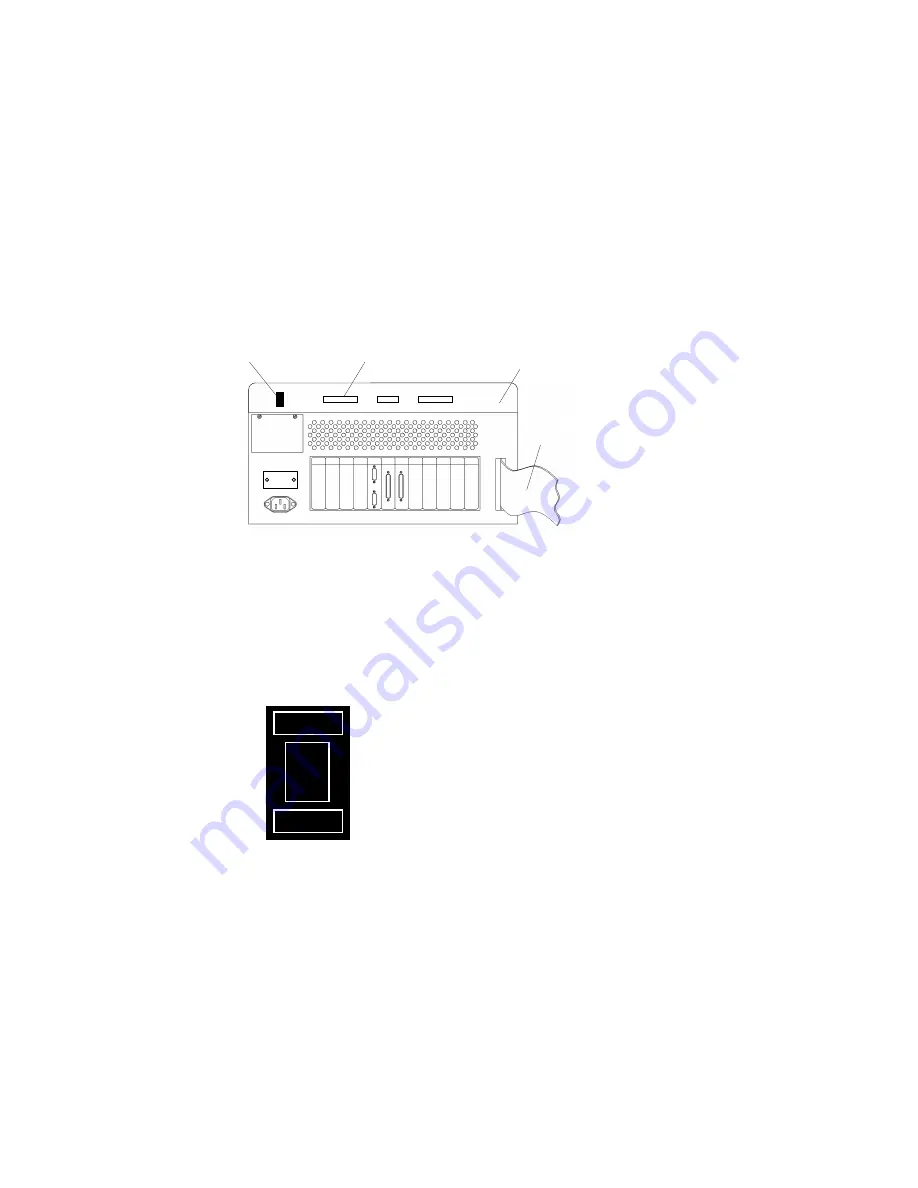
2. Locate the SCSI ID switch on the back of the 3D cover (see Figure 43).
Figure 43: Expansion Chassis and 3D Effects Cover (Rear View)
3. Set the SCSI ID to one of the available SCSI IDs that you found earlier (see the
list of SCSI IDs that you wrote down on page 49), by using the SCSI ID switch
(see Figure 44). The ID number appears in the window in the middle of the
switch. Press the top button to decrement the SCSI ID. Press the bottom
button to increment the SCSI ID.
Figure 44: 3D Effect SCSI ID Switch
▲
Make sure that you do not select a SCSI ID that is already in use on the SCSI
bus.
Interface cable
3D Effects cover
SCSI connector
SCSI ID switch
2
-
+
Decrement ID
Increment ID
Current SCSI ID
Summary of Contents for EXPANSION CHASSIS
Page 1: ... INSTALLING AND USING THE AVID EXPANSION CHASSIS HARDWARE GUIDE ...
Page 10: ...x Contents Installing and Using the Avid Expansion Chassis ...
Page 18: ...6 Chapter 1 Overview Installing and Using the Avid Expansion Chassis ...
Page 30: ...18 Chapter 2 Populated Chassis Installation Installing and Using the Avid Expansion Chassis ...
Page 58: ...46 Chapter 3 Empty Chassis Installation Installing and Using the Avid Expansion Chassis ...
Page 90: ...78 Chapter 6 Chassis Troubleshooting Installing and Using the Avid Expansion Chassis ...


