Chapter 2 Hardware Installation and Connection
XGS2220 Series User’s Guide
42
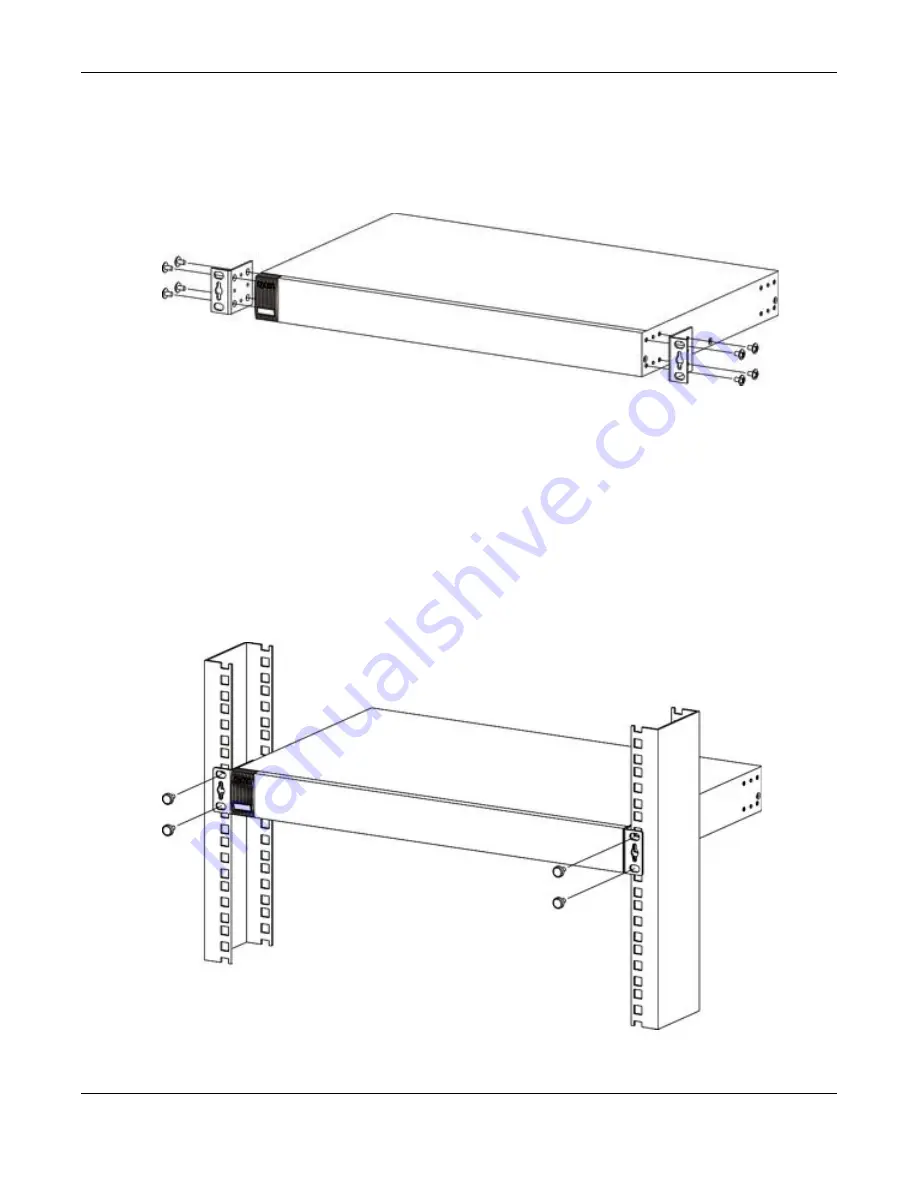
2.4.3 Attaching the Mounting Brackets to the Switch
1
Position a mounting bracket on one side of the Switch, lining up the four screw holes on the bracket with
the screw holes on the side of the Switch.
Figure 10
Attaching the Mounting Brackets
2
Using a #2 Philips screwdriver, install the M3 flat head screws through the mounting bracket holes into
the Switch.
3
to install the second mounting bracket on the other side of the Switch.
4
You may now mount the Switch on a rack. Proceed to the next section.
2.4.4 Mounting the Switch on a Rack
1
Position a mounting bracket (that is already attached to the Switch) on one side of the rack, lining up
the two screw holes on the bracket with the screw holes on the side of the rack.
Figure 11
Mounting the Switch on a Rack
2
Using a #2 Philips screwdriver, install the M5 flat head screws through the mounting bracket holes into
Содержание XGS2220 Series
Страница 27: ...27 PART I User s Guide ...
Страница 56: ...56 PART II Technical Reference ...
Страница 154: ...Chapter 20 Cloud Management XGS2220 Series User s Guide 154 Figure 105 SYSTEM Cloud Management ...
Страница 309: ...Chapter 45 Multicast XGS2220 Series User s Guide 309 Figure 226 MVR Group Configuration Example View ...
Страница 467: ...Chapter 68 Policy Rule XGS2220 Series User s Guide 467 Figure 343 Policy Example ...
Страница 555: ...Chapter 78 MAINTENANCE XGS2220 Series User s Guide 555 Figure 413 MAINTENANCE Tech Support Download ...
Страница 562: ...Chapter 79 Networked AV Mode XGS2220 Series User s Guide 562 Figure 418 SYSTEM Cloud Management ...
Страница 616: ...616 PART III Troubleshooting and Appendices ...


