Chapter 7
Advanced PowerScript Functions
116
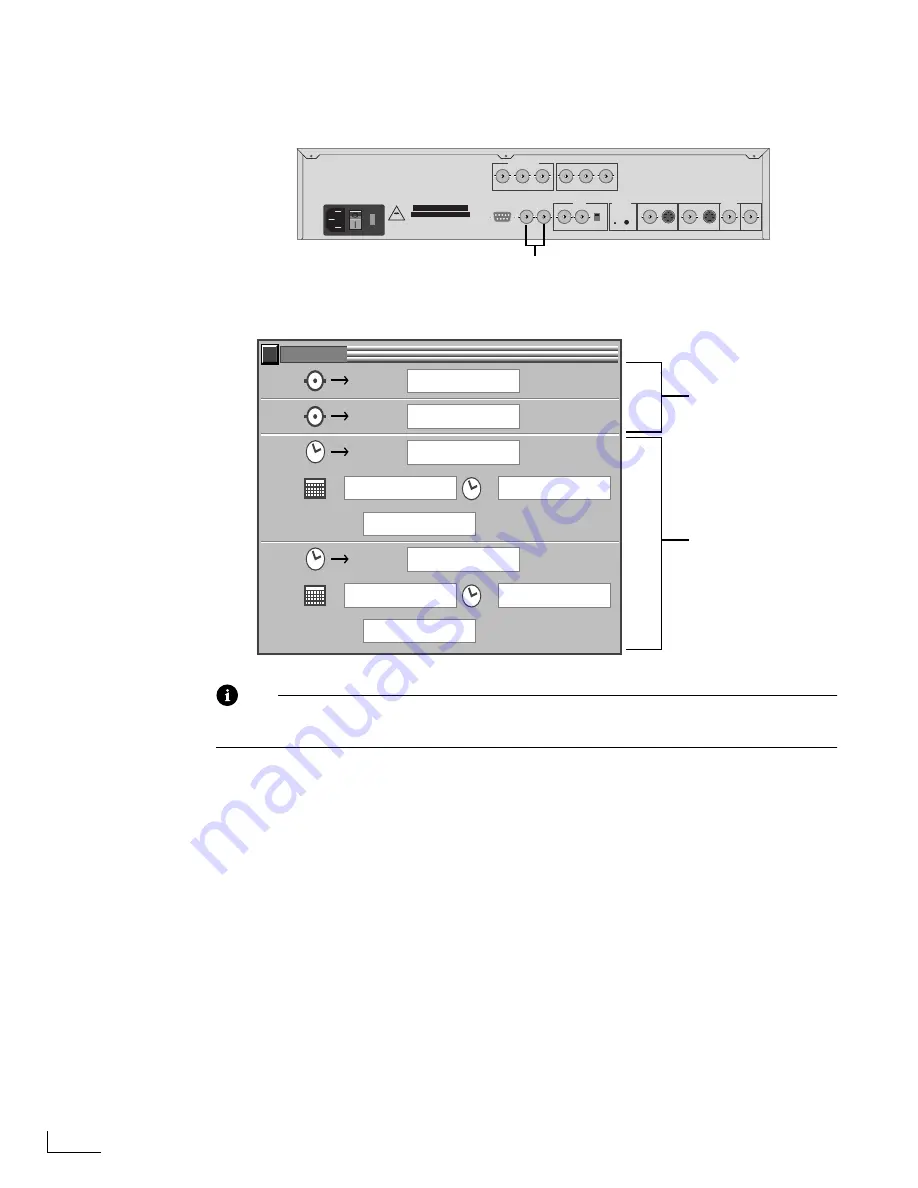
To use the GPI connectors:
1
Connect a GPI device to one or both GPI input connectors on PowerScript’s rear panel.
2
Display the
MAIN MENU
, click the
Setup
option, then click
GPI Options
to display the
SETUP:GPI
menu; or enter
Ctrl+Shift+F8
.
Note
Only the
GPI Controls
are used to control GPI connections. You’ll read about the
Timed Trigger Controls
in the subsequent section.
To trigger a project through a GPI connection:
¨
Enter the name of the project you want to trigger in the
Project
text box. Do not include
the PRJ file type extension when entering the name.
If you are triggering the project through the GPI 1 connector, enter the project name in
the corresponding
Project
text box—likewise, if you are using the GPI 2 connector, use
that
Project
text box. If you are using both GPI connectors, enter the project names in the
corresponding
Project
text boxes.
When the GPI signal arrives at the specified GPI connection, PowerScript locates and
plays the first page in the project. If PowerScript cannot locate a project with the speci-
fied name, it automatically performs a page trigger—which is explained in a later section.
AC INPUT
VOLTAGE
100-240 VAC
50-60 Hz
AV
PC CARD (PCMCIA)
TYPE I, II, III
SERIAL
(RS-232)
GPI-1
GPI-2
Y
R-Y (U)
B-Y (V)
Y
IN
OUT
TERM
FINE
COARSE
COMPOSITE
Y/C
COMPOSITE
Y/C
OUT
OUT
R-Y (U)
B-Y (V)
SYNC
SC PHASE
VIDEO IN
VIDEO OUT
PREVIEW
KEY
COMPONENT IN
COMPONENT OUT
RISK OF FIRE
REPLACE FUSE
AS MARKED
FUSE RATING
1A FOR 120 VAC
.5A FOR 220 VAC
GPI1 and GPI2 Connectors
PROJECT:
.PRJ
PROJECT:
.PRJ
PROJECT:
& REPEAT:
(HH:MM:SS)
(HH:MM:SS)
.PRJ
=
=
PROJECT:
& REPEAT:
.PRJ
=
=
2/14/97
08:30 PM
PINKFLYD
00:00:00
GPI 1
GPI 2
GPI 3
GPI 4
SETUP: GPI
GPI Controls
Timed Trigger Controls
Содержание PowerScript PS4000S
Страница 22: ...Notes ...
Страница 38: ...Notes ...
Страница 72: ...Notes ...
Страница 96: ...Notes ...
Страница 122: ...Notes ...
Страница 156: ...Notes ...
Страница 174: ...Notes ...
Страница 226: ...Notes ...
Страница 236: ...Notes ...


