Section 1 Basic Printer Functions
1-22
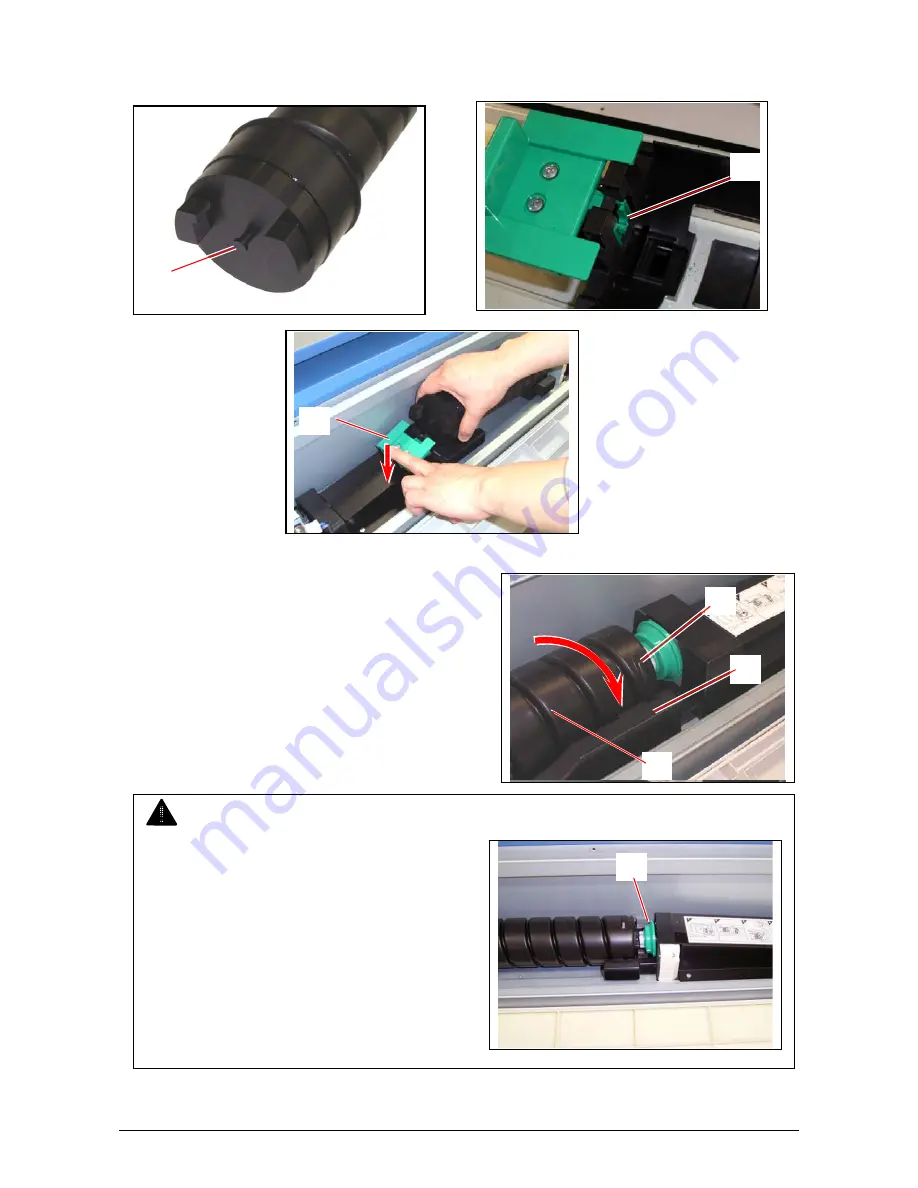
6. Locate the pin (6) of the left side of cartridge. While pressing down the Cartridge Lock Lever (3),
fit the pin to the groove (7)
7. Rotate the body of the cartridge (4) to the arrow’s
direction, several revolutions to open the toner
outlet.
Confirm that the projection (8) will fit into the
notches (9).
7
6
3
8
9
NOTE
It is not necessary to lock the cartridge with the
green Disk (2).
It will automatically lock after the
Toner Hatch is closed.
2
4
Содержание CX 8036
Страница 1: ...Instruction Handbook CX 8036 Large Format System ...
Страница 68: ...Section 2 Copy Mode 2 28 ...
Страница 94: ...Section 4 Job Info Screen 4 8 ...
Страница 110: ...5 16 Section 5 Help Configuration d Select Printer Driver from List e Choose Keep existing Driver ...
Страница 111: ...5 17 Section 5 Help Configuration f Setup Queue name all Caps in English g It is not necessary to Share driver ...
Страница 138: ...Section 6 Windows Driver 6 22 ...
Страница 150: ...Section 7 AutoCAD HDI Driver 7 12 5 0 Custom Settings 1 2 7 3 8 4 9 10 6 5 ...
Страница 201: ...Section 8 Request 8 45 ...
Страница 206: ...Section 8 Request 8 50 ...
Страница 224: ...9 18 Section 9 KIP Print Net KIP PrintNet on Opera ...
Страница 228: ...9 22 Section 9 KIP Print Net ...
Страница 242: ...Section 11 Connectivity 11 8 ...
Страница 246: ... 4 ...
Страница 252: ...2 2 Select the Applications folder 3 Select the Utilities folder ...
Страница 253: ...3 4 Find the Printer Setup Utility 5 On the top menu bar select Printers and then Add a Printer ...
Страница 255: ...5 8 Select Add 9 The printer set up will be in the Printer List ...
Страница 256: ...6 10 In the menu bar on top select Printers then select Create Desktop Printer from the pull down choices ...
Страница 265: ......
Страница 268: ...UTAX GmbH Ohechaussee 235 22848 Norderstedt Germany ...


