- 2 -
b) The .PLT files created by the driver can be viewed within the Request
software and printed in collated sets with enhanced features like using stamps,
header information and Pen settings.
Setting up the HPGL-2 parameters to create KIP Printer ready data file
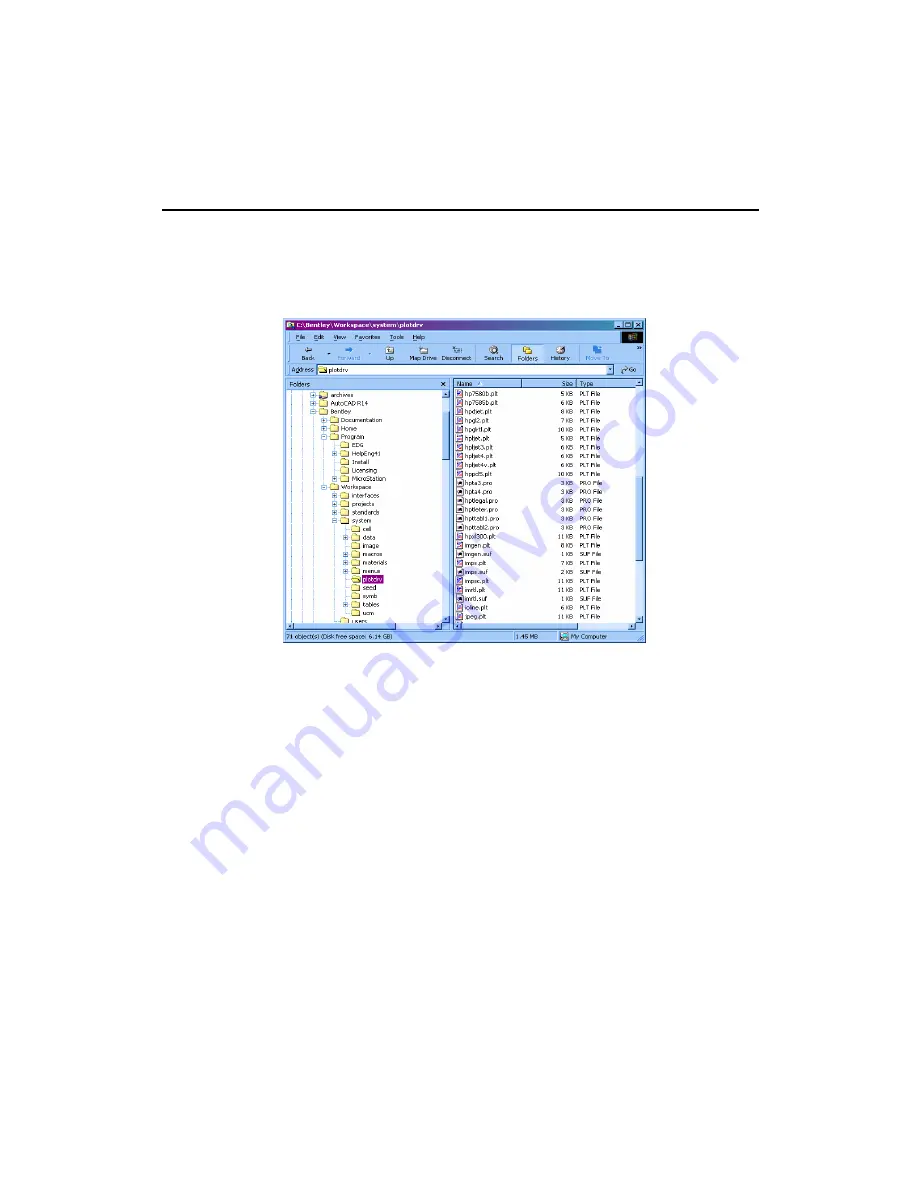
Using windows explorer, identify folder where MICROSTATION software
is installed.
Under the sub-folder ‘PLOTDRV’ select ‘
IMRTL.PLT
’. Open this file with
Windows ‘Notepad’.
Editing the “IMRTL.PLT” file:
The line that requires a change is marked below in bold
.
For an example, we will assume that the MICROSTATION User requires
to print to a Printer. We will also assume the Computer name to
be “
KIP-PPC
”.
Method 2 : Direct Print
Since the Port would be set up automatically with the change as on the next
page, users would be able to use this driver (KIPGL.PLT) to create plot file
data directly to the KIP controller
Method 2 : Request Print
Generate the plot file data (.PLT) at any specified location on the system
using the method above. Use KIP Request to select the “.plt” files and submit
them for printing. File collation, stamping, header information addition, etc are
features the users could use while using the KIP Request software.
Содержание CX 8036
Страница 1: ...Instruction Handbook CX 8036 Large Format System ...
Страница 68: ...Section 2 Copy Mode 2 28 ...
Страница 94: ...Section 4 Job Info Screen 4 8 ...
Страница 110: ...5 16 Section 5 Help Configuration d Select Printer Driver from List e Choose Keep existing Driver ...
Страница 111: ...5 17 Section 5 Help Configuration f Setup Queue name all Caps in English g It is not necessary to Share driver ...
Страница 138: ...Section 6 Windows Driver 6 22 ...
Страница 150: ...Section 7 AutoCAD HDI Driver 7 12 5 0 Custom Settings 1 2 7 3 8 4 9 10 6 5 ...
Страница 201: ...Section 8 Request 8 45 ...
Страница 206: ...Section 8 Request 8 50 ...
Страница 224: ...9 18 Section 9 KIP Print Net KIP PrintNet on Opera ...
Страница 228: ...9 22 Section 9 KIP Print Net ...
Страница 242: ...Section 11 Connectivity 11 8 ...
Страница 246: ... 4 ...
Страница 252: ...2 2 Select the Applications folder 3 Select the Utilities folder ...
Страница 253: ...3 4 Find the Printer Setup Utility 5 On the top menu bar select Printers and then Add a Printer ...
Страница 255: ...5 8 Select Add 9 The printer set up will be in the Printer List ...
Страница 256: ...6 10 In the menu bar on top select Printers then select Create Desktop Printer from the pull down choices ...
Страница 265: ......
Страница 268: ...UTAX GmbH Ohechaussee 235 22848 Norderstedt Germany ...


