Installing the Server Into a Rack
69
Note –
If you installed the second-generation CMA as described in
“Install the
Second-Generation Cable Management Arm” on page 52
, you can ignore this
procedure. The server only ships with one CMA; the second-generation CMA is the
newer version.
1. Unpack the CMA parts.
2. Take the CMA to the back of the equipment rack, and ensure that you have
adequate room to work around the back of the server.
Note –
References to “left” or “right” in this procedure assume that you are facing
the back of the equipment rack.
3. Remove the tape to separate the parts of the CMA.
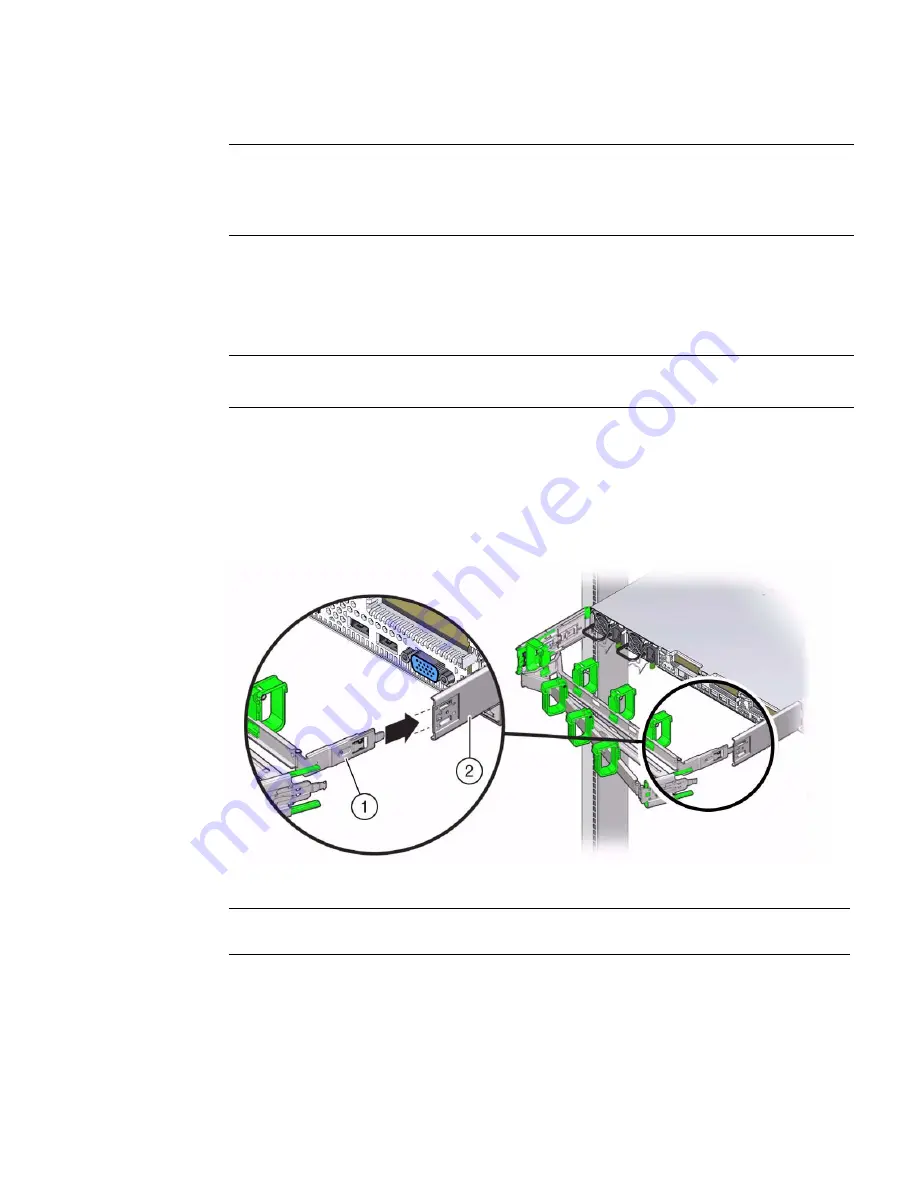
4. Insert the CMA’s mounting bracket connector into the back of the right
slide-rail until the connector locks into place with an audible click.
FIGURE:
Inserting the CMA Mounting Bracket Into the Right Slide-Rail
5. Insert the right CMA slide-rail connector into the back of the right slide-rail
assembly until the connector locks into place with an audible click.
Figure Legend
1
CMA mounting bracket
2
Right slide-rail
Содержание Server X4-2
Страница 1: ...Sun Server X4 2 Installation Guide Part No E38019 04 February 2014...
Страница 10: ...x Sun Server X4 2 Installation Guide February 2014...
Страница 14: ...xiv Sun Server X4 2 Installation Guide February 2014...
Страница 18: ...4 Sun Server X4 2 Installation Guide February 2014...
Страница 44: ...30 Sun Server X4 2 Installation Guide February 2014...
Страница 122: ...108 Sun Server X4 2 Installation Guide February 2014...
Страница 160: ...146 Sun Server X4 2 Installation Guide February 2014 4 Click Virtual Drives The Virtual Drives screen appears...
Страница 162: ...148 Sun Server X4 2 Installation Guide February 2014...
Страница 172: ...158 Sun Server X4 2 Installation Guide February 2014...
Страница 206: ...192 Sun Server X4 2 Installation Guide February 2014...


