5-116
SCANNER/INTERNET FAX
Contents
1
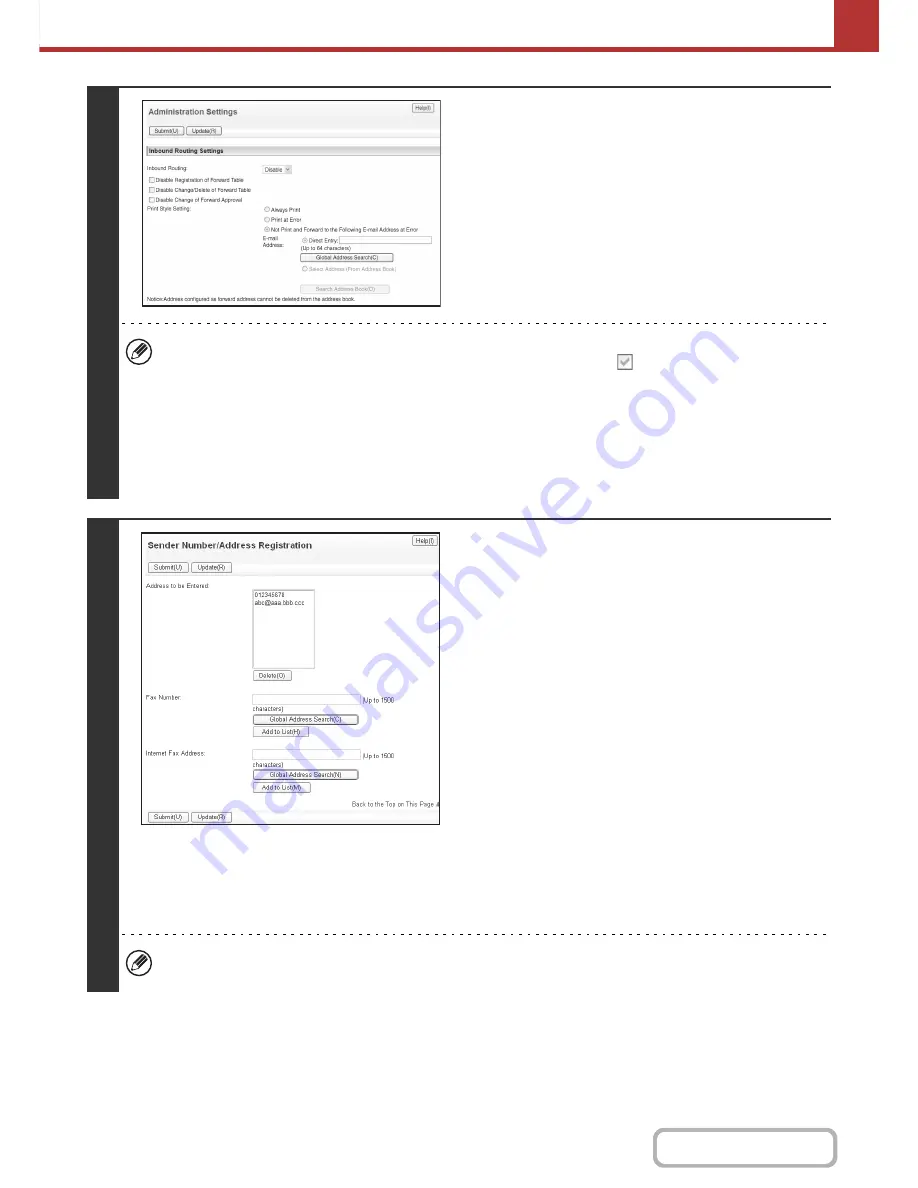
Enabling the inbound routing function.
(1) In the Web page menu, click [Application
Settings], [Inbound Routing Settings], and
then [Administration Settings].
(2) Select [Enable] in "Inbound Routing" and
click the [Submit] button.
Users without administrator rights can be prohibited from storing, editing, and deleting forwarding tables in this screen,
and from specifying which table is used. To do so, select the checkboxes below
.
• Disable Registration of Forward Table • Disable Change/Delete of Forward Table • Disable Change of Forward Approval
When inbound routing is enabled, you can also specify whether or not you wish the machine to print the forwarded faxes.
To have all received faxes printed before being forwarded, select "Print Out All Report" in "Print Style Setting". To
have received faxes printed only when an error prevents forwarding, select "Print at Error".
If an error occurs when [Not Print and Forward to the Following E-mail Address at Error] is selected, received data is
not printed, but is forwarded to the specified e-mail address.
After configuring the settings, be sure to click the [Submit] button.
2
Storing sender addresses.
If you wish to have only faxes from specified addresses
forwarded, store the desired sender addresses. Send
addresses stored here can be selected from a list when you
store a forwarding table.
(1) Click [Sender Number/Address
Registration] in the [Inbound Routing
Settings] menu in the Web page.
(2) Enter the sender address in "Internet Fax
Address" or "Fax Number" as appropriate,
and click the [Add to List] button.
The entered address will be added to the "Address to be
Entered" list.
• Specify whether the address will be directly entered
(maximum of 1500 characters) or selected from a
global address book by clicking the [Global Address
Search] button.
• To store multiple addresses, repeat this step.
(3) When you have finished adding addresses,
click the [Submit] button.
• A maximum of 500 sender numbers/addresses can be stored.
• To delete an entered address, select the address in "Address to be Entered" and click the [Delete] button.
Содержание MX-M282N
Страница 11: ...Conserve Print on both sides of the paper Print multiple pages on one side of the paper ...
Страница 34: ...Search for a file abc Search for a file using a keyword Search by checking the contents of files ...
Страница 35: ...Organize my files Delete a file Delete all files Periodically delete files Change the folder ...
Страница 322: ...3 19 PRINTER Contents 4 Click the Print button Printing begins ...
Страница 870: ...MXM502N GB Z1 Operation Guide MODEL MX M282N MX M362N MX M452N MX M502N ...


