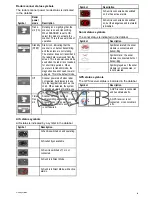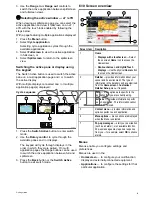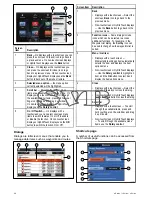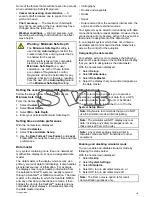
Some of the factors that should be taken into account
when calculating a Safety Margin are:
•
Vessel maneuvering characteristics
— A
vessel’s draft increases due to squat, trim, roll,
pitch and heave.
•
Chart accuracy
— The electronic chart depth
may not be accurate or the true depth may have
changed since the last survey.
•
Weather conditions
— High air pressure, and
prevailing wind strength and direction can affect
wave height.
Warning: Minimum Safe Depth
The
Minimum Safe Depth
setting is
used during
Autorouting
to restrict the
created route from entering water that is
to shallow for the vessel.
Bottom depth is taken from compatible
electronic navigational charts and
Minimum Safe Depth
is a user
calculation. As both of these factors
are outside of Raymarine’s control,
Raymarine will not be held liable for any
damage, physical or otherwise, resulting
from the use of the
Autorouting
feature
or the
Minimum Safe Depth
setting.
Setting the vessel Minimum Safe Depth
Follow the steps below to enter your vessel’s
Minimum Safe Depth
.
From the Homescreen:
1. Select
Customize
.
2. Select
Boat Details
.
3. Select
Min. Safe Depth
.
4. Enter your calculated Minimum Safe Depth.
Setting time and date preferences
With the homescreen displayed:
1. Select
Customize
.
2. Select
Time and Date Set-up
.
3. Use the
Date Format
,
Time Format
, and
Local
Time: UTC
menu items to set your time and date
preferences.
Data master
Any system containing more than one networked
multifunction display must have a designated data
master.
The data master is the display which serves as a
primary source of data for all displays, it also handles
all external sources of information. For example
the displays may require heading information from
the autopilot and GPS systems, usually received
through a SeaTalk
ng
or NMEA connection. The data
master is the display to which the SeaTalk, NMEA
and any other data connections are made, it then
bridges the data to the SeaTalk
hs
network and any
compatible repeat displays. Information shared by
the data master includes:
• Cartography
• Routes and waypoints
• Radar
• Sonar
• Data received from the autopilot, instruments, the
engine and other external sources.
Your system may be wired for redundancy with data
connections made to repeat displays. However these
connections will only become active in the event of a
fault and/or reassignment of the data master.
In an autopilot system which does not contain a
dedicated pilot control head the Data master also
acts as the control for the autopilot.
Designating the data master
For systems with 2 or more displays the following
task must be performed on the multifunction display
that you want to designate as the data master.
With the homescreen displayed:
1. Select
Set-up
.
2. Select
Maintenance
.
3. Select
Data Master
.
4. Select the display that you want to designate as
the data master.
Simulator mode
The Simulator mode enables you to practice
operating your display without data from a GPS
antenna, radar scanner, AIS unit, or fishfinder.
The simulator mode is switched on / off in the
System Setup Menu
.
Note:
Raymarine recommends that you do NOT
use the simulator mode whilst navigating.
Note:
The simulator will NOT display any real
data, including any safety messages (such as
those received from AIS units).
Note:
Any system settings made whilst in
Simulator mode are NOT transmitted to other
equipment.
Enabling and disabling simulator mode
You can enable and disable simulator mode by
following the steps below.
With the homescreen displayed:
1. Select
Set-Up
.
2. Select
System Settings
.
3. Select
Simulator:
.
4. Select On to turn simulator mode on, or
5. Select Off to turn simulator mode off.
Note:
The Demo movie option is for retail
demonstration purposes only.
Getting started
103
Содержание c125
Страница 2: ......
Страница 14: ...14 a Series c Series e Series ...
Страница 41: ...13 GPS receiver 14 Thermal camera 15 Wireless connection Planning the installation 41 ...
Страница 48: ...48 a Series c Series e Series ...
Страница 80: ...80 a Series c Series e Series ...
Страница 118: ...118 a Series c Series e Series ...
Страница 184: ...184 a Series c Series e Series ...
Страница 185: ...Chapter 13 Man Overboard MOB Chapter contents 13 1 Man overboard on page 186 Man Overboard MOB 185 ...
Страница 188: ...188 a Series c Series e Series ...
Страница 191: ...Chapter 15 Fuel manager Chapter contents 15 1 Fuel manager overview on page 192 Fuel manager 191 ...
Страница 206: ...206 a Series c Series e Series ...
Страница 228: ...228 a Series c Series e Series ...
Страница 290: ...290 a Series c Series e Series ...
Страница 310: ...310 a Series c Series e Series ...
Страница 340: ...340 a Series c Series e Series ...
Страница 374: ...374 a Series c Series e Series ...
Страница 422: ...422 a Series c Series e Series ...
Страница 436: ...436 a Series c Series e Series ...
Страница 462: ...462 a Series c Series e Series ...
Страница 463: ......
Страница 464: ...www raymarine com ...


