background image

VessRAID 1740s, 1840s Product Manual

254

If there is a disk drive in the carrier, the Power/Activity LED displays Green. If not, 
the Power/Activity LED remains dark.

The Power/Activity LED flashes during drive activity.

The Disk Status LED displays Green when a drive is present and configured.

See “Critical & Offline Disk Arrays” on page 276 for a discussion of rebuilding and 
failed disk drives.

LCD Panel

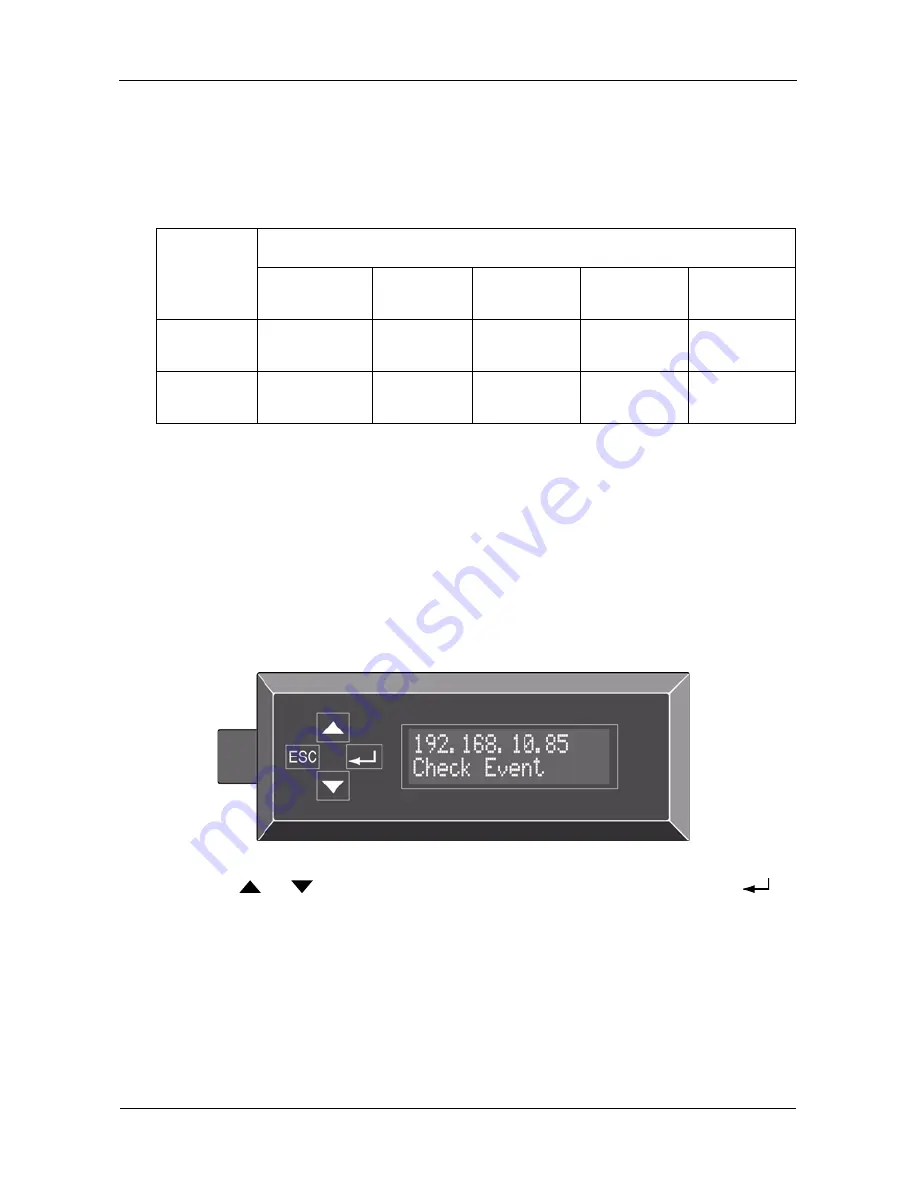
When the VessRAID is fully booted and running under normal conditions, the 
LCD screen shows the VessRAID model number and IP address. If a problem is 
detected in the subsystem, the LCD screen displays a 

Check Event

 message, as 

shown in Figure 4.

Figure 4. VessRAID optional LCD display

Press the 

 or 

 button to see the 

View Events

 menu. Then press the 


button to read the Events. 

Controller LEDs

Under normal conditions, the Controller Status LED is green and the Dirty Cache 
LED icon is dark. The battery and fan LEDs should display green. See the figure 
and table below.

LEDs

State

Dark

Steady 

Green

Flashing 

Green

Amber

Red

Power/

Activity

No Drive

Drive 

Present

Activity

Status

No Drive or 

Unconfigured

Drive OK

Locating the 

Drive

Drive 

Rebuilding

Array Drive 

Offline

Содержание VessRAID 1740s

Страница 1: ...VessRAID 1740s 1840s Product Manual Version 1 0 ...

Страница 2: ... contain technical inaccuracies typographical or other errors Promise Technology assumes no liability for any error in this publication and for damages whether direct indirect incidental consequential or otherwise that may result from such error including but not limited to loss of data or profits Promise Technology provides this publication as is without warranty of any kind either express or imp...

Страница 3: ...on 9 Unpacking the VessRAID 9 Installing the LCD Panel Optional 11 Mounting VessRAID in a Rack 13 Installing Disk Drives 15 Drive Slot Numbering 15 Installing Your Disk Drives 16 Making Data and Management Connections 17 Configuring a Data Path 17 Configuring a Management Path 17 Setting Up Serial Cable Connections 19 Connecting the Power 20 Front Panel LEDs 20 Controller LEDs 21 Disk Drive LEDs 2...

Страница 4: ...Internet 37 Obtaining a Security Certificate 37 Chapter 4 Management with WebPAM PROe 39 Logging into WebPAM PROe 40 Selecting a Language 41 Perusing the Interface 42 Using the Header 43 Using Tree View 44 Using Management View 45 Viewing the Event Frame 45 Logging out of WebPAM PROe 46 Working with the Storage Network 47 Viewing Other Subsytems 47 Updating the List of Subsystems 47 Logging into a...

Страница 5: ...56 Releasing the Lock 57 Managing Users 58 Viewing User Information 58 Making User Settings 58 Making Your Own User Settings 59 Setting up User Event Subscriptions 59 Changing Another User s Password 60 Changing Your Own Password 60 Creating a User 61 Deleting a User 62 Viewing User Sessions 62 Logging out Other Users 62 Managing the Network Connection 63 Making Management Port Settings 63 Managin...

Страница 6: ...Information 78 Restoring Factory Defaults 79 Clearing Statistics 79 Shutting Down the Subsystem 80 Monitoring the Shutdown 80 Restarting the Subsystem 81 Monitoring the Restart 81 Managing the Controller 82 Viewing the Controller 82 Viewing Controller Information 82 Viewing Controller Statistics 83 Making Controller Settings 83 Clearing an Orphan Watermark 84 Managing Enclosures 86 Viewing the Enc...

Страница 7: ... Disk Array Express 100 Creating a Disk Array Advanced 101 Deleting a Disk Array 103 Viewing Disk Array Information 103 Making Disk Array Settings 104 Creating a Logical Drive 105 Deleting a Logical Drive 106 Migrating a Disk Array 106 Rebuilding a Disk Array 107 Running Media Patrol on a Disk Array 108 Running PDM on a Disk Array 109 Transitioning a Disk Array 109 Preparing a Disk Array for Trans...

Страница 8: ...e Help 126 Logging out of the CLU 126 Running Quick Setup 126 Managing the Subsystem 127 Setting an Alias for the Subsystem 127 Running Media Patrol 127 Locking or Unlocking the Subsystem 127 Setting Subsystem Date and Time 128 Managing the Controller 129 Viewing Controller Information 129 Clearing an Orphan Watermark 129 Making Controller Settings 129 Locating the Controller 130 Managing the Encl...

Страница 9: ...ing an Alias for a Disk Array 145 Accepting an Incomplete Array 145 Enabling Media Patrol on a Disk Array 146 Enabling PDM on a Disk Array 146 Preparing the Disk Array for Transport 146 Rebuilding a Disk Array 146 Migrating a Disk Array 147 Running PDM 148 Running Transition on a Disk Array 148 Locating a Disk Array 148 Creating a Logical Drive 149 Deleting a Logical Drive 150 Managing Spare Drive...

Страница 10: ...0 Working with the Event Viewer 162 Viewing Runtime Events 162 Clearing Runtime Events 162 Viewing NVRAM Events 162 Clearing NVRAM Events 163 Working with LUN Mapping 164 Viewing a List of Initiators 164 Enabling LUN Mapping 164 Creating an Initiator 164 Mapping a LUN to an Initiator 165 Deleting an Initiator 165 Managing Users 166 Viewing User Information 166 Creating a User 166 Changing a User s...

Страница 11: ... 179 Restarting VessRAID Serial Connection 179 Making Buzzer Settings 181 Chapter 6 Management with the LCD Panel 183 Using the LCD Panel 183 Perusing the Interface 184 Making Mode Settings 184 Simple Mode 184 Advanced Mode 185 Limitations 185 Viewing Events 185 Managing the Network Connection 186 Making Management Port Settings 186 Managing SAS Connections 187 Viewing SAS Port Information 187 Mak...

Страница 12: ...rive 201 Locating a Spare Drive 202 Chapter 7 Maintenance 203 Updating the Firmware in WebPAM PROe 203 Downloading the Firmware Image File 203 Updating Firmware from TFTP Server 203 Updating Firmware from your PC 204 Restarting the Subsystem 205 Updating the Firmware in the CLU 206 Downloading the Firmware Image File 206 Updating the Firmware 206 Restarting Subsystem over a Telnet Connection 207 R...

Страница 13: ...g a RAID Level 230 RAID 0 230 RAID 1 230 RAID 1E 231 RAID 5 231 RAID 6 231 RAID 10 232 RAID 50 232 RAID 60 232 Choosing Stripe Size 233 Choosing Sector Size 233 2 TB Limitation 234 Cache Policy 234 Read Cache Policy 235 Write Cache Policy 235 Adaptive Writeback Cache 235 Capacity Coercion 236 Initialization 236 Hot Spare Drive s 237 Partition and Format the Logical Drive 237 RAID Level Migration 2...

Страница 14: ...on Response 263 Critical Offline Disk Arrays 276 When a Physical Drive Fails 276 With a Hot Spare Drive 277 Without a Hot Spare Drive 277 Rebuild Operation 278 Incomplete Array 279 Physical Drive Problems 280 Physical Drive Offline 280 Physical Drive Not Usable 280 Physical Drive Failed 280 Enclosure Problems 282 Connection Problems 285 Serial Connections 285 Network Connections 286 Browser Does N...

Страница 15: ...ssional WebPAM PROe software This manual includes a full table of contents index chapter task lists and numerous cross references to help you find the specific information you are looking for Also included are four levels of notices Note A Note provides helpful information such as hints or alternative ways of doing a task Important An Important calls attention to an essential step or point require...

Страница 16: ...ve Figure 1 VessRAID front view A defective drive may be replaced without interruption of data availability to the host computer If so configured a hot spare drive will automatically replace a failed drive securing the fault tolerant integrity of the logical drive The self contained hardware based RAID logical drive provides maximum performance in a compact external chassis Figure 2 VessRAID 1740 ...

Страница 17: ...for additional functions and 128 KB 8 bit NVRAM 512 MB DDRII SDRAM DIMM expandable to 2GB SDRAM has battery backup up to 72 hours PMC PM8388 expander with 2MB flash memory 10 100Mb RJ45 Ethernet management port RJ11 serial port supports RS232 protocol via adapter cable USB 2 0 external ports for subsystem management 16 hot swappable drive bays in a robust 3U rackmount chassis Redundant hot swappab...

Страница 18: ...tion of SAS and SATA drives in the system Staggered physical drive spin up External I O Ports Dual 3 Gb s SAS x4 host ports One external 3 Gb s SAS x4 port for JBOD expansion Data Cache Shared 512 MB predictive data cache expandable to 2 GB Automatic write cache destaging 72 hour battery backup for 512 MB cache Command Queue Depth 512 commands per VessRAID up to 1024 commands with 512 MB memory Op...

Страница 19: ...us Array Error Recovery Data recovery from bad sector or failed HD for redundant RAID RAID 5 6 inconsistent data Prevent Write Hole Table Data content Error Prevent Read Write Check Table NVRAM event logging SCSI Commands Supports extensive SCSI command set equivalent to SCSI FC hard disk drives Variable sector size 512 byte to 4 KB to break OS 2TB limitation 16 byte CDB support for 64 bit LBA add...

Страница 20: ...thout drives 22 0 kg 48 5 lb with 16 drives 1840s 16 0 kg 35 3 lb without drives 24 0 kg 52 9 lb with 16 drives Assuming 0 5 kg 1 1 lb per drive Gross Weight including carton 1740s 19 2 kg 42 3 lb without drives 1840s 20 8 kg 45 9 lb without drives Safety BSMI CB CCC CE FCC Class B MIC VCCI UL cUL TUV Environmental RoHS China RoHS Warranty and Support Warranty Three year limited warranty on all co...

Страница 21: ...mplies with Part 15 of the FCC Rules Operation is subject to the following two conditions 1 this device may not cause harmful interference and 2 this device must accept any interference received including interference that may cause undesired operation KCC Statement ...

Страница 22: ...VessRAID 1740s 1840s Product Manual 8 ...

Страница 23: ...ower page 20 Unpacking the VessRAID The VessRAID box contains the following items VessRAID Unit Quick Start Guide printed RJ11 to DB9 serial data cable Screws for disk drives 70 including 6 spares 1 5m 4 9 ft Power cords 1740s 1 1840s 2 CD with SNMP files Product Manual and Quick Start Guide in PDF format Warning The electronic components within the VessRAID enclosure are sensitive to damage from ...

Страница 24: ...place a failed drive securing the fault tolerant integrity of the logical drive The self contained hardware based RAID logical drive provides maximum performance in a compact external chassis Figure 2 VessRAID 1740s rear view Figure 3 VessRAID 1840s rear view For a description of the LEDs see pages 20 and 21 Drive Carrier LEDs Drive Carriers Power and Status LEDs RAID Controller Power Supply RAID ...

Страница 25: ...nclosure as shown in Figure 4 Figure 4 Remove the screws that attach the left handle to the enclosure 2 Align the connector on the left bracket of the VessRAID enclosure to the connector on the back of the LCD panel as shown in Figure 5 Cautions The LCD panel is NOT a hot swap device Be sure the VessRAID is powered down before you connect or disconnect the LCD panel You must install the LCD panel ...

Страница 26: ...through the holes in the left bracket and into the threaded holes in the LCD panel as shown in Figure 6 Tighten the screws to secure the LCD panel to the bracket Figure 6 Attach the LCD panel to the VessRAID enclosure The LCD screen activates when the VessRAID boots See Connecting the Power on page 20 Connector on the LCD panel Connector on the enclosure ...

Страница 27: ...he mounting rails as needed Cautions At least two persons are required to safely lift place and attach the VessRAID subsystem into a rack system Do not lift or move the VessRAID subsystem by the handles power supplies or the controller units Hold the subsystem itself Only a qualified electrician who is familiar with the installation procedure should mount and install the VessRAID subsystem Be sure...

Страница 28: ...ustment screws and the attaching screws 6 Place the VessRAID subsystem onto the rails 7 Secure the VessRAID subsystem to the rack through each handle using the attaching screws from your rack system Figure 8 Rack mount assembly diagram This completes rack mounting Inside of post Rack front post Rail attaching screws not included Rail adjustment screw center outside of rail Flange Inside of post Ra...

Страница 29: ... disk drive into any slot in the enclosure The diagram below shows how VessRAID s drive slots are numbered Slot numbering is reflected in the WebPAM PROe and CLU user interfaces Figure 9 VessRAID drive slot numbering Install all of the drive carriers into the VessRAID enclosure to ensure proper airflow even if you do not populate all the carriers with disk drives Level Number of Drives Level Numbe...

Страница 30: ...counter sink screws supplied with the VessRAID Install four screws per drive Snug each screw Be careful not to over tighten 4 Reinstall the drive carrier into the VessRAID chassis Repeat steps 1 through 3 until all of your disk drives are installed Figure 10 Disk drive mounted in a drive carrier This completes disk drive installation Caution VessRAID supports disk drive hot swapping To avoid hand ...

Страница 31: ...AS IN port with a circle icon on the I O module of the second VessJBOD 4 Connect the remaining VessJBOD units in the same manner Be sure to connect circle icon to diamond icon and vice versa All SAS ports have SFF 8088 connectors Configuring a Management Path VessRAID subsystems have one RAID controller The controller has an Ethernet RJ45 Management Port connector that enables you to monitor the V...

Страница 32: ...ion Make data connections carefully If you accidently switch a SAS IN connection with a SAS OUT the RAID system cannot function Host PCs or Servers SAS HBA cards Network Switch VessRAID VessJBOD SAS Expansion port Diamond icon VessJBOD SAS OUT port Diamond icon SAS IN ports Circle icon SAS IN port Circle icon SAS IN port Circle icon ...

Страница 33: ...includes a RJ11 to DB9 serial data cable Figure 12 A serial connector is located on the controller To set up a serial cable connection 1 Attach the RJ11 end of the serial data cable to the RJ11 serial connector on the controller 2 Attach the DB9 end of the serial data cable to a serial port on the Host PC or Server This completes the serial cable connection See Setting up the Serial Connection on ...

Страница 34: ...LCD screen light up Front Panel LEDs When boot up is finished and the VessRAID subsystem is functioning normally Power Global Enclosure Status and Global RAID Status LEDs display green continuously Controller Activity LED flashes green when there is controller activity System Heartbeat LED blinks green seven times in three seconds goes dark for six seconds then repeats the pattern Figure 13 VessRA...

Страница 35: ... Drive Carrier They report the presence of a disk drive activity of the drive and the drive s current condition Figure 15 VessRAID disk drive carrier LEDs If there is a disk drive in the carrier the Power Activity LED displays Green If not the Power Activity LED remains dark The Power Activity LED flashes during drive activity The Disk Status LED displays Green when a drive is configured Controlle...

Страница 36: ...n the VessRAID is fully booted and running under normal conditions the LCD screen shows the VessRAID model number and IP address as shown in Figure 16 Figure 16 VessRAID optional LCD display A list of LCD panel functions and instructions for using them is included in the VessRAID Product Manual on the CD This completes the power and start up For setup instructions see Chapter 3 VessRAID Setup on p...

Страница 37: ...Microsoft HyperTerminal This procedure uses the serial cable connection you made in Chapter 2 page 19 You must use the CLI or CLU to assign an IP address to the VessRAID to enable a network connection for WebPAM PROe 1 Change your terminal emulation program settings to match the following specifications Bits per second 115200 Data bits 8 Parity None Stop bits 1 Flow control none 2 Start your PC s ...

Страница 38: ...e your Network Administrator dedicate an IP address for the VessRAID linked to the VessRAID s MAC address This action will prevent the DHCP server from assigning a new IP address when the VessRAID restarts with the result that users can no longer log in To access the MAC address for VessRAID s management port 1 At the administrator cli prompt type menu and press Enter The CLU main menu appears 2 I...

Страница 39: ...nd other settings then press Enter administrator cli net a mod t mgmt s primaryip 192 168 10 85 primaryipmask 255 255 255 0 gateway 192 168 10 1 In the above example the IP addresses and subnet mask are included as examples only Your values will be different If you prefer to let your DHCP server assign the IP address type the following string then press Enter administrator cli net a mod t mgmt s d...

Страница 40: ...ime settings Setting system date and time 1 Press the arrow keys to highlight System Date 2 Press the backspace key to erase the current date 3 Type the new date 4 Follow the same procedure to set the System Time 5 Press Ctrl A to save these settings and move to the Management Port configuration screen Making Manual IP Settings To make Management Port settings manually 1 Press the arrow keys to hi...

Страница 41: ... spacebar to toggle to Enable 3 Press Ctrl A to save these settings Viewing IP Address and Settings To view the current IP address and network settings when using DHCP 1 Press the arrow keys to highlight DHCP 2 Press the spacebar to toggle to Disable The current Management Port settings are displayed 3 Press the spacebar to toggle DHCP back to Enable 4 Press Ctrl A to save these settings and move ...

Страница 42: ... 3 Press the or button and the display says IP Address 4 Press the button to make a change The current IP Address displays with the cursor under the first extreme left digit 5 Press the button to increment and the button decrement Press the button to move left and the button move right To set an IP address with double or single digit octets for example 192 168 1 50 type zeros as placeholders 192 1...

Страница 43: ...To make Management Port settings automatically 1 Press the or button until the display says Management Port 2 Press the button and the display says Link Status Up If it says Link Status Down reconnect to the network before preceding 3 Press the or button and the display says DHCP Disable 4 Press the button to make a change 5 Press the button to Enable 6 Press the button to confirm The display show...

Страница 44: ...hown below is only an example The IP address you type into your browser will be different Regular Connection WebPAM PROe uses an HTTP connection http Enter the VessRAID s IP address 192 168 10 85 Together your entry looks like this http 192 168 10 85 Secure Connection WebPAM PROe uses a secure HTTP connection https Enter the VessRAID s IP address 192 168 10 85 Together your entry looks like this h...

Страница 45: ...r Name and Password are case sensitive Figure 3 WebPAM PROe log in screen After sign in the WebPAM PROe opening screen appears If there are any unconfigured physical drives in the enclosure an Array Configuration menu will also appear see page 33 Note Make a Bookmark Netscape Navigator or set a Favorite Internet Explorer of the Login Screen so you can access it easily next time ...

Страница 46: ... array following a default set of parameters Makes one logical drive automatically Also makes a hot spare drive for all RAID levels except RAID 0 if at least five unconfigured physical drives are available If you have multiple enclosures multiple disk array and logical drive sets are created See page 33 Express You choose the parameters for a new disk array by specifying the characteristics you wa...

Страница 47: ...acity and stripe size Spare Drives The physical drive ID number of the dedicated hot spare assigned to this disk array If you have both Hard Disk Drives HDD and Solid State Drives SSD separate disk array and logical drive sets will be created for your HDDs and for your SSDs These two drive types cannot be mixed in the same disk array If you accept these parameters click the Submit button The new d...

Страница 48: ...saction Data Transaction Log Other 4 Click the Update button Or check the Automatic Update box and updates will occur automatically The following parameters display Disk Arrays The number of physical drives in the disk array their ID numbers configurable capacity and the number of logical drives to be created Logical Drives The ID number of the logical drives their RAID level capacity and stripe s...

Страница 49: ...s SSD Solid State Drives The drive type you selected appears in the list of Physical Drives You cannot mix HDDs and SSDs in the same disk array 4 Highlight the physical drives you want in the disk array from the Available list and press the button to move them to the Selected list You can also double click them to move them 5 When you are done click the Next button Step 2 Logical Drive Creation 1 ...

Страница 50: ...layed under New Logical Drives Repeat the above steps to specify additional logical drives as desired 11 When you have finished specifying logical drives click the Next button Step 3 Summary The Summary lists the disk array and logical drive information you specified To proceed with disk array and logical drive creation click the Submit button Logging out of WebPAM PROe There are two ways to log o...

Страница 51: ...el or SAS capable PC can read and write data to the logical drives on the VessRAID other PCs can monitor the VessRAID from virtually any location Obtaining a Security Certificate Promise Technology provides a default security certificate for the web server as well as for internal data communication However in most cases it is better to install and verify your own certificate And if possible verify...

Страница 52: ...VessRAID 1740s 1840s Product Manual 38 ...

Страница 53: ...age 76 Importing a User Database page 76 Importing a Configuration Script page 77 Updating the Firmware page 78 Viewing Flash Image Information page 78 Restoring Factory Defaults page 79 Clearing Statistics page 79 Shutting Down the Subsystem page 80 Restarting the Subsystem page 81 Managing the Controller page 82 Managing Enclosures page 86 Managing Physical Drives page 92 Managing Disk Arrays pa...

Страница 54: ...ttp Enter the VessRAID s IP address 192 168 10 85 Together your entry looks like this http 192 168 10 85 Secure Connection WebPAM PROe uses a secure HTTP connection https Enter the VessRAID s IP address 192 168 10 85 Together your entry looks like this https 192 168 10 85 3 When the log in screen Figure 1 appears Type administrator in the User Name field Type password in the Password field Click t...

Страница 55: ...ing a Language WebPAM PROe displays in English German French Italian Spanish Russian Japanese Chinese Traditional Chinese Simple and Korean 1 Click Language on the WebPAM PROe banner The language list appears in the Header 2 Click on the language you prefer The WebPAM PROe user interface displays in the selected language Note Make a Bookmark Netscape Navigator or set a Favorite Internet Explorer o...

Страница 56: ... 1840s Product Manual 42 Figure 2 Clicking Language on the WebPAM PROe banner Perusing the Interface WebPAM PROe is browser based RAID management software with a graphic user interface Figure 3 WebPAM PROe interface ...

Страница 57: ...rame see Viewing the Event Frame on page 45 Storage Network To view all of the VessRAID subsystem enclosures currently accessible the network see Working with the Storage Network on page 47 Contact Us Click Contact Us for a list of contact information including Technical Support Also see Contacting Technical Support on page 291 Logout To log out of WebPAM PROe see page 46 Help Click Help in the He...

Страница 58: ...ubsystem including SAS management network and service management RAID controller enclosure physical drives disk arrays logical drives and spare drives The figure below shows the components of Tree View Figure 4 WebPAM PROe Tree View Physical Drives in this Enclosure Name of logged in user Subsystem IP address and model ...

Страница 59: ... again to hide the Event Frame In the event frame events are listed and sorted by Item Number A consecutive decimal number assigned to a specific event Device Battery controller logical drive physical drive port etc Event ID The hexadecimal number that identifies the specific type of event Severity Information Warning Minor Major Critical and Fatal The severity level is user specified See Setting ...

Страница 60: ...ging out of WebPAM PROe There are two ways to log out of WebPAM PROe Close your browser window Click Logout on the WebPAM PROe banner Figure 5 Clicking Logout on the WebPAM PROe banner Clicking Logout brings you back to the Login Screen See page 41 After logging out you must enter your user name and password in order to log in again ...

Страница 61: ... Network 1 Click Storage Network in the Header 2 Click the Show Network Subsystems popup option The list will show all subsystems the network at the time the GUI was launched Updating the List of Subsystems To update the list of the VessRAID subsytems the Storage Network Click the Discover button at the bottom of the subsystem list Logging into a Subsystem To log into any of the displayed VessRAID...

Страница 62: ... page 52 Making Background Activity Settings page 52 Running Background Activities page 53 Running Media Patrol page 53 Running PDM page 54 Viewing Scheduled Activities page 54 Scheduling an Activity page 54 Deleting a Scheduled Activity page 55 Viewing Lock Status page 56 Setting the Lock page 56 Renewing the Lock page 56 Releasing the Lock page 57 Viewing Subsystem Information To view informatio...

Страница 63: ...n menus 4 Type the current year into the Year field 5 Under Subsystem Time choose the Hour Minutes and Seconds from the dropdown menus 6 Click the Submit button Viewing the Runtime Event Log Runtime Events lists information about the 1023 most recent runtime events recorded since the system was started To view runtime events 1 In Tree View click the Subsystem icon 2 In Management View click the Ev...

Страница 64: ...down menu and choose Runtime Events 3 Click the Save Event Log button 4 In the File Download dialog box click the Save button 5 In the Save dialog box name the file navigate to the folder where you want to save the log file and click the Save button Clearing the Runtime Event Log To clear the runtime event log 1 In Tree View click the Subsystem icon 2 In Management View click the Events tab dropdo...

Страница 65: ...r old to new If the triangle points downward the column is sorted high to low or new to old Click the link a second time to change to flip the triangle and reverse the sort sequence Saving NVRAM Events To save the NVRAM event log as a text file 1 In Tree View click the Subsystem icon 2 In Management View click the Events tab dropdown menu and choose System Events in NVRAM 3 Click the Save Event Lo...

Страница 66: ...wn menu to choose a priority of Low Medium and High for the following functions Rebuild Rebuilds the data from a failed drive in a disk array Synchronization Checks the data integrity on disk arrays Initialization Sets all data bits in the logical drive to zero Redundancy Check Checks reports and can correct data inconsistencies in logical drives Migration Change RAID level or add physical dries t...

Страница 67: ...ackground Activities tab and choose one of the following from the dropdown menu Media Patrol See Running Media Patrol on page 53 Rebuild See Rebuilding a Disk Array on page 107 PDM See Running PDM on page 54 Transition See Transitioning a Disk Array on page 109 Initialization See Initializing a Logical Drive on page 113 Redundancy Check See Running Redundancy Check on page 114 3 In the next screen...

Страница 68: ...he Source and Target physical drives The suspect physical drive is the source The replacement physical drive is the target 4 Click the Start button Viewing Scheduled Activities To view scheduled activities for this subsystem 1 Click the Subsystem icon Tree View 2 Click the Scheduler tab in Management View Scheduling an Activity To set a scheduled activity for this subsystem 1 Click the Subsystem i...

Страница 69: ...nd Date perpetual Or choose a number of occurrences for this activity Or choose a specific end date The default is today s date 7 For Redundancy Check only Choose the Auto Fix option This feature attempts to repair the problem when it finds an error Choose the Pause on Error option This feature stops the process when it finds an error Check the boxes beside the logical drives all except RAID 0 to ...

Страница 70: ...g by the same user from making a configuration change to the controller until the lock expires or a forced unlock is done You can set the lock to last from one minute to one day To set the lock for this subsystem 1 Click the Subsystem icon Tree View 2 Click the Lock tab in Management View 3 Click the Lock option 4 Enter a time interval between 1 and 1440 minutes one day that you want the lock to s...

Страница 71: ...change to the controller until the lock expires or a forced unlock is done When the user who locked the controller logs out the lock is automatically released You can also release the lock before the scheduled time To release the lock for this subsystem 1 Click the Subsystem icon Tree View 2 Click the Lock tab in Management View If you are the User who set the lock click the Unlock option If anoth...

Страница 72: ...tatus access privileges display name and email address 1 Click the Subsystem icon in Tree View 2 Click the Administrative Tools icon 3 Click the User Management icon The Information tab appears in Management View Making User Settings To change settings of other users 1 Log into WebPAM PROe as the Administrator or a Super User 2 Click the Subsystem icon in Tree View 3 Click the Administrative Tools...

Страница 73: ...mit button Setting up User Event Subscriptions An event subscription enables a user to receive email messages about events taking place in the VessRAID subsystem To make or change user event subscriptions 1 Click the Subsystem icon in Tree View 2 Click the Administrative Tools icon 3 Click the User Management icon 4 Click the Event Subscription tab in Management View 5 Check the box to enable even...

Страница 74: ...icon 4 Click the User Management icon 5 In the list of users click the link of the user whose settings you want to change The Settings screen for the selected user displays 6 Click the Password tab in Management View 7 Enter a new password of 1 to 31 characters no spaces in the New Password field 8 Enter the new password in the Retype Password field 9 Click the Submit button Changing Your Own Pass...

Страница 75: ...n the Email Address field An email address is required in order to receive email event notification 10 Select a privilege level from the Privilege dropdown menu For definitions of each privilege level see the List of User Privileges below 11 Check the Enabled box to enable this user on this subsystem 12 Click the Submit button List of User Privileges View Allows the user to see all status and sett...

Страница 76: ...e 7 Click the Submit button 8 Click OK in the confirmation box Viewing User Sessions To view the current sessions 1 Click the Subsystem icon in Tree View 2 Click the Administrative Tools icon 3 Click the User Management icon 4 Click the Sessions tab in Management View Logging out Other Users To logout other users 1 Log into WebPAM PROe as the Administrator or a Super User 2 Click the Subsystem ico...

Страница 77: ...efore you change settings please see Choosing DHCP or a Static IP Address on page 24 To make changes to the Management Port settings 1 Click the Subsystem icon in Tree View 2 Click the Administrative Tools icon 3 Click the Network Management icon 4 Click the Port Configuration link in Management View 5 To enable DHCP check the DHCP box When DHCP is NOT enabled enter Primary IP address Primary subn...

Страница 78: ...ck the Subsystem icon in Tree View 2 Click the Administrative Tools icon 3 Click the SAS Management icon The port information appears the screen Channel ID Port Type Link Status Link Speed SAS Address Cable Signal Strength adjustable under Port Settings Making SAS Port Settings The SAS Controller has one SAS channel The SAS channel has two ports See Making Data and Management Connections on page 1...

Страница 79: ...t View click the Statistic tab The statistics for the selected port appear the screen Clearing Statistics To clear statistics see Clearing Statistics on page 79 Viewing SAS Initiators You must add an initiator to the VessRAID s initiator list in order to use the initiator to create a LUN for your logical drive To view a list of recognized initiators 1 Click the Subsystem icon in Tree View 2 Click ...

Страница 80: ...ree View 2 Click the Administrative Tools icon 3 Click the Storage Services icon 4 Click the Initiators tab in Management View 5 From the Initiators tab dropdown menu choose Add Initiator 6 Enter the initiator s name in the Initiator Name field A SAS initiator name is the SAS address of the HBA card in the Host PC Obtain the initiator name from the initiator utility on your host system Obtain the ...

Страница 81: ...ick the Subsystem icon in Tree View 2 Click the Administrative Tools icon 3 Click the Storage Services icon 4 Click the LUN Map tab in Management View 5 Click the LUN Masking Enabled box 6 Click the Submit button Adding a LUN Map To edit the LUN Map 1 Click the Subsystem icon in Tree View 2 Click the Administrative Tools icon 3 Click the Storage Services icon 4 Click the LUN Map tab in Management ...

Страница 82: ...the Storage Services icon 4 Click the LUN Map tab in Management View 5 From the LUN Mapping Masking Information list choose an initiator and click its link Or enter the initiator s name in the Initiator Name field Note that the initiator name you input must match exactly in order for the connection to work 6 In the LUN field enter the LUNs for each logical drive You must enter different LUN number...

Страница 83: ...ng link in Management View 4 Enter the IP address for your SMTP server 5 Enter server port number for your SMTP server 25 is the default 6 Choose Yes to enable SMTP authentication or No to disable 7 If you chose Yes for SMTP authentication enter a Username and Password in the fields provided 8 Enter an Email sender address example RAIDmaster mycompany com 9 Enter an Email subject example VessRAID ...

Страница 84: ...t button Making SLP Settings VessRAID s SLP service discovers services available over the Internet To make SLP service settings 1 Click the Subsystem icon in Tree View 2 Click the Administrative Tools icon 3 Click the Software Management icon 4 Click the SLP link 5 Choose the Startup Type Click the Automatic option to start the service automatically during system startup Recommended Click the Manu...

Страница 85: ...PS Port number 443 is the default 8 If you want to download a SSL Certificate check the Download Certificate box 9 If you checked the Download Certificate box enter the Certificate filename or click the Browse button to locate it 10 Click the Submit button 11 Click OK in the confirmation box to restart the Web Server service with your changes Changing the Startup Setting 1 Under Startup Type Click...

Страница 86: ...K in the confirmation box to restart the Telnet service with your changes Changing the Startup Setting 1 Under Startup Type Click the Automatic option to start the service automatically during system startup Recommended Click the Manual option to start the service manually the service does not start during system startup 2 Click the Submit button Stopping Telnet service To stop the Telnet service ...

Страница 87: ...e default To add a Trap Sink see Adding Trap Sinks below 10 Click OK in the confirmation box to restart the SNMP service with your changes Adding Trap Sinks To add a trap sink 1 Enter a Trap Sink IP address 2 Select a Trap Filter choose the lowest level of Severity to be reported for each event See Setting up User Event Subscriptions on page 59 for an explanation of the Severity levels 3 Click the...

Страница 88: ... subsystem events in the form of text messages to your Host PC and other networked PCs This service is normally Stopped and set to Manual start See Netsend Requirements on page 75 To change the Netsend settings 1 Click the Subsystem icon in Tree View 2 Click the Administrative Tools icon 3 Click the Netsend link 4 Click the Start button to start the Netsend service 5 Click the Submit button Adding...

Страница 89: ...e service manually the service does not start during system startup The default setting 2 Click the Submit button Stopping Netsend service To stop the Netsend service 1 Click the Stop button 2 Click OK in the confirmation box Starting or Restarting Netsend service To start or restart the Netsend service click the Start or Restart button Netsend Requirements In order to use Netsend Netsend must be ...

Страница 90: ...ton The user database file is saved to the Host PC from which you access WebPAM PROe Importing a User Database The Software Management Import tab enables you to import the User Database file from the Host PC s file system to the VessRAID subsystem When you make user settings to one VessRAID you can export the User Database file to the Host PC From there you can import the User Database file to oth...

Страница 91: ...I configuration script to automatically configure your VessRAID subsystem The script must be a plain non encrypted text file The Import function runs the script and performs the configuration automatically To import a Configuration Script to this subsystem 1 Click the Subsystem icon in Tree View 2 Click the Administrative Tools icon 3 Click the Software Management icon 4 Click the Import tab 5 Und...

Страница 92: ...ick the Administrative Tools icon 3 Click the Software Management icon 4 Click the Image Version tab The flash image information displays on the screen Running Image Info The firmware package currently running on the controllers Flashed Image Info The firmware package flashed to memory If the Running and Flashed Images do not match the VessRAID has not restarted since the firmware was last updated...

Страница 93: ...ype the word confirm in the field provided 7 Click the OK button The functions you selected will be automatically restored to their default settings Clearing Statistics The Clear Statistics function clears statistical data on controllers SAS ports physical drives and logical drives To clear statistical data 1 Click the Subsystem icon in Tree View 2 Click the Administrative Tools icon 3 Click the C...

Страница 94: ...onnection will be lost 8 Wait for no less than two minutes 9 Manually turn off the power supply switch both switches on the 1840s model on the back of the subsystem Monitoring the Shutdown To monitor a shutdown you must use the Command Line Interface CLI though a serial connection to the VessRAID At the administrator CLI prompt type shutdown a shutdown When the Shutdown complete It is now safe to ...

Страница 95: ...the Submit button 6 In the warning box click the OK button 7 In the confirmation box type the word confirm in the field provided 8 Click the OK button When the controller shuts down your WebPAM PROe connection will be lost 9 Wait for two to three minutes 10 In your browser log into WebPAM PROe once again If you cannot log in wait for 30 seconds and try again Repeat until login is successful Monito...

Страница 96: ...ew 2 Click the Controllers icon The controller information appears under the Information tab in Management View Controller information includes Controller ID 1 Alias if assigned Model if applicable Status OK means normal Viewing Controller Information To view Controller information 1 Click the Subsystem icon in Tree View 2 Click the Controllers icon 3 Click the Controller icon The controller infor...

Страница 97: ...Viewing Controller Statistics To view controller statistics 1 Click the Subsystem icon in Tree View 2 Click the Controllers icon 3 Click the Controller icon 4 Click the Information tab in Management View and choose Statistics from dropdown menu Clearing Statistics To clear statistics see Clearing Statistics on page 79 Making Controller Settings To make Controller settings 1 Click the Subsystem ico...

Страница 98: ...The choices are GB Truncate Default Reduces the useful capacity to the nearest 1 000 000 000 byte boundary 10GB Truncate Reduces the useful capacity to the nearest 10 000 000 000 byte boundary Group Rounding Uses an algorithm to determine how much to truncate Results in the maximum amount of usable drive capacity Table Rounding Applies a predefined table to determine how much to truncate Enter a t...

Страница 99: ...ROe 85 To clear an Orphan Watermark 1 Click the Subsystem icon in Tree View 2 Click the Controllers icon 3 Click the Controller icon 4 Click the Clear tab in Management View 5 Click the Submit button The changes take effect immediately ...

Страница 100: ...page 89 Reconditioning a Battery page 90 Silencing the Buzzer page 90 Making Buzzer Settings page 90 Testing the Buzzer page 91 Viewing the Enclosure To view information about the enclosures 1 Click the Subsystem icon in Tree View 2 Click the Enclosures icon The following information is shown Enclosure ID number Enclosure Type Operational Status Status Description specific components in need of at...

Страница 101: ...anner in which the data paths among the enclosures are connected Individual Subsystem One VessRAID subsystem JBOD Expansion One VessRAID subsystem plus one or more VessJBOD expansion subsystems managed through the VessRAID or head unit The logical connections for these arrangements are shown the Enclosure Topology tab The physical connections for these arrangements are discussed in Chapter 2 VessR...

Страница 102: ... on page 88 For information on Enclosure problems see Chapter 9 Troubleshooting on page 251 Making Enclosure Settings To make Enclosure settings 1 Click the Subsystem icon in Tree View 2 Click the Enclosures icon 3 Click the Enclosure icon 4 Click the Settings tab in Management View 5 Enter a value in the following fields as necessary Enclosure Warning Temperature Threshold Enclosure Critical Temp...

Страница 103: ...a battery does not reflect normal conditions and it is not currently under reconditioning run the Recondition function before you replace the battery See Reconditioning a Battery on page 90 Reconditioning fully discharges then fully recharges the battery During reconditioning if the Adaptive Writeback Cache function is enabled the controller cache is set to Write Thru After reconditioning the cach...

Страница 104: ... the cache is reset to Write Back See Making Controller Settings on page 83 VessRAID automatically reconditions the battery every two months To set the recondition schedule see Scheduling an Activity on page 54 Silencing the Buzzer The buzzer sounds to inform you that the VessRAID needs attention See VessRAID is Beeping on page 251 for more information To silence the buzzer for the current trigger...

Страница 105: ...nable the buzzer Uncheck the Buzzer Enable box if you do not want the buzzer to sound 6 Click the Submit button Testing the Buzzer You must enable the buzzer before you can test it To test buzzer function 1 Click the Subsystem icon in Tree View 2 Click the Enclosures icon 3 Click the Enclosure icon 4 Click the Buzzer tab in Management View 5 Click the Sound button The buzzer will sound for one min...

Страница 106: ...ysical Drive Offline or Online page 96 Locating a Physical Drive page 96 Viewing a List of Physical Drives To view a list of physical drives in this enclosure 1 Click the Subsystem icon in Tree View 2 Click the Enclosures icon 3 Click the Enclosure icon 4 Click the Physical Drives icon The list of physical drives appears in Management View Identifying a Physical Drive To identify physical drive in...

Страница 107: ... the DMA Mode dropdown menu choose a DMA mode For SAS drives check the boxes to enable Write Cache Read Look Ahead Cache Command Queuing for disk drives that support Command Queuing Read Cache 7 Click the Submit button The functions you enable here depend on whether the physical drives support those functions See Viewing Physical Drive Information on page 93 to determine which functions a particul...

Страница 108: ...ings on page 93 Viewing Physical Drive Statistics To view physical drive statistics 1 Click the Subsystem icon in Tree View 2 Click the Enclosures icon 3 Click the Enclosure icon 4 Click the Physical Drives icon 5 Click a Physical Drive icon 6 From the dropdown menu on the Information tab choose Statistics Clearing Statistics To clear statistics see Clearing Statistics on page 79 Making Physical D...

Страница 109: ...in a prediction of failure Be sure you have corrected the condition by a physical drive replacement rebuild operation etc first Then clear the condition See Physical Drive Problems on page 280 for more information To clear a Stale or PFA status from a physical drive 1 Click the Subsystem icon in Tree View 2 Click the Enclosures icon 3 Click the Enclosure icon 4 Click the Physical Drives icon 5 Cli...

Страница 110: ...rce Offline Online tab in Management View 7 Click the Submit button 8 In the confirmation box type the word confirm in the field provided 9 Click the OK button Locating a Physical Drive To locate a physical drive 1 Click the Subsystem icon in Tree View 2 Click the Enclosures icon 3 Click the Enclosure icon 4 Click the Physical Drives icon 5 Click a Physical Drive icon Caution Forcing a physical dr...

Страница 111: ...r 4 Management with WebPAM PROe 97 6 Click the physical drive you want to locate on the WebPAM PROe screen The disk status LED for the physical drive blinks for one minute Figure 8 Disk Status LED Disk Status ...

Страница 112: ...rs in Management View Click the DA link to view a specific disk array See Viewing Disk Array Information on page 103 Creating a Disk Array The CLU provides three methods of creating a disk array Automatic Creates a new disk array following a default set of parameters Makes one logical drive automatically Also makes a hot spare drive for all RAID levels except RAID 0 if at least five unconfigured p...

Страница 113: ...hese two drive types cannot be mixed in the same disk array To create a Disk Array using the Automatic function To create a disk array automatically 1 Click the Subsystem icon in Tree View 2 Click the Disk Arrays icon 3 Click the Create tab in Management View 4 From the Create tab dropdown menu choose Automatic The following parameters display Disk Arrays The number of physical drives in the disk ...

Страница 114: ... the Subsystem icon in Tree View 2 Click the Disk Arrays icon 3 Click the Create tab in Management View 4 From the Create tab dropdown menu choose Express 5 Check the boxes to choose any one or combination of Redundancy The array will remain available if a physical drive fails Capacity The greatest possible amount of data capacity Performance The highest possible read write speed Mixing SATA SAS D...

Страница 115: ...Disk Array Advanced Creation option enables you to directly specify all parameters for a new disk array One logical drive will be made automatically when you create the disk array If you choose less than the total available capacity you can use the remaining space to create additional logical drives at a later time If you are uncertain about choosing parameters for your disk array use the Express ...

Страница 116: ... selected 3 RAID 50 and 60 only Choose the number of axles from the dropdown menu 4 Specify a Capacity and the unit of measure MB GB or TB This value will be the data capacity of the logical drive If you specify less than disk array s maximum capacity the remainder is available for additional logical drives 5 Specify a Stripe size from the dropdown menu 64 128 256 512 KB and 1 MB are available 64 ...

Страница 117: ...e Submit button 6 In the confirmation box type the word confirm in the field provided 7 Click the OK button The selected disk array disappears from the Disk Array List the Information tab Viewing Disk Array Information To view Disk Array information 1 Click the Subsystem icon in Tree View 2 Click the Disk Arrays icon 3 Click the Disk Array icon The disk array information is shown in Management Vie...

Страница 118: ... tolerance Your data is still available However access will be slower until rebuilding is done Transport Ready The result of a successful Prepare for Transport operation You remove the physical drives of this disk array and move them to another enclosure or to different drive slots in the same enclosure After you relocate the physical drives the disk array status will show OK Adjustable Items Alia...

Страница 119: ...on on axles see RAID 50 Axles on page 225 or RAID 60 Axles on page 228 8 Enter a capacity and choose unit of measure MB GB TB The default value is the available capacity of the disk array You can use this value or any lesser amount 9 From the Stripe dropdown menu choose a Stripe size for this logical drive The choices are 64 KB 128 KB 256 KB 512 KB and 1 MB 64 KB is the default See Choosing Stripe...

Страница 120: ... logical drive will display Synchronizing for several minutes after creation You can use the logical drive during this period but read write performance could be slower than normal Deleting a Logical Drive To delete a logical drive 1 Click the Subsystem icon in Tree View 2 Click the Disk Arrays icon 3 Click the Disk Array icon 4 Click the Delete LD tab in Management View 5 Check the box to the lef...

Страница 121: ... check the Expand Capacity box 9 If you checked the Expand Capacity box enter a number into the Capacity field and choose the appropriate unit of measure MB GB TB 10 Under Capacity Usage highlight the logical drive whose RAID level you want to change or whose capacity you want to expand 11 Click the Update button The logical drive changes to reflect your choices 12 Update other logical drives usin...

Страница 122: ...Background Activity tab choose Start Rebuild 5 Select the Source physical drive This is a remaining functional physical drive in the disk array 6 Select the Target physical drive This is the replacement physical drive The available drives are either HDD or SSD depending on the type of drives in the array 7 Click the Submit button The Disk Array Background Activity tab shows the rebuild progress on...

Страница 123: ...ackground Activities tab in Management View 5 From the dropdown menu the Background Activities tab choose Start PDM 6 In the next screen choose the Source and Target physical drives The suspect physical drive is the source The replacement physical drive is the target The available drives are either HDD or SSD depending on the type of drives in the array 7 Click the Start button Transitioning a Dis...

Страница 124: ...kground Activity Settings on page 52 Preparing a Disk Array for Transport Transport is the action of moving the physical drives of a disk array To different slots in the same VessRAID enclosure From one VessRAID enclosure to another To prepare a disk array for transport 1 Click the Subsystem icon in Tree View 2 Click the Disk Arrays icon 3 Click the Disk Array icon 4 Click the Transport tab in Man...

Страница 125: ... icon 3 Click the Disk Array icon 4 Click the Logical Drives icon Logical Drive Status OK The normal state of a logical drive For RAID Levels other than RAID 0 Striping the logical drive has full redundancy Synchronizing When you first create a logical drive the logical drive synchronizes During that time your data is available However access will be slower until synchronizing is done Rebuilding T...

Страница 126: ...ve on page 106 For a Degraded or Offline logical drive see Critical Offline Disk Arrays on page 276 Viewing Logical Drive Information To view information for a single logical drive 1 Click the Subsystem icon in Tree View 2 Click the Disk Arrays icon 3 Click the Disk Array icon 4 Click the Logical Drives icon 5 Click the Logical Drive icon To specify an Alias or set the Read and Write Policies clic...

Страница 127: ...icon 4 Click the Logical Drives icon 5 Click the Logical Drive icon 6 Click the Settings tab in Management View 7 Optional Enter an alias in the Logical Drive Alias field Maximum of 32 characters Use letters numbers space between words and underscore An alias is optional 8 From the Read Policy dropdown menu choose a Read Cache policy The choices are Read Cache Read Ahead and No Cache 9 From the Wr...

Страница 128: ...not choose Quick Initialization enter a hexidecimal value in the Initialization Pattern in Hex field or use the default 00000000 value 8 Click the Submit button 9 In the confirmation box type the word confirm in the field provided 10 Click the OK button To view the progress of the Initialization click the Background Activity tab To set Initialization priority see Making Background Activity Setting...

Страница 129: ...k priority see Making Background Activity Settings on page 52 Viewing the Logical Drive Check Table The Logical Drive Check Table displays errors related to a logical drive Use this information to evaluate the integrity of the logical drive and to determine whether corrective action is needed To View the tables 1 Click the Subsystem icon in Tree View 2 Click the Disk Arrays icon 3 Click the Disk A...

Страница 130: ...must add the initiator to the VessRAID s initiator list See Adding an Initiator on page 66 You must enable LUN Masking in order apply a LUN map See Enabling LUN Masking on page 67 To specify a LUN Map 1 Click the Subsystem icon in Tree View 2 Click the Disk Arrays icon 3 Click the Disk Array icon 4 Click the Logical Drives icon 5 Click the Logical Drive icon 6 Click the LUN Map tab in Management V...

Страница 131: ...es icon The information includes ID The unique ID number assigned to the spare drive Operational Status OK is normal Can also show Rebuilding Transition Running PDM Running or Offline Physical Drive ID The ID number of the physical drive in the subsystem enclosure Capacity The data storage capacity of this spare drive Revertible Yes or No A revertible spare drive automatically returns to its spare...

Страница 132: ... Transition on page 247 for more information 7 To enable Media Patrol on this spare drive check the Enable Media Patrol box 8 Dedicated spares only From the Media Type dropdown menu choose the physical drive type used in the array HDD Hard Disk Drives SSD Solid State Drives The drive type you selected appears in the list of Physical Drives You cannot mix HDDs and SSDs in the same disk array 9 In t...

Страница 133: ...mit button In the confirmation box type the word confirm in the field provided 6 Click the OK button Making Spare Drive Settings The Spare Drive Settings tab enables you to change the settings of an existing spare drive To change spare drive settings 1 Click the Subsystem icon in Tree View 2 Click the Spare Drives icon 3 Click the Spare Drive icon 4 Click the Settings tab in Management View 5 Choo...

Страница 134: ...re Check verifies the operational status of your spare drives You can also schedule a Spare Check See Scheduling an Activity on page 54 To check a spare drive 1 Click the Subsystem icon in Tree View 2 Click the Spare Drives icon 3 Click the Spare Check tab in Management View 4 From the Physical Drive dropdown menu choose the spare drive you want to check Or choose All to check all the spare drives...

Страница 135: ...ary includes the following functions Viewing a List of All Logical Drives page 121 Viewing Individual Logical Drive Information page 121 Viewing a List of All Logical Drives To view a list of all logical drives in all enclosures 1 Click the Subsystem icon in Tree View 2 Click the Drive Summary icon Viewing Individual Logical Drive Information 1 Click the Subsystem icon in Tree View 2 Click the Dri...

Страница 136: ...VessRAID 1740s 1840s Product Manual 122 ...

Страница 137: ... Network Connection page 157 Managing SAS Connections page 158 Managing Background Activity page 160 Working with the Event Viewer page 162 Working with LUN Mapping page 164 Managing Users page 166 Working with Software Management page 169 Flashing through TFTP page 175 Viewing Flash Image Information page 175 Clearing Statistics page 175 Restoring Factory Defaults page 176 Shutting Down the Subsy...

Страница 138: ...Press Enter once to launch the CLU Making a Telnet Connection If your Telnet connection has not been setup refer to Setting Up Serial Cable Connections on page 19 To start the telnet program 1 Go to the command line prompt Windows or click the terminal icon Linux then run telnet 192 168 10 85 2300 The IP address above is only an example Use your VessRAID s Management port IP address 2300 is the Te...

Страница 139: ... physical drive Disk Array Management View disk array information create and delete disk arrays transport rebuild PDM and transition functions and locate a disk array create and delete logical drives Spare Drive Management View a list of spare drives create modify and delete spare drives and run spare check Logical Drive Management View logical drive information name logical drives initialization ...

Страница 140: ...ash clear statistics and restore factory default settings Buzzer Enable disable or silence the buzzer audible alarm Accessing Online Help To access online help on any CLU screen press Ctrl E To return to the CLU press Enter Logging out of the CLU 1 Highlight Return to Previous Menu and press Enter Repeat this action until you arrive at the Main Menu 2 From the Main Menu highlight Return to CLI and...

Страница 141: ...a on each disk drive Media Patrol checks all physical drives assigned to disk arrays and spare drives It does not check unconfigured drives To start stop pause or resume Media Patrol 1 From the Main Menu highlight Subsystem Management and press Enter 2 Highlight Media Patrol and press enter 3 Highlight Start Stop Pause or Resume and press Enter 4 If you chose Stop press Y to confirm Locking or Unl...

Страница 142: ...r 3 Highlight Unlock and press Enter Releasing a Lock set by another user To release somebody else s lock 1 From the Main Menu highlight Subsystem Management and press Enter 2 Highlight Lock Management and press Enter 3 Highlight Force Unlock and press the Spacebar to change to Yes 4 Highlight Unlock and press Enter Setting Subsystem Date and Time Use this screen to make Date and Time settings 1 F...

Страница 143: ...rmation and press Enter To access controller statistics highlight Controller Statistics and press Enter Clearing an Orphan Watermark This condition is the result of a disk drive failure during an NVRAM RAID level migration on a disk array To clear an orphan watermark 1 From the Main Menu highlight Subsystem Management and press Enter 2 Highlight Controller Management and press Enter 3 Highlight on...

Страница 144: ...ined table to determine truncation Highlight Cache Flush Interval and press the backspace key to erase the current value Type a new interval value 1 to 12 seconds Highlight SMART and press the spacebar to toggle between Enable and Disable Highlight SMART Poll Interval and press the backspace key to erase the current value Type a new interval value 1 to 1440 minutes Highlight Poll Interval and pres...

Страница 145: ...Chapter 5 Management with the CLU 131 Figure 2 Controller Status LED Controller Status ...

Страница 146: ...mation status settings and location To access Enclosure Management 1 From the Main Menu highlight Subsystem Management and press Enter 2 Highlight Enclosure Management and press Enter To access FPU VPD information vital product data on field replaceable units highlight FPU VPD Information and press Enter This function lists the battery backup unit and backplane Viewing Power Supply Status To view ...

Страница 147: ...old there is a fan malfunction See Replacing a Cooling Fan on page 210 Viewing Voltage Sensor Status To view the status of the voltage sensors 1 From the Main Menu highlight Subsystem Management and press Enter 2 Highlight Enclosure Management and press Enter 3 Highlight Voltage Sensors and press Enter If any voltage is outside the Healthy Threshold values there is a voltage malfunction in the enc...

Страница 148: ...ding controller is not present the battery will not appear in the interface If a battery does not reflect normal conditions and it is not currently under reconditioning run the Recondition function before you replace the battery See Reconditioning a Battery on page 135 Reconditioning fully discharges then fully recharges the battery During reconditioning if the Adaptive Writeback Cache function is...

Страница 149: ...nditioning fully discharges then fully recharges the battery During reconditioning if the Adaptive Writeback Cache function is enabled the controller cache is set to Write Thru After reconditioning the cache is reset to Write Back See Making Controller Settings on page 129 Locating an Enclosure This feature helps you identify the physical VessRAID enclosure you are working with through the CLU 1 F...

Страница 150: ...tem JBOD Expansion One VessRAID subsystem plus one or more VessJBOD expansion subsystems managed through the VessRAID or head unit The physical connections for these arrangements are discussed in Chapter 2 VessRAID Installation on page 9 To view enclosure topology 1 From the Main Menu highlight Subsystem Management and press Enter 2 Highlight Enclosure Topology and press Enter Controller Status Fa...

Страница 151: ...ter 2 Highlight Global Physical Drives Settings and press Enter 3 Change the following settings as required For SATA drives Highlight Write Cache and press the spacebar to toggle between Enabled and Disabled Highlight Read Look Ahead Cache and press the spacebar to toggle between Enabled and Disabled Highlight CmdQueuing and press the spacebar to toggle between Enabled and Disabled Highlight DMA M...

Страница 152: ...l Drive Management and press Enter 2 Highlight the physical drive of your choice and press Enter 3 Highlight Physical Drive Statistics and press Enter Clearing Stale and PFA Conditions The Clear Stale and Clear PFA functions only appear when those conditions exist on the physical drive To clear a Stale or PFA condition on a physical drive 1 From the Main Menu highlight Physical Drive Management an...

Страница 153: ...ess Enter 3 Highlight the physical drive of your choice and press Enter 4 Highlight Force Offline or Force Online and press Enter 5 Press Y to confirm Locating a Physical Drive This feature helps you identify a physical drive within the VessRAID enclosure you are working with through the CLU To locate a physical drive 1 From the Main Menu highlight Physical Drive Management and press Enter 2 Highl...

Страница 154: ...default set of parameters Makes one logical drive automatically Also makes a hot spare drive for all RAID levels except RAID 0 if at least five unconfigured physical drives are available If you have multiple enclosures multiple disk array and logical drive sets are created See Creating a Disk Array Automatic on page 141 Express You choose the parameters for a new disk array by specifying the chara...

Страница 155: ...nfiguration and create the disk array and logical drive s highlight Save Configuration and press Enter To reject the proposed configuration highlight Cancel Array Configuration and press Enter You will return to the Disk Arrays Summary screen To create a disk array with different characteristics repeat the steps above specifying different parameters but choose the Express or Advanced option If you...

Страница 156: ...h the applications and choose the best one for your disk array File Server Video Stream Transaction Data Transaction Log Other 8 Press Ctrl A to save your settings and move to the next screen 9 Review the proposed configuration of disk array and logical drive s To accept the proposed configuration and create the disk array and logical drive s highlight Save Configuration and press Enter To reject ...

Страница 157: ... same disk array 8 Highlight Save Settings and Continue and press Enter 9 If you want to specify an alias to the logical drive highlight Alias and type a name Maximum of 32 characters Use letters numbers space between words and underscore 10 Highlight RAID Level and press the spacebar to toggle though a list of available RAID levels 11 If you want to create multiple logical drives highlight Capaci...

Страница 158: ...From the Main Menu highlight Disk Array Management and press Enter 2 Highlight the disk array you want to delete and press the spacebar to mark it The mark is an asterisk to the left of the listing 3 Highlight Delete Marked Arrays and press Enter 4 Press Y to confirm the deletion Viewing Disk Array Information 1 From the Main Menu highlight Disk Array Management and press Enter 2 Highlight the dis...

Страница 159: ...on You remove the physical drives of this disk array and move them to another enclosure or to different drive slots in the same enclosure After you relocate the physical drives the disk array status will show OK Setting an Alias for a Disk Array This function sets an alias for the disk array To set an alias 1 From the Main Menu highlight Disk Array Management and press Enter 2 Highlight the disk a...

Страница 160: ...ant and press Enter 3 Highlight PDM and press the spacebar to toggle between Enable and Disable 4 Press Ctrl A to save your settings See Running PDM on page 148 Preparing the Disk Array for Transport To run the Transport function on a disk array 1 From the Main Menu highlight Disk Array Management and press Enter 2 Highlight the disk array you want and press Enter 3 Highlight Transport and press E...

Страница 161: ...ght Save Settings and Continue and press Enter 7 To change RAID level Highlight the logical drive in the list and press Enter 8 Highlight RAID Level and press the spacebar to toggle through the available RAID levels 9 Optional If you want to increase capacity highlight Expand Capacity and press the spacebar to toggle to Yes 10 Optional If you want to increase capacity highlight Capacity press the ...

Страница 162: ... drive that is currently part of a disk array with an unconfigured physical drive or a non revertible spare drive For more information see Transition on page 247 In order to run Transition The spare drive must be Revertible You must have an unconfigured physical drive of the same or larger capacity and the same type HDD or SSD to replace the spare drive To run Transition on a disk array 1 From the...

Страница 163: ... highlight Disk Array Management and press Enter 2 Highlight the disk array in which you want to create a logical drive and press Enter 3 Highlight Create New Logical Drive and press Enter The Disk Array ID number and Maximum capacity available for the new logical drive are displayed 4 Highlight the following parameters and press the backspace key to erase the current value Alias Type an alias int...

Страница 164: ...hlight Disk Array Management and press Enter 2 Highlight the disk array that contains the logical drive you want to delete and press Enter 3 Highlight the logical drive you want to delete and press the spacebar to mark it The mark is an asterisk to the left of the listing 4 Highlight Delete Marked Logical Drives and press Enter 5 Press Y to confirm the deletion Note If you did not use all of the a...

Страница 165: ...s or Dedicated to specified disk arrays Dedicated to Array The array to which a dedicated spare is assigned Creating a Spare Drive Only unconfigured physical drives can be used to make spares Check your available drives under Physical Drive Management See Managing Physical Drives on page 137 1 From the Main Menu highlight Spare Drive Management and press Enter 2 Highlight Create New Spare Drive an...

Страница 166: ...re drives appears including the following parameters 2 Highlight the spare drive you want to change and press Enter 3 Highlight the setting you want to change Revertible A revertible drive can be returned to spare status after you replace the failed drive in a disk array See Transition on page 247 for more information Type Dedicated means this spare drive can only be used with the specified disk a...

Страница 167: ...are drives appears 2 Highlight the spare drive you want to delete and press the spacebar to mark it The mark is an asterisk to the left of the listing 3 Highlight Delete Marked Spare Drives and press Enter 4 Press Y to confirm the deletion Caution If the spare drive you delete is the only spare the controller will not rebuild a critical array until you provide a new spare drive ...

Страница 168: ...hlight the logical drive you want and press Enter The information and settings screen appears 3 Highlight any of the following and press Enter to view more information Check Table Read Check Write Check and Inconsistency Check Tables Logical Drive Statistics Setting an Alias for a Logical Drive To set an alias for a logical drive 1 From the Main Menu highlight Logical Drive Management and press En...

Страница 169: ...ter 2 Highlight the logical drive you want and press Enter 3 Highlight Background Activity and press Enter 4 Highlight Start Initialization and press Enter The initialization parameters appear Initialization pattern The default 00000000 is best for most applications Quick Initialization Yes means only the first and last sections of the logical drives are initialized No means the entire logical dri...

Страница 170: ...Redundancy Check when an error is found To change a parameter highlight it and press the backspace toggle between Yes and No 5 Highlight Start and press Enter If necessary you can pause and resume or stop and restart the Redundancy Check You can use the logical drive while Redundancy Check is running Locating a Logical Drive This feature helps you identify the physical drives assigned to the logic...

Страница 171: ...light the management port and press Enter 3 Highlight NetMgmt Ethernet Port Settings and press Enter 4 Highlight DHCP and press the spacebar to toggle to Enabled 5 Press Ctrl A to save your settings Making Manual Settings 1 From the Main Menu highlight Network Management and press Enter 2 Highlight the management port and press Enter 3 Highlight NetMgmt Ethernet Port Settings and press Enter 4 Hig...

Страница 172: ...ble Items Cable Signal Strength See Making SAS Port Settings on page 158 Making SAS Port Settings There are two SAS data ports on the controller To make settings to the SAS ports 1 From the Main Menu highlight SAS Management and press Enter 2 Highlight SAS Ports and press Enter 3 Highlight the port you want to see and press Enter 4 Highlight SAS Port Settings and press Enter 5 Highlight Cable Sign...

Страница 173: ...w a list of initiators currently logged either of the SAS ports 1 From the Main Menu highlight SAS Management and press Enter 2 Highlight SAS Initiators and press Enter A list of all currently logged in initiators appears on the screen Adding a SAS Initiator You must add an initiator to the VessRAID s initiator list in order to use the initiator to create a LUN for your logical drive To add an ini...

Страница 174: ...ears including Rebuild PDM Predictive Data Migration Synchronization Redundancy Check Migration Transition Initialization Media Patrol Making Background Activity Settings 1 From the Main Menu highlight Background Activity and press Enter 2 Highlight Background Activity Settings and press Enter 3 Highlight following and press the spacebar to toggle between Enabled and Disabled Media Patrol Checks t...

Страница 175: ...k Checks reports and can correct data inconsistencies in logical drives The rates are defined as follows Low Fewer resources to activity more to data read write Medium Balance of resources to activity and data read write High More resources to activity fewer to data read write 5 Highlight the following PDM trigger settings and press the backspace key to erase the current value Reassigned Block Thr...

Страница 176: ... Runtime Events 1 From the Main Menu highlight Event Viewer and press Enter The log of Runtime Events appears Events are added to the top of the list Each item includes Sequence number Begins with 0 at system startup Device Disk Array Logical Drive Physical Drive by its ID number Severity lowest to highest Information Warning Minor Major Critical and Fatal Timestamp Date and time the event happene...

Страница 177: ...Array Logical Drive Physical Drive by its ID number Severity lowest to highest Information Warning Minor Major Critical and Fatal Timestamp Date and time the event happened Description A description of the event in plain language 3 Press the up and down arrow keys to scroll through the log Clearing NVRAM Events To clear the Runtime Event log 1 From the Main Menu highlight Event Viewer and press En...

Страница 178: ...bling LUN Mapping To enable LUN mapping 1 From the Main Menu highlight Additional Info and Management and press Enter 2 Highlight LUN Mapping and press Enter A list of the current Fibre Channel or SAS initiators appears LUN Mapping must be enabled in order for VessRAID to recognize the initiator If LUN Mapping is currently disabled highlight Enable LUN Mapping and press Enter Creating an Initiator...

Страница 179: ...nt and press Enter 2 Highlight LUN Mapping and press Enter 3 Highlight an existing Initiator and press Enter A list of logical drives displays 4 In the LUN field press the backspace key to erase the current value then type the LUN you want to assign to this initiator from 0 to 255 If you make a error press Ctrl R to restore the current LUN 5 Press Ctrl A to save the LUN map Deleting an Initiator T...

Страница 180: ...ist of the current users appears Creating a User To create a new user account 1 From the Main Menu highlight Additional Info and Management and press Enter 2 Highlight User Management and press Enter 3 Highlight Create New User and press Enter 4 Highlight each field and type in the appropriate information User name no spaces Password Optional Maximum 31 characters Use letters numbers and underscor...

Страница 181: ... can change other user s passwords To change a user s password 1 From the Main Menu highlight Additional Info and Management and press Enter 2 Highlight User Management and press Enter 3 Highlight a User in the list and press Enter 4 Highlight Change Password and press Enter 5 Highlight New Password and type a password Maximum 31 characters Use letters numbers and underscore 6 Highlight Retype Pas...

Страница 182: ...he options For definitions of each privilege level see List of User Privileges on page 167 7 Highlight Status and press the space bar to toggle between the options Enabled Allows the user to log in to the system Disabled Prevents the user from logging in to the system 8 Press Ctrl A to save the settings Deleting a User To delete a user 1 Log in under a user name other than the one you want to dele...

Страница 183: ...light Software Management and press Enter 3 Highlight Email and press Enter 4 Highlight Startup Type and press the spacebar to toggle between Automatic and Manual 5 Highlight the following and press the backspace key to erase the current value then type the new value Server IP address Server Port number 25 is the default 6 Highlight Authentication and press the spacebar to toggle between Yes and N...

Страница 184: ...tus is Started To make Web Server service settings 1 From the Main Menu highlight Additional Info and Management and press Enter 2 Highlight Software Management and press Enter 3 Highlight Web Server and press Enter 4 Highlight Startup Type and press the spacebar to toggle between Automatic and Manual 5 Highlight the following and press the backspace key to erase the current value then type the ne...

Страница 185: ...tart stop or restart the Telnet service highlight Start Stop or Restart and press Enter Making SNMP Settings By default SNMP Simple Network Management Protocol service is set to Automatic and its normal status is Started To make SNMP service settings 1 From the Main Menu highlight Additional Info and Management and press Enter 2 Highlight Software Management and press Enter 3 Highlight SNMP and pr...

Страница 186: ...er 2 Highlight Software Management and press Enter 3 Highlight Create New Trap Sink and press Enter 4 Highlight Trap Sink IP address and press the backspace key to erase the current value then type the new IP address in this field 5 Highlight Trap Filter and press the spacebar to toggle through the severity levels The Severity Levels are lowest to highest Information Warning Minor Major Critical a...

Страница 187: ...he recipient PC in order to receive reports Adding a recipient To add a recipient 1 From the Main Menu highlight Additional Info and Management and press Enter 2 Highlight Software Management and press Enter 1 Highlight Netsend and press Enter 2 Highlight Message Recipient and press Enter 3 Highlight Create New Message Recipient and press Enter 4 Type the recipient s IP address into the field prov...

Страница 188: ...ement and press Enter 2 Highlight Software Management and press Enter 1 Highlight the recipient you want to delete and press the spacebar to mark it The mark is an asterisk to the left of the listing 2 Highlight Delete Marked Entries and press Enter Netsend Requirements In order to use Netsend NetSend must be running the VessRAID You must provide the IP address for each recipient PC The Messenger ...

Страница 189: ...fo The firmware package currently running on the controllers Flashed Image Info The firmware package flashed to memory If the Running and Flashed Images do not match the VessRAID has not restarted since the firmware was last updated Restart the VessRAID to run the Flashed firmware package See Restarting the Subsystem on page 179 Note that all of these components are upgraded together in a package ...

Страница 190: ...o and Management and press Enter 2 Highlight Restore Factory Defaults and press Enter 3 Highlight the setting group you want and press the spacebar to toggle between Yes and No Yes means this setting will be restored to the default value 4 Highlight Restore Factory Defaults and press Enter 5 Press Y to confirm the reset Caution Use this function with care Do not restore to default settings for any...

Страница 191: ...r 3 Highlight Shutdown or Restart and press Enter 4 Highlight Option and press the spacebar to display Restart 5 Highlight Submit and press Enter A warning message appears 6 Press Y to continue The screen goes blank 7 Wait for no less than two minutes 8 Manually turn off the power supply switch both switches on the 1840s model on the back of the subsystem Shutting down the VessRAID Serial Connecti...

Страница 192: ...ubmit and press Enter A warning message appears 6 Press Y to continue 7 Turn off the power supply switch both switches on the 1840s model when you see the following message Shutdown complete It is now safe to power off the subsystem Caution After you turn the power supply switches off you must wait at least 10 seconds before you turn the power switches on again ...

Страница 193: ...pacebar to display Restart 4 Highlight Submit and press Enter A warning message appears 5 Press Y to continue The screen goes blank 6 Wait for no less than two minutes 7 Re establish your Telnet connection to the VessRAID CLU If you cannot re establish a connection wait 30 seconds then try again Restarting VessRAID Serial Connection This function enables you to restart the VessRAID subsystem on a ...

Страница 194: ...VessRAID 1740s 1840s Product Manual 180 6 When the Login prompt appears log into the CLU again ...

Страница 195: ...e buzzer settings 1 From the Main Menu highlight Buzzer and press Enter A list of Controllers appears with the current buzzer setting and status 2 Highlight the Controller whose buzzer you want to set and press Enter 3 Highlight Enabled and press the spacebar to toggle between Yes and No 4 Press Ctrl A to save your settings The buzzer provides the audible alarm See VessRAID is Beeping on page 251 ...

Страница 196: ...VessRAID 1740s 1840s Product Manual 182 ...

Страница 197: ...0 Using the LCD Panel The LCD panel is optional and typically installed during VessRAID installation See page 11 The LCD panel activates approximately 35 seconds after you switch on the VessRAID s power supply At first the LCD screen displays System is Initializing When the VessRAID is fully booted and running under normal conditions the LCD screen displays the VessRAID model number and IP address...

Страница 198: ...ess the button choose the alternative mode setting The alternative LCD mode is set Simple Mode Simple Mode enables you to perform the following enclosure and RAID management functions View Events View critical events if any have been set View Controller View IP address MAC address LCD UI version Vendor name WWN memory size and firmware version Spare Drive Management View SD ID physical drive ID nu...

Страница 199: ...Stale or PFA condition from a physical drive Creating a revertible spare drive or a dedicated spare drive Running background activity such as Media Patrol PDM Rebuild or RAID level migration Viewing event logs Shutting down or restarting the VessRAID Refer to Chapter 4 Management with WebPAM PROe on page 39 and Chapter 5 Management with the CLU on page 123 when you need to perform these functions ...

Страница 200: ... left digit 5 Press the button to increment and the button decrement Press the button to move left and the button move right To set an IP address with double or single digit octets for example 192 168 1 50 type zeros as placeholders 192 168 001 050 After you have set the last extreme right digit press the button The current Subnet Mask displays with the cursor under the first extreme left digit 6 ...

Страница 201: ...st data ports Viewing SAS Port Information page 187 Making SAS Port Settings page 188 To add a SAS initiator see Adding an Initiator on page 66 WebPAM PROe or page 159 CLU Viewing SAS Port Information The SAS Controller has one SAS channel The SAS channel has two ports See Making Data and Management Connections on page 17 for information about how these ports are physically connected to the Host P...

Страница 202: ...n to choose SAS Port 2 4 Press the or button to scroll to Signal Strength 5 Press the button to highlight the current value 6 Press the or button to increment or decrement the value The range is 1 to 8 1 is the default Signal strength correlates to cable length in meters Example If you have a 2 m SAS cable set signal strength to 2 If performance is unsatisfactory try settings of 1 and 3 then use t...

Страница 203: ...ROe or page 132 CLU Viewing the Enclosure This function requires the LCD to be in Advanced mode See page 184 To view enclosure information 1 Press the or button until the display says View Enclosure 2 Press the button and the display says Enclosure Status 3 Press the button again and the display says Temperature Status This is the item list It includes Temperature status Fan status Power Supply st...

Страница 204: ...Information page 190 Locating a Physical Drive page 191 For other physical drive functions see Managing Physical Drives on page 92 WebPAM PROe or page 137 CLU Viewing Physical Drive Information This function requires the LCD to be in Advanced mode See page 184 To view physical drive information 1 Press the or button until the display says Physical Drive Management 2 Press the button and the displa...

Страница 205: ...ton until the display says Locate Physical Drive 6 Press the button The disk status LED for the physical drive blinks for one minute See Figure 2 Figure 2 Disk Status LED Managing Disk Arrays Disk Array Management in the LCD includes the following functions Creating a Disk Array Automatic page 192 Creating a Disk Array Advanced page 193 Deleting a Disk Array page 195 Viewing Disk Array Information...

Страница 206: ...hese two drive types cannot be mixed in the same disk array Creating To create a disk array automatically 1 Press the or button until the display says Array Configure 2 Press the button and the display says Auto Configure 3 Press the button again and the display says Are you sure 4 Press the button so the display says Yes 5 Press the button to input your answer 6 Press the button again to confirm ...

Страница 207: ...button to move to END and press the button to input your choices 9 Press the button again to confirm The display shows the array creation process When the creation is finished the LCD returns to Disk Array Create Creating a Logical Drive For more information on the choices below see Chapter 8 Technology Background on page 217 To create a logical drive on your new disk array 1 Press the button and ...

Страница 208: ...hows the write policy you want 14 Press the button to choose the write policy shown on the screen 15 Press the button again to confirm The display shows the logical drive creation process When the creation is finished the LCD returns to Logical Disk Create Creating a Spare Drive This function creates a non revertible global spare drive If you want a revertible or a dedicated spare drive see Creati...

Страница 209: ...Press the button to change the answer to YES then press the button 10 Press the button again to confirm The chosen disk array is deleted Viewing Disk Array Information To view disk array information 1 Press the or button until the display says Disk Array Management 2 Press the button and the display a list of disk arrays by ID number 3 Press the or button to scroll through the list of disk arrays ...

Страница 210: ...as been replaced the disk array automatically begins rebuilding in order to restore redundancy fault tolerance Your data is still available However access will be slower until rebuilding is done Transport Ready This function is not supported in the LCD panel See Preparing a Disk Array for Transport on page 110 WebPAM PROe or page 146 CLU Locating a a Disk Array This feature helps you identify the ...

Страница 211: ...vel shown on the screen The display shows the maximum available capacity 9 Press the or button until the display shows the capacity you want 10 Press the button to choose the capacity shown on the screen The display shows the default stripe size The choices are 64 KB 128 KB 256 KB 512 KB and 1 MB 11 Press the or button until the display shows the stripe size you want 12 Press the button to choose ...

Страница 212: ...ical drive for deletion 7 Press the button and the display says Delete Logical Drive X 8 Press the button again and the display says Are you sure NO 9 Press the button to change the answer to YES then press the button 10 Press the button again to confirm The chosen logical drive is deleted Viewing Logical Drive Information This function requires the LCD to be in Advanced mode See page 184 To view ...

Страница 213: ... failure Your data is still available However the logical drive has lost redundancy fault tolerance You must determine the cause of the problem and correct it See Critical Offline Disk Arrays on page 276 Offline This condition arises as the result of a second physical drive failure An Offline logical drive is not accessible but some or all of your data may remain intact You must determine the caus...

Страница 214: ...ve page 202 For other spare drive functions see Managing Spare Drives on page 117 or Managing Spare Drives on page 151 Viewing Spare Drive Information To view spare drive information 1 Press the or button until the display says Spare Drive Management 2 Press the button and the display a list of spare drives by ID number 3 Press the or button to scroll through the list of spare drives 4 Press the b...

Страница 215: ...he display says Spare Drive Create 5 Press the button again to display a list of unconfigured physical drives 6 Press the or button to move through the list Press the button to choose a physical drive for your spare drive To create a dedicated or revertible spare drive see Creating a Spare Drive on page 118 WebPAM PROe or page 151 CLU Deleting a Spare Drive To delete a spare drive 1 Press the or b...

Страница 216: ...e drive To locate a spare drive 1 Press the or button until the display says Spare Drive Management 2 Press the button and the display a list of spare drives by ID number 3 Press the or button to scroll through the list of spare drives 4 Press the button choose a spare drive 5 Press the or button until the display says Locate Spare Drive 6 Press the button The disk status LED for the physical driv...

Страница 217: ...are from one of these sources TFTP Server page 203 The Host PC or Server page 204 Restarting the Subsystem page 205 Downloading the Firmware Image File Go to the Promise website at http www promise com support and download the latest firmware image img file to your TFTP server or your PC The firmware update image file includes all of the files for the VessRAID including Updating Firmware from TFTP...

Страница 218: ...opup message click the OK button The update progress displays Then a popup message appears to tell you to reboot the VessRAID 12 In the popup message click the OK button 13 Restart the VessRAID See Restarting the Subsystem on page 205 Updating Firmware from your PC To update the firmware from your PC 1 Click the Subsystem icon in Tree View 2 Click the Administrative Tools icon 3 Click the Software...

Страница 219: ...em on page 205 Restarting the Subsystem To restart the VessRAID subsystem 1 Click the Subsystem icon in Tree View 2 Click the Administrative Tools icon 3 Click the Shutdown link in Management View A Shutdown or Restart tab will appear 4 On the Shutdown or Restart tab choose Restart from the dropdown menu 5 Click the Submit button 6 In the warning box click the OK button 7 In the confirmation box t...

Страница 220: ... com support and download the latest firmware image file to your TFTP server Updating the Firmware To update the firmware file in the CLU 1 From the Main Menu highlight Additional Info and Management and press Enter 2 Highlight Flash through TFTP and press Enter 3 Highlight TFTP Server and type the IP address of your TFTP server in the field provided 4 Highlight Port Number and press the backspace...

Страница 221: ...ds then try again Restarting Subsystem over a Serial Connection To restart the VessRAID subsystem on a serial connection 1 From the Main Menu highlight Additional Info and Management and press Enter 2 Highlight Shutdown or Restart and press Enter 3 Press the spacebar to display Restart then press Enter A warning message appears 4 Press Y to continue The screen will display shutdown and startup fun...

Страница 222: ... Removing the old power supply To remove the power supply 1 Verify that the power supply LED is amber or red 2 Switch off the power to the power supply you plan to replace 3 Unplug the power cord 4 Loosen and remove the retaining screw on the left side of the power supply 5 Pull the power supply out of the VessRAID enclosure Installing the new power supply To install the power supply 1 Carefully s...

Страница 223: ...he VessRAID See Shutting Down the Subsystem on page 80 or page 177 2 On the RAID Controller loosen the thumbscrew swing the latch to the right and pull the RAID Controller out of the enclosure 3 Disconnect the SAS Ethernet serial and power cables 4 On the RAID Controller loosen the thumbscrew swing the latch to the right and pull the RAID Controller out of the enclosure See Figure 1 Figure 1 Remov...

Страница 224: ...AID restarts For more information about VessRAID s start up behavior see Connecting the Power on page 20 This completes the RAID Controller replacement procedure Replacing a Cooling Fan To replace a fan 1 Verify that the Fan LED on the cooling unit is amber or red See Figure 2 Figure 2 Fan LEDs 2 Shut down the VessRAID and remove the RAID Controller See Replacing a RAID Controller on page 209 3 La...

Страница 225: ...r connector and lift the old fan out of the controller Figure 4 RAID Controller cooling fan 6 Place a new fan in the controller attach the power connector and install the four attaching screws 7 Attach the RAID Controller cover and install the two attaching screws See Figure 3 Attaching screw one each side Cover Attaching screws 4 Power connectors ...

Страница 226: ...age 80 or page 177 3 Shut down the VessRAID and remove the RAID Controller See Replacing a RAID Controller on page 209 Cautions Try reconditioning the battery before you replace it See page 90 or page 135 for more information If power service has failed do not remove the RAID Controller if the Dirty Cache LED is lighted See Figure 5 Wait until power service is restored Only a qualified technician ...

Страница 227: ...aching screw on the outside of the RAID controller housing 6 Detach the battery connector and remove the battery assembly Figure 6 RAID Controller cache battery 7 Attach the connector of the new battery assembly Be careful to line up the connector pins correctly See Figure 7 Figure 7 Battery connector pins Slot Attaching screw on controller housing Connector Battery assembly Battery Row A Row B Ro...

Страница 228: ...eplace the memory module as a capacity upgrade as well as a repair To replace the memory module 1 Shut down the VessRAID and remove the RAID Controller See Replacing a RAID Controller on page 209 Figure 8 Removing the RAID Controller 2 Lay the RAID Controller on a non static surface and remove the cover attaching screws one on each side then remove the cover See page 211 Figure 3 3 Gently press th...

Страница 229: ...memory module into the slot until the retainers click into locked position 6 Attach the RAID Controller cover and install the two attaching screws See page 211 Figure 3 7 Reinstall the RAID Controller See Replacing a RAID Controller on page 209 This completes the memory module replacement procedure Memory module Retainer Retainer Memory slot Alignment groove ...

Страница 230: ...VessRAID 1740s 1840s Product Manual 216 ...

Страница 231: ...gether in a disk array Then all or a portion of the disk array is formed into a logical drive The operating system sees the logical drive as a single storage device and treats it as such The RAID software and controller manage all of the individual drives The benefits of a RAID can include Higher data transfer rates for increased server performance Increased overall storage capacity for a single d...

Страница 232: ...ance as well as data storage efficiency Figure 1 RAID 0 Striping interleaves data across multiple drives The disk array s data capacity is equal to the number of disk drive members multiplied by the smallest drive s capacity For example one 100 GB and three 120 GB drives will form a 400 GB 4 x 100 GB disk array instead of 460 GB If physical drives of different capacities are used there will also b...

Страница 233: ...cal drive is present the spare drive will be used as the replacement drive and data will begin to be mirrored to it from the remaining good drive Figure 2 RAID 1 Mirrors identical data to two drives The logical drive s data capacity equals the smaller physical drive For example a 100 GB physical drive and a 120 GB physical drive have a combined capacity of 100 GB in a mirrored logical drive If phy...

Страница 234: ... function providing fault tolerance Figure 3 RAID 1E can mirror data over an odd number of drives The advantage of RAID 1E is the ability to use an odd number of physical drives unlike RAID 1 and RAID 10 You can also create a RAID 1E Logical Drive with an even number of physical drives However with an even number of drives you will obtain somewhat greater security with comparable performance using...

Страница 235: ... and web servers Figure 4 RAID 5 stripes all drives with data and parity information The capacity of a RAID 5 logical drive equals the smallest physical drive times the number of physical drives minus one Hence a RAID 5 logical drive with four 100 GB physical drives will have a capacity of 300 GB A RAID 5 logical drive with two 120 GB physical drives and one 100 GB physical drive will have a capac...

Страница 236: ...drive with 7 100 GB physical drives will have a capacity of 500 GB A RAID 6 logical drive with 4 100 GB physical drives will have a capacity of 200 GB RAID 6 becomes more capacity efficient in terms of physical drives as the number of physical drives increases RAID 6 provides double fault tolerance Your logical drive remains available when up to two physical drives fail RAID 6 is generally conside...

Страница 237: ...ed over a second drive pair Figure 6 RAID 10 takes a data mirror on one drive pair and stripes it over a second drive pair The data capacity RAID 10 logical drive equals the capacity of the smallest physical drive times the number of physical drives divided by two In some cases RAID 10 offers double fault tolerance depending on which physical drives fail RAID 10 arrays require an even number of ph...

Страница 238: ... data capacity RAID 50 logical drive equals the capacity of the smallest physical drive times the number of physical drives minus two RAID 50 also provides very high reliability because data is still available even if multiple physical drives fail one in each axle The greater the number of axles the greater the number of physical drives that can fail without the RAID 50 logical drive going offline...

Страница 239: ...sical drives depending on the number of physical drives in the logical drive The chart below shows RAID 50 logical drives with 6 to 16 physical drives the available number of axles and the resulting distribution of physical drives on each axle RAID 50 Logical Drive No of Drives No of Axles Drives per Axle 6 2 3 3 7 2 3 4 8 2 4 4 9 2 4 5 3 3 3 3 10 2 5 5 3 3 3 4 11 2 5 6 3 3 4 4 12 2 6 6 3 4 4 4 4 ...

Страница 240: ...VessRAID 1740s 1840s Product Manual 226 15 2 7 8 3 5 5 5 4 3 4 4 4 5 3 3 3 3 3 16 2 8 8 3 5 5 6 4 4 4 4 4 5 3 3 3 3 4 RAID 50 Logical Drive No of Drives No of Axles Drives per Axle ...

Страница 241: ...tributed Parity disk arrays The total capacity of a RAID 60 logical drive is the smallest physical drive times the number of physical drives minus four RAID 60 also provides very high reliability because data is still available even if multiple physical drives fail two in each axle The greater the number of axles the greater the number of physical drives that can fail without the RAID 60 logical d...

Страница 242: ...ysical drives depending on the number of physical drives in the logical drive The chart below shows RAID 60 logical drives with 8 to 20 physical drives the available number of axles and the resulting distribution of physical drives on each axle RAID 60 Logical Drive No of Drives No of Axles Drives per Axle 8 2 4 4 9 2 4 5 10 2 5 5 11 2 5 6 12 2 6 6 3 4 4 4 13 2 6 7 3 4 4 5 14 2 7 7 3 4 5 5 15 2 7 ...

Страница 243: ...Chapter 8 Technology Background 229 18 2 9 9 3 6 6 6 4 4 4 5 5 19 2 9 10 3 6 6 7 4 4 5 5 5 20 2 10 10 3 6 7 7 4 5 5 5 5 5 4 4 4 4 4 RAID 60 Logical Drive No of Drives No of Axles Drives per Axle ...

Страница 244: ...vantages Disadvantages Implements a striped disk array the data is broken down into blocks and each block is written to a separate disk drive I O performance is greatly improved by spreading the I O load across many channels and drives No parity calculation overhead is involved Not a true RAID because it is not fault tolerant The failure of just one drive will result in all data in an disk array b...

Страница 245: ...thanks to multiple stripe segments Can use an odd number of disks Very high disk overhead uses only 50 of total capacity Advantages Disadvantages High Read data transaction rate Medium Write data transaction rate Good aggregate transfer rate Disk failure has a medium impact on throughput File and Application servers WWW E mail and News servers Intranet servers Most versatile RAID level Advantages ...

Страница 246: ... Disadvantages Implemented as a mirrored disk array whose segments are RAID 0 disk arrays High I O rates are achieved thanks to multiple stripe segments Very high disk overhead uses only 50 of total capacity Advantages Disadvantages High Read data transaction rate Medium Write data transaction rate Good aggregate transfer rate High reliability Supports large volume sizes Higher disk overhead than ...

Страница 247: ...ose that size as your Stripe Size If you do not know the cache buffer or fixed data block sizes Promise suggests you choose 64 KB as your Stripe Size Generally speaking email POS and Web Servers prefer smaller stripe sizes Video and database applications prefer larger stripe sizes Choosing Sector Size A sector is the smallest addressable area on a physical disk drive Sector Size refers to the size...

Страница 248: ...ne with a larger sector size Cache Policy As it is used with VessRAID the term cache refers to any of several kinds of high speed volatile memory that hold data moving from your computer to the physical drives or vice versa Cache is important because it can read and write data much faster than a physical drive There are read caches which hold data as it is read from a physical drive and write cach...

Страница 249: ...fline When the battery comes back online the write policy automatically changes back to Write Back Adaptive Writeback Cache On the VessRAID subsystem you can set the logical drive write cache policy to Write Thru or Write Back If you set the write cache policy to Write Back your data is first written to the controller cache and later to the logical drive This action improves performance To preserv...

Страница 250: ...Group Rounding Uses an algorithm to determine how much to truncate Results in the maximum amount of usable drive capacity Table Rounding Applies a predefined table to determine how much to truncate Capacity Coercion also affects a replacement drive used in a disk array Normally when an physical drive fails the replacement drive must be the same capacity or larger However the Capacity Coercion feat...

Страница 251: ...e See Managing Spare Drives on page 117 WebPAM PROe or page 151 CLU for information on how to make this setting The spare drive effectively takes the place of the failed drive and the RAID system immediately begins to rebuild data onto the drive When the rebuild is complete the disk array is returned to fault tolerant status VessRAID includes a function that enables you to return a hot spare drive...

Страница 252: ...hout disturbing the existing data While the disk array is migrating you can access the data as before When migration is complete your disk array will have a different RAID level and or a larger capacity In most cases you must add one or more physical drives during the migration process You can never reduce the number of physical drives The tables below show the migration options for a source logic...

Страница 253: ... have less than 16 physical drives If existing physical drives have no unused space add 1 or more physical drives RAID 6 4 physical drives minimum 16 maximum If existing physical drives have no unused space add 1 or more physical drives RAID 10 4 physical drives minimum Even number of physical drives If existing physical drives have no unused space add 1 or more physical drives RAID 50 6 physical ...

Страница 254: ...hysical drives RAID 10 4 physical drives minimum Even number of physical drives Add 2 or more physical drives RAID 50 6 physical drives minimum 16 per axle maximum Add 4 or more physical drives Target Requirements RAID 0 None RAID 1E Add physical drives RAID 5 3 physical drives minimum 16 maximum RAID 1E must have less than 16 physical drives If existing physical drives have no unused space add 1 ...

Страница 255: ...al drives RAID 10 4 physical drives minimum Even number of physical drives If existing physical drives have no unused space add 1 or more physical drives RAID 50 6 physical drives minimum 16 per axle maximum If existing physical drives have no unused space add 1 or more physical drives RAID 60 8 physical drives minimum 16 per axle maximum If existing physical drives have no unused space add 1 or m...

Страница 256: ...s than 16 physical drives RAID 6 4 physical drives minimum 16 maximum RAID 10 must have less than 16 physical drives If existing physical drives have no unused space add 1 or more physical drives RAID 10 Add physical drives Even number of physical drives RAID 50 6 physical drives minimum 16 per axle maximum RAID 60 8 physical drives minimum 16 per axle maximum If existing physical drives have no u...

Страница 257: ...m RAID 50 must have less than 16 physical drives If existing physical drives have no unused space add 1 or more physical drives RAID 10 Even number of physical drives RAID 50 Add physical drives 16 per axle maximum RAID 60 8 physical drives minimum 16 per axle maximum If existing physical drives have no unused space add 1 or more physical drives Target Requirements RAID 6 16 physical drives maximu...

Страница 258: ... expansion is finished WebPAM PROe will show the logical drive in the desired size Your operating system might show the logical drive at the maximum size listed in the table below Additional capacity might appear as unpartitioned and unformatted Important The Target disk array may require more physical drives than the Source disk array If the Target disk array requires an EVEN number of physical d...

Страница 259: ...hecks all physical drives assigned to disk arrays Media Patrol does not check unconfigured drives Media Patrol will also check spare drives if those drives have Media Patrol enabled Media Patrol for spare drives is enabled by default You can disable it in VessRAID s Command Line Interface CLI Unlike Synchronization and Redundancy Check Media Patrol is concerned with the condition of the media itse...

Страница 260: ... following actions trigger PDM A disk drive with unhealthy status see below Media Patrol finds a disk critical error You initiate PDM manually PDM also counts the number of media errors reported by Media Patrol A disk drive becomes unhealthy when A SMART error is reported The bad sector remapping table fills to the specified level Because data would be lost if written to a bad sector when a bad se...

Страница 261: ... and the array goes critical or degraded VessRAID automatically rebuilds your array to the revertible spare drive and the array becomes functional again You replace the failed physical drive with a new physical drive of equal or greater capacity VessRAID automatically transitions moves the data from the revertible spare to the new physical drive The new physical drive becomes part of the array and...

Страница 262: ... a revertible spare drive If a physical drive fails in a disk array and there is a spare drive of adequate capacity available the controller automatically rebuilds the array using the spare drive In this example physical drive 3 failed and the array is rebuilt using physical drive 6 the revertible spare drive When the rebuild is complete the spare drive has replaced the failed drive In this exampl...

Страница 263: ...er 8 Technology Background 249 There is no spare drive at this moment Even if physical drive 5 is of adequate capacity it has not been designated as a spare therefore the controller cannot use it as a spare ...

Страница 264: ... to the disk array and physical drive 6 is a revertible spare drive The original configuration is restored Manual Transition If you wanted to use the drive in slot 5 as a member of the disk array rather than the drive in slot 3 you would run the Transition function manually See page 109 WebPAM PROe or page 148 CLU When the Manual Transition is finished physical drives 1 2 4 and 5 belong to the dis...

Страница 265: ...lems page 285 Browser Does Not Connect to WebPAM PROe page 287 Unsaved Data in the Controller Cache page 288 VessRAID is Beeping VessRAID s alarm has five different patterns as shown below Figure 1 Audible alarm sound patterns When you first power up the VessRAID it beeps twice to show normal operation The audible alarm sounds at other times to inform you that the VessRAID needs attention But the ...

Страница 266: ...ge 90 or page 181 LEDs Display Amber or Red Front Panel LEDs When boot up is finished and the VessRAID subsystem is functioning normally Power Global Enclosure Status and Global RAID Status LEDs display green continuously Controller Activity LED flashes green when there is controller activity System Heartbeat LED blinks green seven times in three seconds goes dark for six seconds then repeats the ...

Страница 267: ...EDs LEDs State Dark Steady Green Flashing Green Amber Red Power System Off Normal GlobalRAID Status System Off Normal Logical Drive Critical Logical Drive Offline Global Enclosure Status System Off Normal Locating the Enclosure Fan battery power supply temperature or voltage problem Controller Activity System Off or no SAS ports connected One or more SAS ports connected Activity Controller Heartbe...

Страница 268: ...screen shows the VessRAID model number and IP address If a problem is detected in the subsystem the LCD screen displays a Check Event message as shown in Figure 4 Figure 4 VessRAID optional LCD display Press the or button to see the View Events menu Then press the button to read the Events Controller LEDs Under normal conditions the Controller Status LED is green and the Dirty Cache LED icon is da...

Страница 269: ...rty Cache No data in cache Unsaved data in cache Amber Unsaved data in cache Battery Not detected or Not installed OK Backup capacity below 72 hours No power to controller cache Fan Not detected OK One fan turning too slowly Multiple fans turning too slowly USB Ports No device detected Device detected Failed data transfer Amber Activity SAS IN OUT Ports No connection Port connected Green Activity ...

Страница 270: ...e Enclosure Problems on page 282 CLU Reports a Problem The CLU reports information passively you must determine which functions to check based on the sound of the VessRAID s buzzer and any amber or red LEDs See page 251 through 255 Check the event logs first Then check the reported component Viewing Runtime Events To display Runtime Events 1 From the Main Menu highlight Event Viewer and press Ente...

Страница 271: ... the log Checking a Reported Component In this example let us check disk array status 1 Open the CLU 2 Highlight Disk Array Management and press Enter 3 Observe the status of your disk arrays DaId Alias OpStatus CfgCapacity FreeCapacity MaxContiguousCap 0 DA0 OK 75 44GB 66 06GB 66 06GB 1 DA1 Degraded 189 06GB 179 68GB 179 68GB 2 DA2 OK 73 57GB 64 20GB 64 20GB At this point you can highlight the De...

Страница 272: ...nter to identify the failed disk drive Highlight Rebuild and press Enter to rebuild the array after you replace the failed disk drive For more information see Critical Offline Disk Arrays on page 276 WebPAM PROe Reports a Problem WebPAM PROe aids in troubleshooting your logical drives and enclosure by continuous monitoring and reporting to the User in the following ways Displays yellow s red Xs in...

Страница 273: ...d popup message notification see Setting up User Event Subscriptions on page 59 Figure 7 An example of a popup message Keeps a record in the Event Log Figure 8 The Event Log Keeps a record in the Event Log Displays full information in Management View ...

Страница 274: ...drive shown in Management View Also see these troubleshooting topics Event Notification Response on page 263 Critical Offline Disk Arrays on page 276 Frequently Asked Questions on page 289 Auto Rebuild Replacement Drive Critical Rebuilding Status Failed Disk Drive ...

Страница 275: ...ng a Report from OPAS The VessRAID subsystem comes with One Plug Auto Service OPAS OPAS automatically saves a comprehensive system profile and diagnostic report as a text file when you plug a USB stick in one of the USB ports on the VessRAID controller To view an OPAS report on the VessRAID 1 Plug a USB stick into one of the USB ports on the VessRAID controller Figure 11 USB ports on the VessRAID ...

Страница 276: ... log to the PC desktop or a convenient location Figure 12 Locating the report file on the USB stick 5 Open the subinfo_xxxxxxxxxx log file in a text editor to read the system profile and diagnostic report Note Choose a text editor with some word processor capability such as WordPad on a Windows PC for easier viewing ...

Страница 277: ...66 Event Log page 266 Host Interface Controller page 266 Logical Drive page 267 Media Patrol page 268 Online Capacity Expansion page 269 PDM page 269 Physical Disk page 270 PSU Power Supply Units page 271 RAID Level Migration page 272 Rebuild page 272 Redundancy Check page 273 Resource page 274 Spare Check page 274 Spare Drives page 274 SMART page 274 Synchronization page 274 System VessRAID page ...

Страница 278: ...sconnected or removed Reinstall the battery See page 212 Battery charging failed Replace the battery See page 212 Battery reconditioning started Battery reconditioning has begun Battery recondition terminated The battery was disconnected or removed during reconditioning Reinstall the battery See page 212 Blowers Blowers have started Normal Blowers have stopped Verify that the fans are properly ins...

Страница 279: ...See page 49 and 50 WebPAM PROe or page 162 CLU Controller temperature is above the threshold warning threshold The VessRAID controller is overheating Check for airflow around and through the controller and verify that all fans are working Replace fans as needed Controller temperature is above the critical threshold The VessRAID controller is seriously overheating Check for airflow around and throu...

Страница 280: ...sRAID is overheating Check for airflow around and through the VessRAID and verify that all fans are working Replace fans as needed Enclosure temperature is above the critical threshold The VessRAID is seriously overheating Check for airflow around and through the VessRAID and verify that all fans are working Replace fans as needed Enclosure temperature is within the normal range Normal Event Log E...

Страница 281: ...ror An unidentified error occurred If this message appears repeatedly contact Technical Support See page 291 Host interface controller has encountered a system error A VessRAID system error occurred If this message appears repeatedly contact Technical Support See page 291 Host interface controller has encountered a fatal error Restart the VessRAID See page 81 WebPAM PROe or page 179 CLU If this me...

Страница 282: ...he physical drives of the array are restored to online status Logical drive has been placed online Possible data loss One or more physical drives in the array went offline See page 276 Logical drive has been set to critical One or more physical drives in the array went offline See page 276 Logical drive axle has been placed online RAID 50 and 60 One of the axles RAID 5 or 6 arrays returned on onli...

Страница 283: ... has encountered a physical disk error Bad block found on a disk drive Migration will finish Check the disk drive check table after migration and replace disk drive as needed See page 93 WebPAM PROe or page 138 CLU Online capacity expansion is aborted due to an internal error System resources are low Reduce system load or restart the VessRAID See page 81 WebPAM PROe or page 179 CLU Online capacity...

Страница 284: ...or user action Normal Physical disk is no longer assigned as global spare Result of settings or user action Normal Physical disk assigned as dedicated spare Result of settings or user action Normal Physical disk is no longer assigned as dedicated spare Result of settings or user action Normal Physical disk has been inserted A disk drive has been inserted into the VessRAID subsystem Physical disk h...

Страница 285: ...rked as dead and will not work on the VessRAID Replace the disk drive A physical drive page 0 1 settings have been changed Result of settings or user action Normal Physical disk is marked as dead due to removal failure of reassign sectors PFA condition forced offline state Replace the disk drive PSU Power Supply Units PSU is not inserted has been removed A power supply unit is missing from the Ves...

Страница 286: ... needed RAID Level migration is aborted due to an internal error System resources are low Reduce system load or restart the VessRAID See page 81 WebPAM PROe or page 179 CLU RAID Level migration is queued Migration has been set manually or by schedule Migration has detected cleared stale NV Watermark Watermarks are progress markers left as the result of interrupted RAID migrations If the watermark ...

Страница 287: ...y or by schedule Redundancy Check is completed Redundancy Check has finished Redundancy Check is paused Redundancy Check paused because of user intervention schedule or a higher priority background activity Redundancy Check is resumed Redundancy Check has resumed again after a pause Redundancy Check is stopped Redundancy Check stopped because of user intervention schedule or the logical drive was ...

Страница 288: ... settings or user action Normal Physical disk assigned as dedicated spare Result of settings or user action Normal Physical disk is no longer assigned as dedicated spare Result of settings or user action Normal Dedicated Spare has been deleted Result of settings or user action Normal SMART SMART error is received A disk drive reported a SMART error If this message appears repeatedly replace the di...

Страница 289: ...rmal Transition is completed Normal Transition is paused Transition paused because of user intervention schedule or a higher priority background activity Transition is resumed Transition has resumed again after a pause Transition is stopped Transition stopped because of user intervention or the logical drive was deleted Transition was switched to rebuild Transition changed to rebuild because the l...

Страница 290: ...nt disk array RAID 1 1E 5 6 10 50 and 60 goes offline contact Promise Technical Support See page 291 A non fault tolerant disk array RAID 0 goes offline when a disk drive is removed or fails Since the disk array is not fault tolerant the data stored in the disk array is no longer accessible If one disk drive fails all of the data on the disk array is lost You must replace the failed drive Then if ...

Страница 291: ... Creating a Spare Drive on page 118 WebPAM PROe or page 151 CLU Without a Hot Spare Drive If there is no hot spare drive of adequate capacity you must remove the failed drive and install an unconfigured replacement drive of the same or greater capacity in the same slot as the failed drive Until you install the replacement drive the logical drive will remain Degraded If the Auto Rebuild function is...

Страница 292: ...ing physical drive displays a green Activity lower LED while the Status upper LED flashes green once per second Figure 15 VessRAID disk drive carrier LEDs During rebuilding you can still read and write data to the logical drive However fault tolerance is lost until the Disk Array returns to OK not rebuilding status After a successful rebuild The alarm is silent The Disk Array s Operational Status ...

Страница 293: ...closure See Installing Disk Drives on page 15 If you choose to accept the incomplete array 1 Click OK in the incomplete array dialog box 2 Check the operational status of the logical drives in the array If the logical drives are critical or degraded proceed with a rebuild See Rebuilding a Disk Array on page 107 WebPAM PROe or page 146 CLU If the logical drives are offline contact Technical Support...

Страница 294: ...ive SAS cable between the VessRAID subsystem and a VessJBOD enclosure Physical Drive Failed When physical drive status shows failed the physical drive cannot be repaired You must replace the failed drive Physical Drive Fails during Migration VessRAID has two methods for migrating a disk array DDF The default setting Slower but reliable NVRAM An optional setting that requires special access Faster ...

Страница 295: ... Incomplete Array on page 279 Because the setting for migration under NVRAM requires special access most users will not encounter this condition Physical Drive Fails during Transport Transport is the action of moving the physical drives of a disk array To different slots in the same VessRAID enclosure From one VessRAID enclosure to another If a physical drive fails during a transport or you do not...

Страница 296: ...nclosure icon The Enclosure screen will display below Figure 16 Enclosure information in Management View In this example one of the RAID Controller fans has failed The Enclosure Diagram displays color and motion changes to identify the failed fan In WebPAM PROe RAID Controller fans are called Blowers See Replacing a Cooling Fan on page 210 for instructions Note that the image above was shortened t...

Страница 297: ...If a RAID Controller fan fails you can replace it onsite See page 210 Air Circulation Air circulation around the VessRAID enclosure may be a more complex problem Use the thermometer icons to help you locate the specific hot spot Check for these conditions Accumulated dust or objects blocking the fans Less than a minimum of 5 inches 13 cm space between the back of the VessRAID and the wall or other...

Страница 298: ... See page 291 Fan Failure As noted above if a power supply fan fails you must replace the power supply Without the fan to cool it the power supply will overheat and eventually fail anyway See page 208 for instructions on replacing a power supply Battery VessRAID uses a battery as backup power for the cache Should a power failure occur the battery enables the cache to hold data up to 72 hours The b...

Страница 299: ... are the proper ones for your RAID subsystem They are in brand new condition You paid for them with the purchase of your VessRAID Serial Connections VessRAID uses a serial connection for the command line interface CLI and the command line utility CLU After you set the IP address you can access the CLI and CLU through a network connection also Normally users prefer WebPAM PROe because of its graphi...

Страница 300: ... 3 VessRAID Setup on page 23 Figure 17 Management port connection on the RAID controller Note that VessRAID Management Port can accept IP address assignments from a DHCP server Use VessRAID s Command Line Utility CLU to enable this feature If you have not activated DHCP support but there is a DHCP server on your network there is a chance that it will inadvertently assign the VessRAID s Management ...

Страница 301: ...isplays the VessRAID model number and management port IP address as shown in Figure 18 Figure 18 LCD panel default display If your VessRAID does not have an LCD panel set up a serial connection to access the CLI See page 19 and 23 for more information To find the new IP address 1 Start your PC s terminal VT100 or ANSI emulation program 2 Press Enter once to launch the CLI 3 At the Login prompt typ...

Страница 302: ...ved to non volatile memory Such data is sometimes called dirty not to suggest it is corrupted in some way but because it has not been saved to a disk drive Figure 19 Dirty Cache LED If there is unsaved data in the controller s cache the Dirty Cache LED shines amber During this time do NOT power down the VessRAID Wait until the LED will goes dark Dirty Cache LED ...

Страница 303: ...rak subsystems used a proprietary method of disk metadata VessRAID subsystems have a metadata to DDF conversion feature To use the conversion feature you must restart the VessRAID after installing disk drives from an older VTrak subsystem Note that if you move your disk drives from the VessRAID to an early VTrak the older subsystem will not recognize your disk array or logical drive How can I tell...

Страница 304: ...er software embedded With VessRAID you point your browser directly to the VessRAID rather than a server Also with VessRAID you do not have to create a subsystem because the subsystem already exists Why can a RAID 1 logical drive on VessRAID consist of only two disk drives On VessRAID RAID 1 logical drives work in mirrored physical drive pairs You could create up to eight RAID 1 logical drives Or y...

Страница 305: ...n addition leaving one power supply off reduces air flow through the VessRAID enclosure and can contribute to overheating Always switch on both power supplies VessRAID s Netsend service does not report all events to Windows PCs This condition results from a shortcoming in Windows Messenger that causes miscommunication with Netsend Promise is developing a workaround at the time of this writing Note...

Страница 306: ... for support Promise Technology Inc 580 Cottonwood Drive Milpitas CA 95035 USA E mail Support e Support On Line Fax Support 31 0 40 256 9463 Attn Technical Support Phone Support 31 0 40 235 2600 If you wish to write us for support Promise Technology Europe B V Science Park Eindhoven 5542 5692 EL Son The Netherlands E mail Support e Support On Line Fax Technical Support 49 0 2 31 56 76 48 29 Attn T...

Страница 307: ...ish to write us for support Promise Technology Italy Piazza del Popolo 18 00187 Roma Italia E mail Support e Support On Line Fax Support 886 3 578 2390 Attn Technical Support Phone Support 886 3 578 2395 ext 8822 or 8823 If you wish to write us for support Promise Technology Inc 2F No 30 Industry E Rd IX Science based Industrial Park Hsin Chu 30075 Taiwan R O C ...

Страница 308: ...Technology China Beijing Room 1205 Tower C Webok Time Center No 17 South Zhong Guan Cun Street Hai Dian District Beijing 100081 China E mail Support e Support On Line Fax Support 86 21 6249 4627 Attn Technical Support Phone Support 86 21 6249 4192 4193 or 4199 If you wish to write us for support Promise Technology China Shanghai Room 508 Leader Tower 1189 West Wu Ding Road Jing An District Shangha...

Страница 309: ...ification s performed by the end user b operation outside the environmental specifications for the product c accident misuse negligence misapplication abuse natural or personal disaster or maintenance by anyone other than a Promise or a Promise authorized service center Disclaimer of other warranties This warranty covers only parts and labor and excludes coverage on software items as expressly set...

Страница 310: ...irect incidental or punitive damages whether in contract tort or otherwise notwithstanding the failure of the essential purpose of the foregoing remedy and regardless of whether Promise has been advised of the possibility of such damages Promise is not an insurer If you desire insurance against such damage you must obtain insurance from another party Some states do not allow the exclusion or limit...

Страница 311: ...er Return ONLY the specific product covered by the warranty do not ship cables manuals diskettes etc with a copy of your proof of purchase to You must follow the packaging guidelines for returning products Use the original shipping carton and packaging Include a summary of the product s problem s Write an attention line on the box with the RMA number Include a copy of proof of purchase Important O...

Страница 312: ...product s Promise may replace defective parts with new or reconditioned parts or replace the entire unit with a new or reconditioned unit In the event of a replacement the replacement unit will be under warranty for the remainder of the original warranty term from purchase date or 30 days whichever is longer Promise will pay for standard return shipping charges only You will be required to pay for...

Страница 313: ...nning 53 scheduling 54 settings 52 160 view 52 battery checking 89 134 failure 284 LED 255 reconditioning 90 135 reported events 263 BBU reported events 265 blower reported events 264 browser does not connect 287 buzzer settings 90 181 189 silence 90 sounding 251 277 test 91 C cable RJ11 to DB9 19 124 cache battery replace 212 cancel alarm 90 181 189 capacity coercion defined 236 setting 84 130 ca...

Страница 314: ... dedicated spare drive 117 118 119 151 152 200 237 default settings restore 79 176 delete disk array 103 144 195 initiator 165 logical drive 106 150 198 schedule background activities 55 spare drive 119 153 201 user 62 168 DHCP server changed IP address 287 diagnostic report 261 diamond icon 17 18 dirty cache LED 254 Discover button 47 disk array advanced creation 101 143 193 alias 101 104 105 143...

Страница 315: ...33 topology 87 136 view 86 189 voltage 88 133 error block threshold 53 161 event notification response 263 severity 59 74 173 subscriptions 59 event log clear 50 51 162 163 NVRAM 162 256 problem reporting 259 reported events 266 runtime 49 162 256 save 50 51 expand disk array 106 147 expansion ranges 244 export user database 76 F failed battery 284 power supply 284 power supply fan 283 RAID contro...

Страница 316: ...AS port 64 158 187 subsystem 48 initialization defined 236 logical drive 36 102 113 155 rate 52 161 initiator add 65 66 159 164 delete 66 165 map LUN to 67 165 view 65 159 Internet access to WebPAM PROe 37 intranet access to WebPAM PROe 290 IP address DHCP or static 24 DHCP server changed 287 finding 183 287 management port 25 27 28 157 186 286 Netsend recipient 75 174 J JBOD expansion data path 1...

Страница 317: ...ple mode 184 spare drive create 201 delete 201 locate 202 view 200 LCD panel cont view controller 188 disk array 195 enclosure 189 events 185 logical drive 198 physical drive 190 SAS port 187 spare drive 200 LED battery 255 controller 289 controller activity 20 252 controller status 254 dirty cache 254 288 disk drive power activity 21 254 disk drive status 21 254 277 278 disk status 278 drive carr...

Страница 318: ...mat 237 RAID level 105 143 Redundancy Check 114 156 reported events 267 268 settings 113 154 155 logical drive cont status 111 199 critical 111 199 offline 111 199 rebuilding 111 199 synchronizing 111 199 transport ready 112 199 Summary 121 synchronization 112 view list of all 121 LUN map add 67 165 edit 68 logical drive 116 view 67 LUN masking enable 67 164 M MAC address 24 Media Patrol 108 defin...

Страница 319: ...tatus 94 DMA mode 93 137 fail during migration 280 fail during transport 281 failure recovery 276 force offline or online 96 139 from VTrak subsystem 289 physical drive cont global settings 93 137 information 93 138 190 list 92 locate 92 93 96 139 190 191 not usable 280 operational status 94 read cache 93 137 reported events 270 select for array 143 select for spare 118 151 settings 94 stale and P...

Страница 320: ... 221 RAID 50 applications 232 description 224 RAID 6 applications 231 description 222 RAID levels cont RAID 60 applications 232 description 227 read cache physical drive 93 137 policy 105 113 143 150 194 policy defined 235 read check table 116 reassigned block threshold 53 161 rebuild disk array 107 146 278 manual 108 rate 52 160 reported events 272 273 recipients Netsend 74 recondition a battery ...

Страница 321: ...9 162 256 S SAS add initiator 65 66 159 164 circle diamond icons 17 18 connector 17 delete initiator 66 port information 64 158 187 SAS cont port settings 64 158 188 port statistics 65 159 view initiator 65 159 scheduling background activities 54 screws counter sink 16 sector size defined 233 setting 105 143 149 194 security certificate 37 serial connection 19 124 setting lock 56 127 settings back...

Страница 322: ...111 154 199 physical drive 94 138 power supply 88 132 spare drive 117 subsystem lock 56 127 Storage Network 47 stripe size defined 233 setting 105 143 149 194 subsystem alias 49 127 date and time 49 128 fully booted 289 heartbeat LED 20 252 information 48 lock 56 127 logging into 47 maintenance 203 management port settings 63 157 186 Media Patrol 127 restart 81 179 205 207 service report save as t...

Страница 323: ... beeping 251 277 drive slot numbering 15 features and benefits 3 overview 2 specifications 6 warranty 6 295 view background activities 52 controllers 82 disk arrays 98 enclosure 86 189 list of all logical drives 121 lock status 56 LUN map 67 physical drives 92 scheduled activities 54 spare drives 117 users 58 166 voltage enclosure 88 133 W warranty on VessRAID 295 watermark orphan 84 129 reported ...

Страница 324: ...VessRAID 1740s 1840s Product Manual 310 write cache policy 105 113 143 150 194 defined 235 physical drive 93 137 write check table 116 Y yellow 252 258 282 ...

Отзывы: