22 MANAGING CASES
User’s manual
Planmeca Chairside CAD/CAM solution 115
22 MANAGING CASES
All data are automatically stored into Planmeca Romexis
database and organized into cases which can be
exported to another system or sent to a certified
laboratory for design and milling using Planmeca
Romexis Cloud service (see 26 “SENDING AND
RECEIVING CASES VIA PLANMECA ROMEXIS
22.1 Patient’s case files
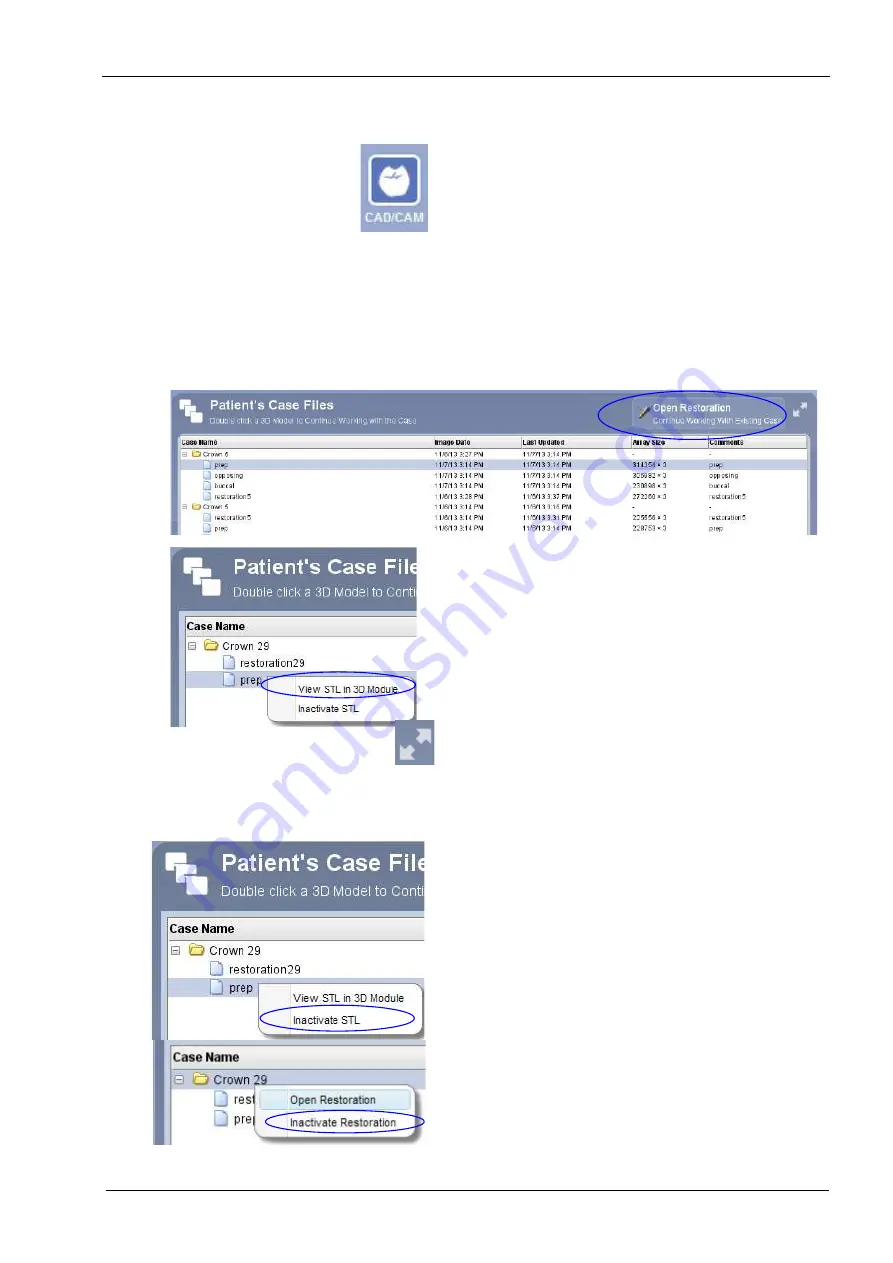
To open an existing scan or restoration (crown, inlay,
onlay etc.) double-click on a case on the list or click the
Open Restoration button
The case opens in the
Setup
tab of the Planmeca
PlanScan scanner.
To open a case in
3D module
right-click on the case and
select View STL in 3D Module.
By clicking this button on the top right corner of the
Patient’s Case Files
window you can extend/reduce the
window size.
22.1.1 Inactivating files
To inactivate an image (stl file) from the patient’s case
files right-click on the file and select Inactivate STL.
To delete a case from the patient’s case files right-click on
the case and select Inactivate restoration.
To reactivate or permanently delete a case from the
database see section 22.3 “Inactivate” on page 117.
Содержание Chairside PlanCAD Easy
Страница 2: ......
Страница 12: ...3 SYMBOLS ON PRODUCT LABELS 6 Planmeca Chairside CAD CAM solution User s manual 3 1 2 Milling unit...
Страница 179: ......


