background image

Using other functions

09

72

En

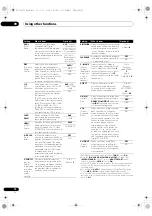
DUAL

(Dual 
Mono)

Specifies how dual mono 
encoded Dolby Digital 
soundt

r

acks should be played. 

Dual mono is not widely used, but 
is sometimes necessa

r

y when 

two languages need to be sent to 
sepa

r

ate channels.

CH1

 – Channel 

1 is hea

r

d only

CH2

 – Channel 

2 is hea

r

d only

CH1 CH2

 – 

Both channels 

hea

r

d f

r

om 

f

r

ont speake

r

s

DRC

(Dynamic 
Range 
Cont

r

ol)

Adjusts the level of dynamic 

r

ange fo

r

 movie soundt

r

acks 

optimized fo

r

 Dolby Digital, DTS, 

Dolby Digital Plus, Dolby T

r

ueHD, 

DTS-HD and DTS-HD Maste

r


Audio (you may need to use this 
featu

r

e when listening to 

su

rr

ound sound at low volumes).

AUTO

d

MAX

MID

OFF

LFE


(LFE 
Attenuate)

Some audio sou

r

ces include 

ult

r

a-low bass tones. Set the LFE 

attenuato

r

 as necessa

r

y to 

p

r

event the ult

r

a-low bass tones 

f

r

om disto

r

ting the sound f

r

om 

the speake

r

s. 

The LFE is not limited when set to 
0 dB, which is the 

r

ecommended 

value. When set to –5 dB, –10 dB, 
–15 dB o

r

 –20 dB, the LFE is 

limited by the 

r

espective deg

r

ee. 

When OFF is selected, no sound 
is output f

r

om the LFE channel.

0dB

/ –5dB/ 

–10dB/ –15dB/ 

–20dB

OFF

SACD 

GAIN

e

B

r

ings out detail in SACDs by 

maximizing the dynamic 

r

ange 

(du

r

ing digital p

r

ocessing).

0dB

+6 dB

HDMI

f

(HDMI 
Audio)

Specifies the 

r

outing of the HDMI 

audio signal out of this 

r

eceive

r


(

amp

) o

r


through

 to a TV. When 

THROUGH is selected, no sound 
is output f

r

om this 

r

eceive

r

.

AMP

THROUGH

A. DELAY

(Auto 
delay)

This featu

r

e automatically 

co

rr

ects the audio-to-video delay 

between components connected 
with an HDMI cable. The audio 
delay time is set depending on the 
ope

r

ational status of the display 

connected with an HDMI cable. 
The video delay time is 
automatically adjusted acco

r

ding 

to the audio delay time.

g

OFF

ON

C. WIDTH

h

(Cente

r


Width)
(Applicable 
only when 
using a 
cente

r


speake

r

)

P

r

ovides a bette

r

 blend of the 

f

r

ont speake

r

s by sp

r

eading the 

cente

r

 channel between the f

r

ont 

r

ight and left speake

r

s, making it 

sound wide

r

 (highe

r

 settings) o

r


na

rr

owe

r

 (lowe

r

 settings). 

0 to 7

Default: 

3

Setting

What it does

Option(s)

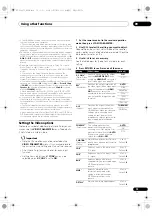
DIMENSION

h

Adjusts the depth of the su

rr

ound 

sound balance f

r

om f

r

ont to back, 

making the sound mo

r

e distant 

(minus settings), o

r

 mo

r

e fo

r

wa

r

(positive settings).

–3 to +3

Default: 

0

PANORAMA

h

Extends the f

r

ont ste

r

eo image to 

include the su

rr

ound speake

r

s fo

r


a ‘w

r

apa

r

ound’ effect.

OFF

ON

C. IMAGE

i

(Cente

r


Image)
(Applicable 
only when 
using a 
cente

r


speake

r

)

Adjusts the cente

r

 image to 

c

r

eate a wide

r

 ste

r

eo effect with 

vocals. Adjust the effect f

r

om 

0


(all cente

r

 channel sent to f

r

ont 

r

ight and left speake

r

s) to 

10


(cente

r

 channel sent to the cente

r


speake

r

 only).

0 to 10

Defaults:

Neo:6 MUSIC: 

3

Neo:6 

CINEMA: 

10

EFFECT

Sets the effect level fo

r

 the 

cu

rr

ently selected Advanced 

Su

rr

ound o

r

 ALC mode (each 

mode can be set sepa

r

ately).

10 to 90

Defaults:

EXT.STEREO: 

90

Othe

r

s: 

50

H.GAIN

(Height 
Gain)

Adjusts the output f

r

om the f

r

ont 

height speake

r

 when listening in 

DOLBY PLIIz HEIGHT

 mode. If set 

to 

HIGH

, the sound f

r

om the top 

will be mo

r

e emphasized.

LOW

MID

HIGH

V.SB

(Vi

r

tual 

Su

rr

ound 

Back)

When you’

r

e not using su

rr

ound 

back speake

r

s, selecting this 

mode allows you to hea

r

 a vi

r

tual 

su

rr

ound back channel th

r

ough 

you

r

 su

rr

ound speake

r

s. You can 

choose to listen to sou

r

ces with 

no su

rr

ound back channel 

info

r

mation, o

r

 if the mate

r

ial 

sounds bette

r

 in the fo

r

mat (fo

r


example, 5.1) fo

r

 which it was 

o

r

iginally encoded, you can have 

the 

r

eceive

r

 only apply this effect 

to 6.1 encoded sou

r

ces like Dolby 

Digital EX o

r

 DTS-ES.

j

OFF

ON

V.HEIGHT

(Vi

r

tual 

Height)

When you’

r

e not using f

r

ont 

height speake

r

s, selecting this 

mode allows you to hea

r

 a vi

r

tual 

f

r

ont height channel th

r

ough you

r


f

r

ont speake

r

s.

k

OFF

ON

a.The adjustment can be made only when 

TONE

 is set to 

ON

.

b.With the 

iPod/USB

HOME MEDIA GALLERY

 (SC-LX83 only), 

INTERNET RADIO

 (SC-LX73 only) o

r


ADAPTER PORT

 input 

function, by default 

S.RTRV

 is set to 

ON

.

c.UP1 to UP4 can be selected only when the f

r

ont height speake

r

 is 

connected. The p

r

esence o

r

 absence of effects depends on the 

listening mode.

d.The initially set 

AUTO

 is only available fo

r

 Dolby T

r

ueHD signals. 

Select 

MAX

 o

r


MID

 fo

r

 signals othe

r

 than Dolby T

r

ueHD.

e.You shouldn’t have any p

r

oblems using this with most SACD 

discs, but if the sound disto

r

ts, it is best to switch the gain setting 

back to 

dB.

Setting

What it does

Option(s)

SC-LX83_73_DLPW.book  72 ページ  2010年5月19日 水曜日 午後2時7分

Содержание SC-LX73

Страница 1: ...Operating Instructions audio video multi channel receiver SC LX83 SC LX73 SC LX83_73_DLPW book 1 ページ 2010年5月19日 水曜日 午後2時7分 ...

Страница 2: ...shock if the cut off plug is inserted into any 13 amp socket If a new plug is to be fitted please observe the wiring code as shown below If in any doubt please consult a qualified electrician IMPORTANT The wires in this mains lead are coloured in accordance with the following code Blue Neutral Brown Live As the colours of the wires in the mains lead of this appliance may not correspond with the co...

Страница 3: ...n CAUTION The STANDBY ON switch on this unit will not completely shut off all power from the AC outlet Since the power cord serves as the main disconnect device for the unit you will need to unplug it from the AC outlet to shut down all power Therefore make sure the unit has been installed so that the power cord can be easily unplugged from the AC outlet in case of an accident To avoid fire hazard...

Страница 4: ...6 Making MULTI ZONE connections 36 Connecting to the network through LAN interface 37 Connecting the Bluetooth ADAPTER 38 Connecting an HDMI equipped component to the front panel input 38 Connecting an iPod 38 Connecting a USB device 38 Connecting a USB device for Advanced MCACC output 39 Connecting an IR receiver 39 Operating other Pioneer components with this unit s sensor 40 Switching component...

Страница 5: ...s with a product of a different brand that supports the Control with HDMI function 69 Setting the PQLS function 70 Cautions on the Control with HDMI function 70 09 Using other functions Setting the Audio options 71 Setting the Video options 73 Switching the speaker terminals 74 Using the MULTI ZONE controls 74 Making an audio or a video recording 75 Reducing the level of an analog signal 75 Using ...

Страница 6: ...ing MCACC preset data 108 Clearing MCACC presets 108 12 The System Setup and Other Setup menus Making receiver settings from the System Setup menu 109 Manual speaker setup 109 Speaker system setting 110 Speaker Setting 110 Channel Level 111 Speaker Distance 111 X Curve 112 THX Audio Setting 112 Network Setup menu 112 IP address Proxy setting 113 Checking the MAC address 113 Network Standby 113 The...

Страница 7: ...e OSD Language page 42 7 MCACC speaker settings Automatically conducting optimum sound tuning Full Auto MCACC page 43 8 The Input Setup menu page 45 When using connections other than the recommended connections 9 Basic playback page 46 10 Switching the HDMI output page 76 11 Adjusting the sound and picture quality as desired Using the various listening modes page 55 Better sound using Phase Contro...

Страница 8: ... oriented sound field The height channel strengthens the sound field s sense of three dimensionality and air producing presence and expansion Internet Radio By connecting this receiver to the network via the LAN terminal you can listen to Internet radio stations HOME MEDIA GALLERY2 This receiver can play back contents stored on your computer when your computer is connected to the LAN terminal of t...

Страница 9: ... as a kitchen Do not touch this receiver s bottom panel while the power is on or just after it is turned off The bottom panel becomes hot when the power is on or right after it is turned off and could cause burns Loading the batteries In case of SC LX83 In case of SC LX73 The batteries included with the unit are to check initial operations they may not last over a long period We recommend using al...

Страница 10: ...the receiver with RF two way communications SC LX83 only below Flow for operating the receiver with RF two way communications SC LX83 only This remote control unit is set for operations using infrared signals upon shipment from the factory To set it for RF operations take the steps below Note 1 The RF adapter and CU RF100 omni directional remote control are included with the SC LX83 sold separatel...

Страница 11: ...L buttons These buttons are dedicated to control the TV assigned to the TV operation selector switch 8 Receiver setting buttons Set the remote control operation selector switch to RECEIVER first to access AUDIO PARAMETER Use to access the Audio options page 71 VIDEO PARAMETER Use to access the Video options page 73 HOME MENU Use to access the Home Menu pages 42 45 68 99 109 and 112 RETURN Press to...

Страница 12: ...estores the sound if it has been muted adjusting the volume also restores the sound Remote control display2 Remote control display for infrared signal transmission default Remote control display for RF two way communications3 1 Remote control operating zone indicator This indicates which zone the remote control is currently set to operate The display indicates the setting of the MULTI ZONE operati...

Страница 13: ...rently be operated with the remote control Also when a button is pressed and its operation code is sent the name of that code is displayed 6 Area indicating the remote control s status 7 Nothing displayed Nothing is displayed here when the remote control code sending mode is set to IR 8 Scroll indicators Light when there are more selectable items when making the various settings 9 Receiver input i...

Страница 14: ...buttons when setting up your surround sound system see page 99 and the Audio or Video options page 71 or 73 8 Receiver Control buttons Press first to access AUTO ALC DIRECT Switches between Auto Surround page 55 Auto Level Control mode and Stream Direct mode page 58 STEREO Switches between stereo playback and Front Stage Surround Advance modes page 57 STANDARD Press for Standard decoding and to sw...

Страница 15: ... SR Left surround Right surround channel LFE Low frequency effects channel the indicators light when an LFE signal is being input XL XR Two channels other than the ones above XC Either one channel other than the ones above the mono surround channel or matrix encode flag 3 Digital format indicators Light when a signal encoded in the corresponding format is detected 2 DIGITAL Lights with Dolby Digit...

Страница 16: ...en the sound is muted page 15 12 Master volume level Shows the overall volume level indicates the minimum level and 12dB indicates the maximum level 13 Input function indicators Light to indicate the input function you have selected HMG only lights for the SC LX83 14 Scroll indicators Light when there are more selectable items when making the various settings 15 Speaker indicators Lights to indica...

Страница 17: ...ial 7 Front panel controls To access the front panel controls push gently on the lower third portion of the panel with your finger 8 AUDIO PARAMETER Use to access the Audio options page 71 9 VIDEO PARAMETER Use to access the Video options page 73 10 TUNE PRESET ENTER Use the arrow buttons when setting up your Home Menu Use TUNE to find radio frequencies and use PRESET to find preset stations page ...

Страница 18: ... MULTI ZONE connections see MULTI ZONE setup on page 36 use these controls to control the sub zone from the main zone see Using the MULTI ZONE controls on page 74 15 SPEAKERS Use to change the speaker terminal page 74 16 HOME MENU Press to access the Home Menu pages 42 45 68 99 109 and 112 17 RETURN Press to confirm and exit the current menu screen 18 HDMI input connector Use for connection to a c...

Страница 19: ...RT PREOUT OUTPUT 5 V 150 mA MAX SPEAKERS MULTICHIN SIGNAL GND FRONT CENTER SUBWOOFER SURROUND SURR BACK L R CAUTION SPEAKERIMPEDANCE 6Ω 16Ω A SURROUND BACK Single B R FRONT HEIGHT WIDE L R L R L R L SURROUND FRONT CENTER SEE INSTRUCTION MANUAL SELECTABLE 220 230 V 240 V VOLTAGE SELECTOR RS 232C HDMI ASSIGNABLE COAXIAL COMPONENTVIDEO ASSIGNABLE OPTICAL ASSIGNABLE ASSIGNABLE MONITOR OUT IN Y CD R TA...

Страница 20: ...outlet Plugging in should be the final step Connecting the RF adapter SC LX83 only Two way communications between the receiver and remote control are possible by connecting the included RF adapter to the RS 232C and CU RF100 terminals on the receiver For the features of two way communications and detailed usage instructions see Using the RF communications function on page 86 Input function Input T...

Страница 21: ...hannel surround system Front wide Speaker System setting Normal SB FW This plan replaces the left and right front height speakers shown in A with the left and right front wide speakers FWL FWR This surround system produces a true to life sound over a wider area C 7 1 channel surround system Speaker B connection Speaker System setting Speaker B With these connections you can simultaneously enjoy 5 ...

Страница 22: ... t use the front height speakers front wide speakers we recommend placing the surround speaker right beside you If you intend to connect only one surround back speaker place it directly behind you Place the left and right front height speakers at least one meter directly above the left and right front speakers THX speaker system setup If you are using a THX certified subwoofer use the THX INPUT ja...

Страница 23: ... up with the terminals on the speakers themselves CAUTION These speaker terminals carry HAZARDOUS LIVE voltage To prevent the risk of electric shock when connecting or disconnecting the speaker cables disconnect the power cord before touching any uninsulated parts Make sure that all the bare speaker wire is twisted together and inserted fully into the speaker terminal If any of the bare speaker wi...

Страница 24: ...IN IN IN OUT OUT 1 2 1 2 OUTPUT 12V TOTAL 150 mA MAX SUBWOOFER IN 4 LAN 10 100 OUTPUT 5 V 100 mA MAX ADAPTERPORT PREOUT OUTPUT 5 V 150 mA MAX SPEAKERS MULTICHIN SIGNAL GND FRONT CENTER SUBWOOFER SURROUND SURR BACK L R A SURROUND BACK Single B R FRONT HEIGHT WIDE L R L R L R L SURROUND FRONT CENTER CAUTION SPEAKERIMPEDANCE 6Ω 16Ω SEE INSTRUCTION MANUAL SELECTABLE 220 230 V 240 V VOLTAGE SELECTOR LI...

Страница 25: ...AUTION Don t connect different speakers from the same terminal in this way When bi wiring as well heed the cautions for bi amping shown at the left RS 232C HDMI ASSIGNABLE COAXIAL COMPONENTVIDEO ASSIGNABLE OPTICAL ASSIGNABLE ASSIGNABLE MONITOR OUT ZONE 2 OUT IN Y CD R TAPE ANTENNA FMUNBAL75 AMLOOP AC IN IN CD IN VIDEO MONITOR OUT OUT ZONE2 OUT ZONE3 OUT DVD IN TV SAT IN VIDEO IN DVR BDR PHONO IN O...

Страница 26: ...NE 2 setup With these connections you can simultaneously enjoy 5 1 channel surround sound in the main zone with stereo playback on another component in ZONE 2 1 Connect a pair of speakers to the surround back speaker terminals See Standard surround connection on page 24 2 Select ZONE 2 from the Speaker System menu See Speaker system setting on page 110 to do this About the audio connection With an...

Страница 27: ...by U S patents and other intellectual property rights Use of this copyright protection technology must be authorized by Rovi Corporation and is intended for home and other limited viewing uses only unless otherwise authorized by Rovi Corporation Reverse engineering or disassembly is prohibited Note 1 An HDMI connection can only be made with DVI equipped components compatible with both DVI and High...

Страница 28: ... ZONE2 OUT ZONE3 OUT DVD IN TV SAT IN VIDEO IN DVR BDR PHONO IN OUT IN PR PB 1 IN BD IN 1 IN 2 IN 3 OUT 1 CONTROL OUT 2 1 4 DVD IN 2 DVR BDR IN 3 VIDEO IN 1 DVD IN 1 TV SAT IN 2 DVR BDR IN O FRONT CENTER SURROUND SURR BACK Single FH FW 3 VIDEO IN 2 CD IN 3 CD R CONTROL CU RF100 IR 12V TRIGGER IN IN IN OUT OUT 1 2 1 2 OUTPUT 12V TOTAL 150 mA MAX SUBWOOFER IN 4 LAN 10 100 OUTPUT 5 V 100 mA MAX ADAPT...

Страница 29: ...R BDR IN 3 VIDEO IN 1 DVD IN 1 TV SAT IN 2 DVR BDR IN OUT FRONT CENTER SURROUND SURR BACK Single FH FW 3 VIDEO IN 2 CD IN 3 CD R CONTROL CU RF100 IR 12V TRIGGER IN IN IN OUT OUT 1 2 1 2 OUTPUT 12V TOTAL 150 mA MAX SUBWOOFER IN 4 LAN 10 100 OUTPUT 5 V 100 mA MAX ADAPTERPORT PREOUT OUTPUT 5 V 150 mA MAX SPEAKERS SIGNAL GND FRONT CENTER SUBWOOFER S CAUTION SPEAKERIMPEDANCE 6Ω 16Ω SURROUND BACK Single...

Страница 30: ...ell the receiver which digital input you connected the player to see The Input Setup menu on page 45 RS 232C HDMI ASSIGNABLE COAXIAL COMPONENTVIDEO ASSIGNABLE OPTICAL ASSIGNABLE ASSIGNABLE MONITOR OUT ZONE 2 OUT IN Y CD R TAPE ANTENNA FMUNBAL75 AMLOOP IN CD IN VIDEO MONITOR OUT OUT ZONE2 OUT ZONE3 OUT DVD IN TV SAT IN VIDEO IN DVR BDR PHONO IN OUT IN PR PB 1 IN BD IN 1 IN 2 IN 3 OUT 1 CONTROL OUT ...

Страница 31: ...ASSIGNABLE COAXIAL COMPONENTVIDEO ASSIGNABLE OPTICAL ASSIGNABLE ASSIGNABLE MONITOR OUT ZONE 2 OUT IN Y CD R TAPE ANTENNA FMUNBAL75 AMLOOP IN CD IN VIDEO MONITOR OUT OUT ZONE2 OUT ZONE3 OUT DVD IN TV SAT IN VIDEO IN DVR BDR PHONO IN OUT IN PR PB 1 IN BD IN 1 IN 2 IN 3 OUT 1 CONTROL OUT 2 1 4 DVD IN 2 DVR BDR IN 3 VIDEO IN 1 DVD IN 1 TV SAT IN 2 DVR BDR IN OUT FRONT CENTER SURROUND SURR BACK Single ...

Страница 32: ...IGNABLE MONITOR OUT ZONE 2 OUT IN Y CD R TAPE ANTENNA FMUNBAL75 AMLOOP IN CD IN VIDEO MONITOR OUT OUT ZONE2 OUT ZONE3 OUT DVD IN TV SAT IN VIDEO IN DVR BDR PHONO IN OUT IN PR PB 1 IN BD IN 1 IN 2 IN 3 OUT 1 CONTROL OUT 2 1 4 DVD IN 2 DVR BDR IN 3 VIDEO IN 1 DVD IN 1 TV SAT IN 2 DVR BDR IN OUT FRONT CENTER SURROUND SURR BACK Single FH FW 3 VIDEO IN 2 CD IN 3 CD R CONTROL CU RF100 IR 12V TRIGGER IN ...

Страница 33: ...PE FMUNBAL75 IN CD IN VIDEO MONITOR OUT OUT ZONE2 OUT ZONE3 OUT DVD IN TV SAT IN VIDEO IN DVR BDR PHONO IN OUT IN IN 1 IN 2 IN 3 OUT 1 CONTROL OUT 2 IN 1 DVD IN 1 TV SAT IN 2 DVR BDR IN OUT FRONT CENTER SURROUND SURR BACK Single FH FW 3 VIDEO IN 2 CD IN 3 CD R IR 12V TRIGGER IN IN OUT 1 2 1 2 OUTPUT 12V TOTAL 150 mA MAX SUBWOOFER IN 4 LAN 10 100 OUTPUT 5 V 100 mA MAX ADAPTERPORT PREOUT SPEAKERS MU...

Страница 34: ...wever the connected DVD player set top box etc must be able to output WMA9 Pro format audio signals through a coaxial or optical digital output COAXIAL OPTICAL ASSIGNABLE ASSIGNABLE CD R TAPE IN CD IN VIDEO MONITOR OUT OUT TV SAT IN VIDEO IN DVR BDR PHONO IN OUT IN IN 3 OUT 1 CONTROL OUT 2 IN 1 DVD IN 1 TV SAT IN 2 DVR BDR IN OUT FRONT CENTER SURROUND SURR BACK Single FH FW 3 VIDEO IN 2 CD IN 3 CD...

Страница 35: ...the tabs then insert one wire fully into each terminal then release the tabs to secure the AM antenna wires 3 Fix the AM loop antenna to the attached stand To fix the stand to the antenna bend in the direction indicated by the arrow fig a then clip the loop onto the stand fig b If you plan to mount the AM antenna to a wall or other surface secure the stand with screws fig c before clipping the loo...

Страница 36: ...an be output to ZONE 2 and ZONE 31 Basic MULTI ZONE setup ZONE 2 Connect a separate amplifier to the AUDIO ZONE 2 OUT jacks and a TV monitor to the VIDEO ZONE 2 OUT2 jack both on this receiver You should have a pair of speakers attached to the sub zone amplifier as shown in the following illustration ANTENNA FMUNBAL75 AMLOOP 75 Ω coaxial cable ANTENNA FMUNBAL75 AMLOOP Outdoor antenna Indoor antenn...

Страница 37: ...NT VIDEO ZONE 2 OUT jack is connected The video convert function does not work for ZONE 2 Connect the composite video and component video to the same types of jacks for the inputs and outputs ENTVIDEO NABLE MONITOR OUT ZONE 2 OUT IN ANTENNA FMUNBAL75 AMLOOP ZONE2 OUT ZONE3 OUT DVD IN PR PB 1 IN BD IN 1 IN 2 DVD IN 2 DVR BDR IN 3 VIDEO CONTROL IR 1 T IN IN IN OUT OUT 1 2 1 2 1 T 1 COAXIAL OPTICAL A...

Страница 38: ... iPod on page 47 Connecting a USB device It is possible to play audio and photo files by connecting USB devices to this receiver It is also possible to connect a USB keyboard US international layout to the receiver to enter text in the following GUI screens Change the input name in the Input Setup menu page 45 Add names to radio station presets page 51 SC LX73 only Enter Internet radio station URL...

Страница 39: ...eceiver 3 1 Connect the IR receiver sensor to the IR IN jack on the rear of this receiver 2 Connect the IR IN jack of another component to the IR OUT jack on the rear of this receiver to link it to the IR receiver Please see the manual supplied with your IR receiver for the type of cable necessary for the connection If you want to link a Pioneer component to the IR receiver see Operating other Pio...

Страница 40: ...onnect the 12 V TRIGGER jack of this receiver to the 12 V trigger of another component Use a cable with a mono mini plug on each end for the connection After you ve specified the input functions that will switch on the trigger you ll be able to switch the component on or off just by pressing the input function s you ve set on page 45 It is also possible to have the component switch not when the in...

Страница 41: ...ectric shock Check the power cord once in a while If you find it damaged ask your nearest Pioneer authorized independent service company for a replacement Do not use any power cord other than the one supplied with this unit Do not use the supplied power cord for any purpose other than that described below The receiver should be disconnected by removing the mains plug from the wall socket when not ...

Страница 42: ... how to switch the setting 1 Switch the receiver into standby 2 While holding down ENTER on the front panel press STANDBY ON The display shows RESET NO Use to select FREQ STEP 9k and then use to select 9k or 10k Changing the OSD display language OSD Language The language used on the Graphical User Interface screen can be changed The explanations in these operating instructions are for when English...

Страница 43: ...3 Select the parameters you want to set 3 If the speakers are connected using any setup other than Normal SB FH be sure to set Speaker System before the Full Auto MCACC Setup See Speaker system setting on page 110 Speaker System4 Shows the current settings When this is selected and ENTER is pressed the speaker system selection screen appears Select the proper speaker system then press RETURN to re...

Страница 44: ...the receiver outputs more test tones to determine the optimum receiver settings Again try to be as quiet as possible while this is happening It may take 3 to 10 minutes 8 The Full Auto MCACC Setup procedure is completed and the Home Menu menu reappears automatically Be sure to disconnect the microphone from this receiver upon completion of the Full Auto MCACC Setup The settings made in the Full Au...

Страница 45: ...t is skipped when selecting the input using INPUT SELECT DVD and other inputs can be still be selected directly with the input function buttons 12V Trigger1 2 After connecting a component to one of the 12 volt triggers see Switching components on and off using the 12 volt trigger on page 40 select MAIN ZONE 2 ZONE 3 or OFF for the corresponding trigger setting to switch it on automatically along w...

Страница 46: ...I connection Set the remote control to the receiver operation mode then use INPUT SELECT to select the HDMI input you ve connected to for example HDMI 1 You can also perform the same operation by using the INPUT SELECTOR dial on the front panel or by pressing HDMI on the remote control repeatedly Set the HDMI parameter in Setting the Audio options on page 71 to THROUGH if you want to hear HDMI aud...

Страница 47: ...itch the remote control to the iPod USB operation mode Note 1 This system is compatible with the audio and video of the iPod nano audio only for the iPod nano 1G 2G iPod fifth generation audio only iPod classic iPod touch and iPhone However some of the functions may be restricted for some models The system is not compatible with the iPod shuffle Compatibility may vary depending on the software ver...

Страница 48: ...his doesn t remedy the problem it is likely your USB device is incompatible Playing back audio files stored on a USB memory device The maximum number of levels that you can select in Step 2 below is 8 Also you can display and play back up to 30 000 folders and files within a USB memory device 5 1 Use to select Music from the USB Top menu 2 Use to select a folder then press ENTER to browse that fol...

Страница 49: ...tored on the USB device while displaying photos Music Select Select the folder containing the music files to be played when BGM is set to ON 3 When you re finished press RETURN You will return to the USB Top menu Note 1 Copyrighted audio files cannot be played back on this receiver DRM protected audio files cannot be played back on this receiver 2 Photo files cannot be played in the sub zone 3 If ...

Страница 50: ... Supported Supported WAV wav LPCM Sampling frequency 32 kHz 44 1 kHz 48 kHz Quantization bitrate 8 bit 16 bit Channel 2 ch Monaural WMA wma WMA8 9b b Files encoded using Windows Media Codec 9 may be playable but some parts of the specification are not supported specifically Pro Lossless Voice Sampling frequency 8 kHz to 48 kHz Quantization bitrate 16 bit Channel 2 ch Bitrate 8 kbps to 320 kbps VBR...

Страница 51: ...AUTO ALC DIRECT for Neural Surround The Neural Surround mode can be selected also with STANDARD Tuning directly to a station 1 SC LX83 only Set the remote control operation selector switch to SOURCE 2 Press TUNER to select the tuner 3 Use BAND to change the band FM or AM if necessary 4 Press D ACCESS Direct Access 5 Use the number buttons to enter the frequency of the radio station For example to ...

Страница 52: ...it leaves the factory the link may have expired In that case preset the stations again yourself 1 Press NET RADIO to switch to the Internet radio input 2 The Internet Radio list screen is displayed 2 Use to select the Internet radio station to play back and then press ENTER Press to scroll up and down the list and select the desired item When you press ENTER playback starts with the playback scree...

Страница 53: ...displayed on screen and the selected Internet radio station will begin playing via this receiver If the connection failed Connection NG will be displayed Check to see if the URL you entered is correct Important Connection OK and Connection NG are only displayed when this receiver is set to the Internet radio function When entering the title and URL of Internet radio station do not press Update whi...

Страница 54: ...from the Bluetooth wireless technology device 9 From the Bluetooth wireless technology device list select Bluetooth ADAPTER and enter the Passcode selected in step 5 4 Listening to music contents of a Bluetooth wireless technology device with your system 1 SC LX83 only Set the remote control operation selector switch to SOURCE 2 Press ADAPTER on the remote control to switch the receiver to ADAPTER...

Страница 55: ...n the Auto level control ALC mode this receiver equalizes playback sound levels OPTIMUM SURR SC LX83 only In the Optimum Surround mode this receiver automatically optimizes sound balance in each scene based on actually set volume The sound balancer controls three major theater sound elements dialogue bass and surround with original algorithm Tip When ALC is selected the effect level can be adjuste...

Страница 56: ...atrix decoding process for the THX CINEMA mode see THX Audio Setting on page 112 for an explanation of each process THX CINEMA THX MUSIC THX GAMES 2 Pro Logic IIx MOVIE THX CINEMA 2 PRO LOGIC THX CINEMA Neo 6 CINEMA THX CINEMA 2 Pro Logic IIx MUSIC THX MUSIC Neo 6 MUSIC THX MUSIC 2 Pro Logic IIx GAME THX GAMES 2 Pro Logic IIz HEIGHT THX CINEMA1 2 Pro Logic IIz HEIGHT THX MUSIC1 2 Pro Logic IIz HEI...

Страница 57: ...ptions on page 71 Listening in stereo When you select STEREO you will hear the source through just the front left and right speakers and possibly your subwoofer depending on your speaker settings Multichannel sources are downmixed to stereo 1 Set the remote control to the receiver operation mode 2 While listening to a source press STEREO for stereo playback Press repeatedly to switch between STERE...

Страница 58: ... the different inputs as described below 2 1 Set the remote control to the receiver operation mode 2 Press SIGNAL SEL to select the input signal corresponding to the source component Each press cycles through the options as follows AUTO The receiver selects the first available signal in the following order HDMI DIGITAL ANALOG ANALOG Selects an analog signal DIGITAL Selects an optical or coaxial di...

Страница 59: ...or on the front panel lights Note 1 Phase matching is a very important factor in achieving proper sound reproduction If two waveforms are in phase they crest and trough together resulting in increased amplitude clarity and presence of the sound signal If a crest of a wave meets a trough then the sound will be out of phase and an unreliable sound image will be produced The PHASE CONTROL feature is ...

Страница 60: ...dows 7 with Windows Media Player 12 installed DLNA compatible digital media servers on PCs or other components Files stored in a PC or DMS Digital Media Server as described above can be played via command from an external Digital Media Controller DMC Devices controlled by this DMC to play files are called DMRs Digital Media Renderers This receiver supports this DMR function When in the DMR mode su...

Страница 61: ...selected category the names of folders files and Internet radio stations are displayed 4 Use to select the folder music files or Internet radio station to play back and then press ENTER Press to scroll up and down the list and select the desired item When you press ENTER playback starts with the playback screen being displayed for the selected item To return to the list screen press RETURN 1 Only ...

Страница 62: ...press ENTER 3 Use to select Get access code then press ENTER The access code required for registration on the special Pioneer Internet radio site is displayed Make a memo of this address The following can be checked on the Help screen Get access code The access code required for registration on the special Pioneer Internet radio site is displayed Show Your WebID PW After registering on the special...

Страница 63: ...e and save at least one Internet radio station before proceeding with the following steps 1 Set the remote control operation selector switch to SOURCE 2 Select the class that you want to retrieve an Internet radio station from Each time you press CLASS the class switches to A to G in turn 3 Use to select the station number that you want to retrieve You can also select the station number by using t...

Страница 64: ...tion check with the manufacturer of your server About playback behavior over a network Playback may stall when the PC is switched off or any media files stored on it are deleted while playing content If there are problems within the network environment heavy network traffic etc content may not be displayed or played properly playback may be interrupted or stalled For best performance a 100BASE TX ...

Страница 65: ... frequency 8 kHz to 48 kHz Quantization bitrate 16 bit 20 bit 24 bit Channel 2 ch WMA wma WMA2 7 8 Sampling frequency 8 kHz to 48 kHz Quantization bitrate 16 bit Channel 2 ch Bitrate 5 kbps to 320 kbps VBR CBR Supported Supported WMA9 Sampling frequency 8 kHz to 48 kHz Quantization bitrate 16 bit Channel 2 ch Bitrate 5 kbps to 320 kbps VBR CBR Supported Supported AAC m4a aac 3gp 3g2 MPEG 4 AAC LC ...

Страница 66: ...tered trademark or trademark of Microsoft Corporation in the U S and or other countries Use an application licensed by Microsoft Corporation to author distribute or play Windows Media formatted content Using an application unauthorized by Microsoft Corporation is subject to malfunction Windows Media DRM Windows Media DRM is a DRM Digital Rights Management service for the Windows Media platform It ...

Страница 67: ... function may not work properly if a different type of HDMI cable is used For details about concrete operations settings etc refer to also the operating instructions for each component Making Control with HDMI connections You can use synchronized operation for a connected TV and up to five other components Be sure to connect the TV s audio cable to the audio input of this unit When the TV and rece...

Страница 68: ...bled YES The all power off function is enabled The receiver s power turns off together with the TV s power This function only works when the input for a component connected to the receiver by HDMI connection is selected or when watching the TV NO The all power off function is disabled The receiver s power is not affected when the TV s power is turned off 8 Select the Standby Through setting you wa...

Страница 69: ...omponent other than one connected by HDMI The operations below can also be used on Pioneer Control with HDMI compatible TVs When the receiver s volume is adjusted or the sound is muted the volume status is displayed on the TV s screen When the OSD language is switched on the TV the receiver s language setting also switches accordingly About connections with a product of a different brand that supp...

Страница 70: ...DMI function Connect the TV directly to this receiver Interrupting a direct connection with other amps or an AV converter such as an HDMI switch can cause operational errors Only connect components Blu ray disc player etc you intend to use as a source to the HDMI input of this receiver Interrupting a direct connection with other amps or an AV converter such as an HDMI switch can cause operational ...

Страница 71: ...oundtrack will be slightly out of sync with the picture By adding a bit of delay you can adjust the sound to match the presentation of the video 0 0 to 10 0 frames 1 second 25 frames PAL 30 frames NTSC Default 0 0 MIDNIGHT Allows you to hear effective surround sound of movies at low volumes MIDNIGHT LOUDNESS OFF MIDNIGHT ON LOUDNESS Used to get good bass and treble from music sources at low volume...

Страница 72: ...e from front to back making the sound more distant minus settings or more forward positive settings 3 to 3 Default 0 PANORAMAh Extends the front stereo image to include the surround speakers for a wraparound effect OFF ON C IMAGEi Center Image Applicable only when using a center speaker Adjusts the center image to create a wider stereo effect with vocals Adjust the effect from 0 all center channel...

Страница 73: ...is selected at Speaker system and SP AB is selected with the SPEAKERS button When inputting Dolby True HD SC LX73 only DTS HD or DTS Express audio signals the Virtual Surround Back mode cannot be used if no surround signals are recorded in the source k You can t use the Virtual Height mode when the headphones are connected to this receiver or when any of the stereo Front Stage Surround Advance Sou...

Страница 74: ... to 6 Default 0 CHROMAd Chroma Level Adjusts saturation from dull to bright 6 to 6 Default 0 BLK SETUPf Corrects the black depth in the brightness signal Normally select 0 If the black level is too bright due to the combination with the connected monitor select 7 5 0 7 5 a If the video picture deteriorates when this settings is switched ON switch it OFF b When set to a resolution with which the TV...

Страница 75: ...e the remote control s SIGNAL SEL button 4 Prepare the recorder Insert a blank tape MD video etc into the recording device and set the recording levels Refer to the instructions that came with the recorder if you are unsure how to do this Most video recorders set the audio recording level automatically check the component s instruction manual if you re unsure 5 Start recording then start playback ...

Страница 76: ... IP address of this receiver is 192 168 0 2 enter http 192 168 0 2 When the connection is made with the receiver a Top Menu will be displayed This receiver s IP address can be found in the IP address Proxy menu page 112 3 Once the Top Menu is displayed click the button for the zone you want to operate 4 Operate from the screen for the individual zone Even when the receiver is in the standby mode i...

Страница 77: ...DIMMER Brightest Network Standby OFF Inputs See Input function default and possible settings on page 45 HDMI HDMI Audio Amp HDMI output HDMI OUT ALL Control ON Control Mode ALL DIsplay Power Off YES DSP Power On Level LAST Volume Limit OFF Mute Level FULL Phase Control ON Sound Retriever iPod USB HOME MEDIA GALLERY SC LX83 only INTERNET RADIO SC LX73 only ADAPTER PORT function ON Other functions O...

Страница 78: ...ion buttons are pressed This is convenient for using the remote control unit for devices not connected to the receiver See Direct function on page 82 RENAME The names of the input function buttons displayed on the remote control unit can be changed as desired See Renaming input function names manually on page 81 SYNC RENAMING Input function names changed on the receiver can be acquired by the remo...

Страница 79: ...at device should be assigned to both the TV operation selector switch and TV input buttons Devices may be assigned to the following input function buttons Selecting preset codes directly 1 While pressing MULTI OPERATION press HOME MENU The remote display shows SETUP MENU 2 Use to select PRESET RECALL then press ENTER 3 Press the input function button for the component you want to control then pres...

Страница 80: ...rammed and restores the button to the factory default 1 While pressing MULTI OPERATION press HOME MENU The remote display shows SETUP MENU 2 Use to select ERASE LEARNING then press ENTER The remote display prompts you for the component corresponding to the button setting to be erased Note 1 The remote can store about 200 preset codes this has been tested with codes of Pioneer format only 2 You can...

Страница 81: ... feature to check which preset code is assigned to an input function button 1 While pressing MULTI OPERATION press HOME MENU The remote display shows SETUP MENU 2 Use to select READ PRESET ID then press ENTER The remote display prompts you for the input function button you want to check 3 Press the input function button of the component for which you want to check the preset code then press ENTER ...

Страница 82: ...ER If you selected Multi Operation MULTI OPERATE the remote display prompts you for an input function button If you selected System Off SYSTEM OFF go to step 4 3 Press the input function button for the component that will start the multi operation then press ENTER For example if you want to start the sequence by switching on your DVD player press DVD 4 Use to select EDIT CODE then press ENTER To e...

Страница 83: ...n be selected separately for the individual input functions To perform a multi operation on a device input function for which the IR mode is selected point the remote control toward the remote sensor on that device 2 In order to avoid accidently switching off a DVD recorder that is currently recording no DVD recorder power off codes are sent 3 With this remote control the IR and RF modes can be se...

Страница 84: ...OP MENU DISC NAVI LIST TOOLS GUIDE USER MENU TOOLSa GUIDE GUIDE ENTER ENTER ENTER ENTER ENTER ENTER HOME MENU HOME MENU HOME MENU HOME MENU HOME RETURN RETURN RETURN RETURN RETURN PGM Red Red Red HDD DVD Red MENU Green Green Green MENU Green Yellow Yellow Yellow VCR Yellow Blue Blue Blue MENU TV DTV Blue AUTO SETUP C FREEZE D A ANT AV SELECTION B SCREEN SIZE E AUDIO AUDIO AUDIO AUDIO AUDIO AUDIO A...

Страница 85: ...INKb b Controls for SACD ENTER ENTER SACD SETUPb RETURN PGM Red PROGRAM Yellow REPEAT Blue SHUFFLE MS c c Controls for DAT MS c AUDIO AUDIO PURE AUDIOb DISP DISPLAY INFO TIMEb Button s TV Projector SOURCE POWER ON 1 MOVIE 2 STANDARD 3 DYNAMIC 4 USER1 5 USER2 6 USER3 7 COLOR 8 SHARP 9 GAMMA 0 COLOR dot SHARP ENTER CLASS COLOR TEMP EXIT INFO ENTER ENTER TEST HIDE MENU HDMI1 HDMI2 COMP VIDEO S VIDEO ...

Страница 86: ...and acquired automatically For details see Renaming input function names in synchrony with the receiver on page 88 When the receiver s input is switched the remote control s display and operating mode switch to that input automatically For details see Setting the remote control operation mode on page 89 Important The line of sight communications distance is a rough indication and may differ accord...

Страница 87: ...d ZONE 3 Connect the receiver and RF adapter and pair the RF adapter and remote control unit beforehand 1 While pressing MULTI OPERATION press HOME MENU The remote display shows SETUP MENU 2 Use to select IR RF SELECT then press ENTER Check that the units are paired If RECEIVER MAIN is displayed pairing has been performed properly so proceed to step 3 If RF MODE ONLY flashes pairing has not been p...

Страница 88: ...can be synchronized with the input names that have been changed at Input Name on the receiver s Input Setup menu page 45 and acquired automatically There are two modes AUTO in which the receiver s input names are acquired automatically each time the input is switched and MANUAL in which the receiver s input names are only acquired for input functions selected manually Even when input names are cha...

Страница 89: ...isted in item 2 1 Examples of common devices utilizing the 2 4 GHz band Cordless phone Cordless facsimile Microwave oven Wireless LAN router Wireless AV device Wireless controllers for games Microwave therapeutic devices Bluetooth wireless technology devices 2 Other devices using 2 4 GHz Shoplifting prevention systems Amateur wireless radio Distribution control systems at factories and warehouses ...

Страница 90: ...are received after being bounced off of walls furniture and other buildings reflected waves As a result reflected waves can be generated by obstacles and other reflective objects causing variations in the signal quality In such cases try slightly changing the position of the remote control CAUTION With the exception of cases determined by law to be the subject of legal liability Pioneer refuses al...

Страница 91: ...d operations cannot be performed even though you have set the preset codes the remote control signals of other devices can be learned directly See Programming signals from other remote controls on page 92 Multi operation A series of the remote control operations for starting listening or viewing can be programmed Multiple remote control codes can be set for the different input functions See Multi ...

Страница 92: ...his happens enter the 4 digit preset code again 4 Repeat steps 2 through 3 for the other components you want to control To try out the remote control switch the component on or off into standby by pressing SOURCE If it doesn t seem to work select the next code from the list if there is one 5 Press R SETUP to exit the preset setup mode Programming signals from other remote controls If the preset co...

Страница 93: ... mode press R SETUP 2 Press and hold the input function button corresponding to the command to be erased for three seconds If the LED lights for one second the erasing has been successfully completed Direct function Default setting On You can use the direct function feature to control one component using the remote control while at the same time using your receiver to play a different component Th...

Страница 94: ...ess MULTI OPERATION and then the DVD input function button to 1 Switch this receiver on 2 Switch this receiver s input to DVD 3 Transmit a sequence of up to five programmed commands Similar to Multi operations System off allows you to use two buttons to stop and switch off a series of components in your system at the same time 1 Only one System off operation sequence may be programmed Press MULTI ...

Страница 95: ...d 6 Press R SETUP to exit the programming mode Using multi operations 1 Press MULTI OPERATION The LED flashes continuously 2 Within five seconds press an input function button that has been set up with a multi operation The receiver switches on if it was in standby and the programmed multi operation is performed automatically Using System off 1 Press MULTI OPERATION The LED flashes continuously 2 ...

Страница 96: ... the main TV to the TV CTRL button Note 1 When preset codes are set all the signals learned in the input function buttons are cleared This function is convenient when you want to reset some but not all of input function buttons Input function button Preset code DVD 2 2 4 6 BD 2 2 4 8 DVR BDR 2 2 3 8 HDMI 2 2 4 7 TV 0 1 8 6 CD 5 0 6 6 CD R 5 0 6 7 VIDEO 1 0 7 7 TV CTRL 0 1 8 6 RECEIVER ZONE 2 ZONE ...

Страница 97: ...TER EXIT INFO EXIT TOP MENU TOP MENU LIST TOOLS GUIDE EPG USER MENU TOOLS GUIDE GUIDE ENTER ENTER ENTER ENTER ENTER ENTER HOME MENU HOME MENU HOME MENU HOME MENU HOME MENU RETURN RETURN RETURN RETURN RETURN HDD Red Red Red HDD Red DVD Green Green Green DVD Green Yellow Yellow Yellow VCR Yellow Blue Blue Blue MENU MENU Blue AUTO SETUP FREEZE TV DTV AV SELECTION SCREEN SIZE AUDIO AUDIO AUDIO AUDIO A...

Страница 98: ... CLASS ENTER DISC ENTER OPEN CLOSEb ENTER TOP MENU MS LEGATO LINKa MS ENTER ENTER SACD SETUPa RETURN AUDIO AUDIO PURE AUDIOa DISP DISPLAY INFO TIMEa Button s TV Projector SOURCE POWER ON 1 MOVIE 2 STANDARD 3 DYNAMIC 4 USER1 5 USER2 6 USER3 7 COLOR 8 SHARP 9 GAMMA 0 COLOR dot SHARP ENTER CLASS COLOR TEMP EXIT INFO ENTER ENTER TEST HIDE MENU HDMI1 HDMI2 COMP VIDEO S VIDEO BRIGHT BRIGHT AUDIO POWER O...

Страница 99: ... appears on your TV Use and ENTER to navigate through the screens and select menu items Press RETURN to confirm and exit the current menu Press HOME MENU at any time to exit the Home Menu 3 Select Advanced MCACC from the Home Menu then press ENTER 4 Select the setting you want to adjust Full Auto MCACC See Automatically conducting optimum sound tuning Full Auto MCACC on page 43 for a quick and eff...

Страница 100: ...level at your normal listening position If you do not have a tripod use some other object to install the microphone 3 4 When you re finished setting the options select START then press ENTER 5 Follow the instructions on screen 6 Wait for the Auto MCACC Setup to finish outputting test tones A progress report is displayed on screen while the receiver outputs test tones to determine the speakers pres...

Страница 101: ...09 2 You can also choose to view the settings by selecting individual parameters from the MCACC Data Check screen see Checking MCACC Data on page 105 Press RETURN after you have finished checking each screen When you re finished select RETURN to go back to the Home Menu Be sure to disconnect the microphone from this receiver upon completion of the Auto MCACC Setup Manual MCACC setup You can use th...

Страница 102: ...ls 12 0 dB as necessary Use to adjust the volume of the speaker you selected to match the reference speaker When it sounds like both tones are the same volume press to confirm and continue to the next channel For comparison purposes the reference speaker will change depending on which speaker you select If you want to go back and adjust a channel simply use to select it 4 When you re finished pres...

Страница 103: ...conducting optimum sound tuning Full Auto MCACC on page 43 or Automatic MCACC Expert on page 99 you can also adjust these settings manually to get a frequency balance that suits your tastes 1 Select EQ Adjust from the Manual MCACC setup menu 2 Select the channel s you want and adjust to your liking Use to select the channel Use to select the frequency and to boost or cut the EQ When you re finishe...

Страница 104: ...n select START 4 Based on the reverb measurement above you can choose the time period that will be used for the final frequency adjustment and calibration Even though you can make this setting without reverb measurement it is best to use the measurement results as a reference for your time setting For an optimal system calibration based on the direct sound coming from the speakers we recommend usi...

Страница 105: ...ars on your TV Use and ENTER to navigate through the screens and select menu items Press RETURN to confirm and exit the current menu 2 Select MCACC Data Check from the Home Menu 3 Select the setting you want to check Speaker Setting Used to check the settings of the speaker systems See Speaker Setting on page 106 for more on this Channel Level Used to check the output level of the different speake...

Страница 106: ...anding wave control The standing wave related calibration value for the selected channel stored at the selected MCACC preset and its graph are displayed 3 Press to highlight MCACC then use to select the MCACC preset you want to check Acoustic Cal EQ Use this to display the calibration values for the frequency response of the various channels set in the different MCACC presets See Acoustic Calibrat...

Страница 107: ...select menu items Press RETURN to confirm and exit the current menu 2 Select Data Management from the Home Menu 3 Select the setting you want to adjust Memory Rename Name your MCACC presets for easy identification see Renaming MCACC presets below MCACC Memory Copy Copy settings from one MCACC preset to another see Copying MCACC preset data on page 108 MCACC Memory Clear Clear any MCACC presets tha...

Страница 108: ...CACC Memory Copy is displayed select YES If NO is selected the memory is not copied Completed shows in the GUI screen to confirm the MCACC preset has been copied then you automatically return to the Data Management setup menu Clearing MCACC presets If you are no longer using one of the MCACC presets stored in memory you can choose to clear the calibration settings of that preset 1 Select MCACC Mem...

Страница 109: ...lay language can be changed see Changing the TV format setting on page 42 Network Setup Conducts the setup necessary to connect this unit to the network see Network Setup menu on page 112 Other Setup Makes customized settings to reflect how you are using the receiver see The Other Setup menu on page 114 Manual speaker setup This receiver allows you to make detailed settings to optimize the surroun...

Страница 110: ...make sure that the settings made in Automatically conducting optimum sound tuning Full Auto MCACC on page 43 are correct Note that this setting applies to all MCACC presets and cannot be set independently 1 Select Speaker Setting from the Manual SP Setup menu 2 Choose the set of speakers that you want to set then select a speaker size Use to select the size and number of each of the following spea...

Страница 111: ...hen add the proper delay needed for effective surround sound 1 Select Speaker Distance from the Manual SP Setup menu 2 Adjust the distance of each speaker using You can adjust the distance of each speaker in 0 01 m Increments 3 When you re finished press RETURN You will return to the Manual SP Setup menu Tip For best surround sound make sure the surround back speakers are the same distance from th...

Страница 112: ...ack speakers from each other 0 0 3 m Surround back speakers within 30 cm apart best for THX surround sound 0 3 1 2 m Surround back speakers between 30 cm and 1 2 m apart 1 2 m Surround back speakers more than 1 2 m apart default 5 Specify whether your subwoofer is Ultra2 Select22 certified or not If your subwoofer isn t THX Ultra2 Select22 certified but you still want to switch boundary gain compe...

Страница 113: ...meric buttons to enter alphanumeric characters To delete alphanumeric characters entered one at a time press CLEAR 1 Select IP Address Proxy from the Network Setup menu 2 Select the DHCP setting you want When you select ON the network is automatically set up and you do not need to follow Steps 3 Proceed with Step 4 If there is no DHCP server on the network and you select ON this receiver will use ...

Страница 114: ...d on 1 Select Volume Setup from the Other Setup menu 2 Select the Power ON Level setting you want The volume can be set so that it is always set to the same level when the receiver s power is turned on LAST default When the power is turned on the volume is set to the same level as when the power was last turned off When the power is turned on the volume is set to minimum level 80 0dB to 12 0dB Spe...

Страница 115: ...ations To do so set the EXTENSION setting to ON When ON is set here the receiver can be operated even when the receiver is in the standby mode 1 Select EXTENSION Setup from the Other Setup menu 2 Select the EXTENSION setting you want 3 When you re finished press RETURN You will return to the Other Setup menu Multi Channel Input Setup You can adjust the level of the subwoofer for a multi channel in...

Страница 116: ...r 1 so that it is not under the height of the ears Step 3 Adjusting the speaker orientation If the left and right speakers are not pointing in the same direction the tone will not be the same on the right and left and as a result the sound field will not be reproduced properly However if all the speakers are pointed towards the listening position the sound field will seem cramped Testing by the Pi...

Страница 117: ...nents and electrical appliances being used If the trouble cannot be rectified even after exercising the checks listed below ask your nearest Pioneer authorized independent service company to carry out repair work Note If the unit does not operate normally due to external effects such as static electricity disconnect the power plug from the outlet and insert again to return to normal operating cond...

Страница 118: ...thorized independent service company OVERHEAT blinks in the display or AMP OVERHEAT and the STANDBY ON indicator flash and the power turns off Allow the unit to cool down in a well ventilated place before switching back on Wait at least 1 minute then try turning the power on again The receiver suddenly power off or ADVANCED MCACC flashes The power unit is damaged Unplug the receiver from the wall ...

Страница 119: ...ake sure this is not turned down Make sure that the multichannel analog inputs are not selected Select any other input function No sound is output or a noise is output when Dolby Digital DTS software is played back Check that your BD or DVD player is compatible with Dolby Digital DTS discs Check the digital output settings or the HDMI audio output settings of your BD or DVD player Make sure that t...

Страница 120: ...ceiver during playback Depending on the listening mode the front height or front wide and surround back speakers may switch automatically in function of changes in the input audio A speaker switching sound clicking sound will be heard from the receiver at this time If this sound bothers you we recommend changing the listening mode see Listening in surround sound on page 55 The maximum volume avail...

Страница 121: ...the monitor connected to the HDMI terminal Change the VIDEO PARAMETER menu RES setting Video signals from the HDMI terminal cannot be output to the component terminals Input the video signals from the player or other source to the composite or component terminals When using the component terminal assign it at Input Setup The picture s movement is unnatural When Resolution under VIDEO PARAMETER is ...

Страница 122: ...even when selecting ALL CH ADJ in the Auto MCACC Setup due to adjustments made to compensate for room characteristics to achieve optimal sound Areas of the graph may appear identical before and after when there is little or no adjustment needed The graph may appear to have shifted vertically when comparing before and after measurements EQ adjustments made using the Manual MCACC setup on page 101 d...

Страница 123: ...reasing the distance from microwave ovens devices on a wireless LAN other wireless devices etc see Precautions when using the Omni Directional RF Remote Control on page 89 Try replacing the batteries in the remote control see Loading the batteries on page 9 If the RF adapter s LED is off the RF adapter may not be properly connected to the receiver Check whether the RF adapter is properly connected...

Страница 124: ...may occur when switching between audio formats or beginning playback Turning on off the device connected to this unit s HDMI OUT terminal during playback or disconnecting connecting the HDMI cable during playback may cause noise or interrupted audio Noisy or distorted picture Sometimes a video deck may output a noisy video signal during scanning for example or the video quality may just be poor wi...

Страница 125: ...nected display unit for example audio output is reduced to 2 channels for a monitor with stereo audio limitations If you want to switch the input function you ll have to switch functions on both the receiver and your display unit Since the sound is muted on the display when using the HDMI connection you must adjust the volume on the display every time you switch input functions USB interface Sympt...

Страница 126: ... before the receiver Cannot listen to Internet radio stations Connection Error shows in the display The firewall settings for components on the network are currently in operation Check the firewall settings for components on the network You are currently disconnected from the Internet Check the connection settings for components on the network and consult with your network service provider if nece...

Страница 127: ...ed in MPEG 4 AAC or FLAC cannot be played back on Windows Media Player 11 or Windows Media Player 12 Try using another server Refer to the operation manual supplied with your server The component connected to the network is not properly operated Check whether the component is affected by special circumstances or is in the sleep mode Try rebooting the component if necessary The component connected ...

Страница 128: ...y page 112 The broadcasts from an Internet radio station are stopped or interrupted There are cases where you cannot listen to some Internet radio stations even when they are listed in the list of Internet radio stations on this receiver page 62 The Home Media Gallery cannot be operated with the buttons on the remote control The remote control is not currently set to the Home Media Gallery mode Pr...

Страница 129: ...VHS tape DVD etc and is not changed for playback in a small home theatre environment THX engineers developed patented technologies to accurately translate the sound from the movie theatre environment into the home correcting the tonal and spatial errors that occur On this product when the THX indicator is on THX features are automatically added in Cinema modes e g THX Cinema THX Surround EX Re Equ...

Страница 130: ...ceived differently by the listener THX Loudness Plus compensates for the tonal and spatial shifts that occur when the volume is reduced by intelligently adjusting ambient surround channel levels and frequency response This enables users to experience the true impact of soundtracks regardless of the volume setting THX Loudness Plus is automatically applied when listening in any THX listening mode T...

Страница 131: ...s list of conditions and the following disclaimer in the documentation and or other materials provided with the distribution Neither the name of the Xiph org Foundation nor the names of its contributors may be used to endorse or promote products derived from this software without specific prior written permission THIS SOFTWARE IS PROVIDED BY THE COPYRIGHT HOLDERS AND CONTRIBUTORS AS IS AND ANY EXP...

Страница 132: ...ogic ll MOVIE DTS Surround Neo 6 CINEMA Neo 6 CINEMA Other stereo sources Stereo playback Stereo playback Analog sources As above ANALOG DIRECT stereo PCM sources As above PCM DIRECT DVD A sources As above As above SACD sources As above As above Input signal format Auto Surround ALC PURE DIRECT DIRECT Surround Back speaker s Connected Dolby Digital EX 6 1 channel flagged Dolby Digital EX 2 Pro Log...

Страница 133: ... 0040 Blue Star 0036 Boots 0026 0114 BPL 0036 0040 Brandt 0033 0038 0042 0044 Brinkmann 0040 Brionvega 0023 0034 0037 0040 Britannia 0026 0113 0114 Bruns 0023 BTC 0028 Bush 0027 0028 0030 0032 0034 0036 0037 0039 0040 0065 0078 0114 Capsonic 0025 Carena 0040 Carrefour 0032 Cascade 0027 0039 0040 Casio 0106 Cathay 0034 0037 0040 CCE 0114 Centurion 0034 0037 0040 Century 0023 CGE 0010 0017 Cimline 0...

Страница 134: ...urphy 0026 0113 Naonis 0030 NEC 0032 0114 Neckermann 0010 0023 0026 0030 0034 0035 0037 0040 0114 NEI 0034 0037 0040 Neufunk 0039 0040 New Tech 0027 0034 0039 0040 0114 New World 0028 Nicamagic 0026 0113 Nikkai 0025 0026 0028 0034 0037 0039 0040 0113 0114 Nobliko 0017 0026 0029 0113 Nokia 0031 Nordic 0114 Nordmende 0023 0031 0033 0034 Nordvision 0037 Novatronic 0040 Oceanic 0031 0041 Okano 0010 00...

Страница 135: ...me 2090 Eclipse 2085 Electrohome 2093 Elin 2093 Elta 2047 2093 Enzer 2083 Finlux 2085 2093 Gericom 2050 Global Solutions 2086 Global Sphere 2086 Goodmans 2027 2070 2089 Graetz 2083 Grundig 2053 Grunkel 2093 H B 2089 Haaz 2085 2086 HiMAX 2090 Hitachi 2015 2083 2090 Innovation 2002 JVC 2024 2041 2057 Kansai 2095 Kennex 2093 Kenwood 2051 KeyPlug 2093 Kiiro 2093 Kingavon 2089 Kiss 2083 Koda 2089 KXD 2...

Страница 136: ...l 1007 1017 Kyoto 1017 Lenco 1003 Leyco 1007 1017 LG 1000 1005 1016 Lifetec 1002 Loewe Opta 1005 1006 Logik 1007 1017 Lumatron 1003 1018 Luxor 1017 M Electronic 1000 Manesth 1007 1017 Marantz 1006 Mark 1018 Matsui 1002 1005 Matsushita 1000 1006 Mediator 1006 Medion 1002 Memorex 1000 1005 Memphis 1007 1017 Micromaxx 1002 Microstar 1002 Migros 1000 Multitech 1000 1004 1006 1007 1017 Murphy 1000 NEC ...

Страница 137: ...114 6075 6133 GOD Digital 6090 Gold Box 6096 6095 Gold Vision 6123 Golden Interstar 6126 Goodmans 6052 6130 6093 6140 6147 6066 6094 6077 Gran Prix 6106 Granada 6052 Grandin 6104 Grocos 6115 6062 Grundig6108 6096 6053 6093 6140 6094 6077 6066 Haensel Gretel 6132 Haier 6121 Hama 6059 Hanseatic 6091 6098 Hauppauge 6107 6108 HB 6072 Heliocom 6131 Helium 6131 Hiro 6065 Hirschmann 6143 6053 6105 6137 6...

Страница 138: ...099 6103 6114 6108 6104 Teletech 6089 Televes 6132 6052 6112 6072 6127 6114 6133 Telewire 6128 Tempo 6069 Tevion 6130 6056 6115 6108 6060 Thomson 6110 6096 6086 6088 6095 6056 6131 6052 6141 6153 6140 Thorn 6052 Tiny 6108 Tioko 6132 Titan 6065 6060 TNT SAT 6134 Tokai 6090 Tonna 6052 6112 6056 6079 Topfield 6074 Toshiba 6052 6093 6161 Trevi 6103 Triasat 6112 Triax 6096 6090 6132 6135 6065 6129 6104...

Страница 139: ... 6100 Toshiba 6116 UPC 6146 US Electronics 6152 Virgin Media 6097 6101 Visiopass 6136 Zenith 6116 Ziggo 6084 Cable Set Top Box Cable PVR Combination Freebox 6150 Humax 6124 6100 Nokia 6084 Scientific Atlanta 6101 Telewest 6101 Thomson 6146 UPC 6146 Virgin Media 6101 CD SACD Pioneer 5065 5066 AKAI 5043 Asuka 5045 Denon 5019 Fisher 5048 Goldstar 5040 Hitachi 5042 Kenwood 5020 5021 5031 Luxman 5049 M...

Страница 140: ...o convert off Digital In Out Section HDMI terminal 19 pin Not DVI HDMI output type 5 V 100 mA USB terminal USB2 0 Full Speed Type A iPod terminal USB and Video Composite ADAPTER PORT terminal 5 V 100 mA Integrated Control Section Control SR terminal Ø 3 5 Mini jack MONO Control IR terminal Ø 3 5 Mini jack MONO IR signal High Active High Level 2 0 V 12 V Trigger terminal Ø 3 5 Mini jack MONO 12 V T...

Страница 141: ...perating instructions Note Specifications and the design are subject to possible modifications without notice due to improvements Cleaning the unit Use a polishing cloth or dry cloth to wipe off dust and dirt When the surface is dirty wipe with a soft cloth dipped in some neutral cleanser diluted five or six times with water and wrung out well and then wipe again with a dry cloth Do not use furnit...

Страница 142: ...ure Corporation 708 Apelo Cruz St Malibay P O Box 473 Pasay city TEL 02 8520031 SINGAPORE PIONEER ASIACENTRE PTE LTD Domestic Service Dept 253 Alexandra Road 04 01 Singapore 159936 TEL 64727555 TAIWAN PIONEER HIGH FIDELITY TAIWAN CO LTD 8F No 407 Ruiguang Road Neihu Dist Taipei City 11492 Taiwan PTC service telephone number 02 2657 7366 THAILAND PIONEER ELECTRONICS THAILAND CO LTD FL 17 KPN Tower ...

Страница 143: ...Additional information 13 143 En SC LX83_73_DLPW book 143 ページ 2010年5月19日 水曜日 午後2時7分 ...

Страница 144: ... Markham Ontario L3R 0P2 Canada TEL 1 877 283 5901 905 479 4411 PIONEER EUROPE NV Haven 1087 Keetberglaan 1 B 9120 Melsele Belgium TEL 03 570 05 11 PIONEER ELECTRONICS ASIACENTRE PTE LTD 253 Alexandra Road 04 01 Singapore 159936 TEL 65 6472 7555 PIONEER ELECTRONICS AUSTRALIA PTY LTD 178 184 Boundary Road Braeside Victoria 3195 Australia TEL 03 9586 6300 PIONEER ELECTRONICS DE MEXICO S A DE C V Blv...

Отзывы: