Connecting your equipment
03
39
En
•
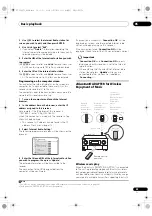
Switch the receiver into standby then connect your
USB device to the USB terminal on the front panel of
this receiver.
1
• Fo
r
inst
r
uctions on playing the USB device, see
Playing a USB device
on page 48.
Connecting a USB device for Advanced
MCACC output
When using Full Auto MCACC (page 43), Auto MCACC
(page 99) o
r
Acoustic Calib
r
ation EQ P
r
ofessional
(page 103) to calib
r
ate the
r
eve
r
b cha
r
acte
r
istics of you
r
listening
r
oom, the 3D g
r
aphs of the
r
eve
r
b
cha
r
acte
r
istics in you
r
listening
r
oom (befo
r
e and afte
r
calib
r
ation) can be checked on a compute
r
sc
r
een.
SC-
LX83 only:
Also, the speake
r
s’ g
r
oup delay cha
r
acte
r
istics
befo
r
e and afte
r
calib
r
ation can be checked on 3D g
r
aphs.
The va
r
ious MCACC pa
r
amete
r
s can also be checked on
the compute
r
. MCACC data and pa
r
amete
r
s a
r
e
t
r
ansfe
rr
ed f
r
om this
r
eceive
r
to a USB device and by
connecting the USB device to a compute
r
, the data is
impo
r
ted via the MCACC softwa
r
e in the compute
r
.
The MCACC softwa
r
e to output the
r
esults is available by
contacting the Pionee
r
Autho
r
ized Dist
r
ibuto
r
fo
r
you
r
a
r
ea (as listed on page 142 of this manual) as well as the
inst
r
uctions necessa
r
y fo
r
using it.
See the documentation p
r
ovided with the Advanced
MCACC PC Display Application Softwa
r
e fo
r
mo
r
e
info
r
mation.
• Fo
r
the USB device connection and ope
r
ations, see
Output MCACC data
on page 107
2
.
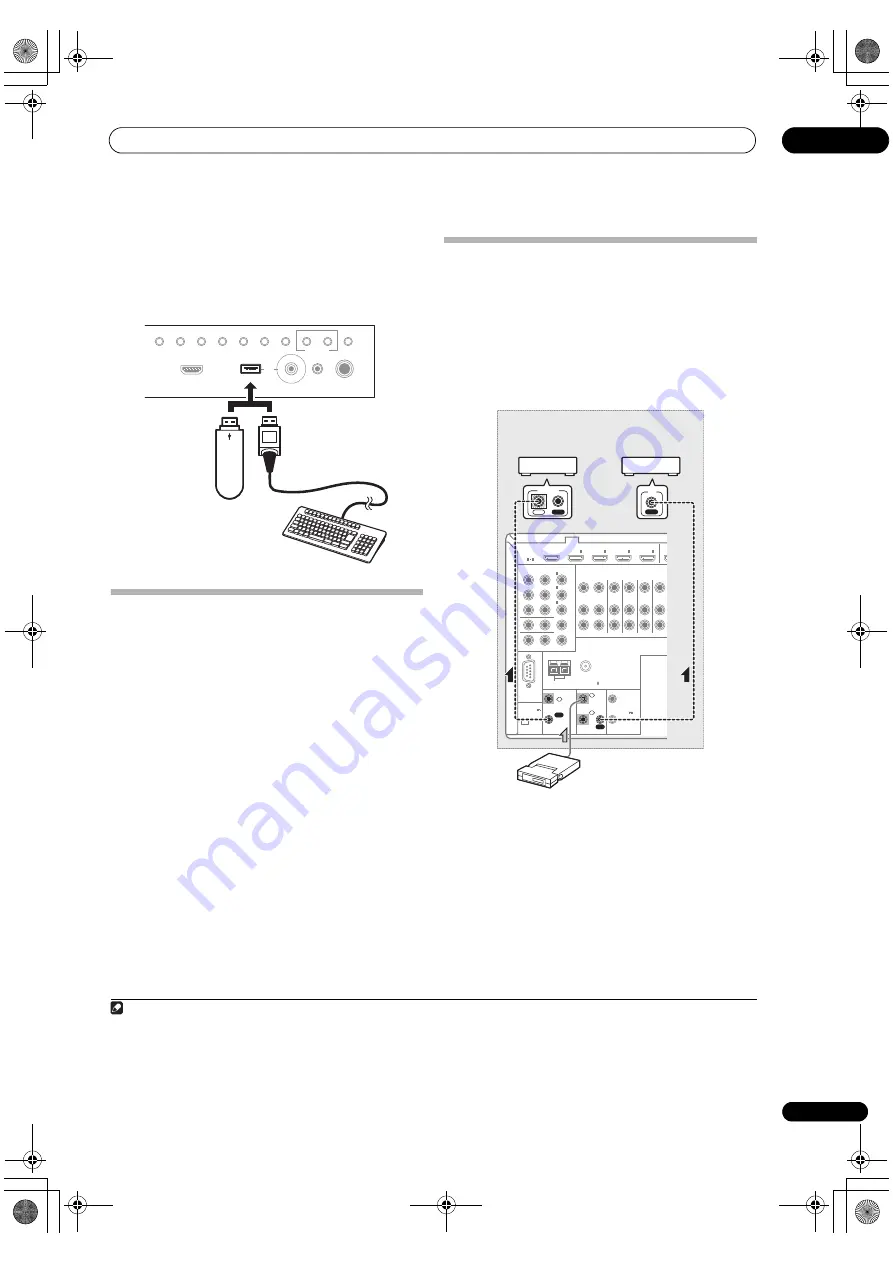
Connecting an IR receiver
If you keep you
r
ste
r
eo components in a closed cabinet o
r
shelving unit, o
r
you wish to use the sub zone
r
emote
cont
r
ol in anothe
r
zone, you can use an optional IR
r
eceive
r
(such as a Niles o
r
Xantech unit) to cont
r
ol you
r
system instead of the
r
emote senso
r
on the f
r
ont panel of
this
r
eceive
r
.
3
1
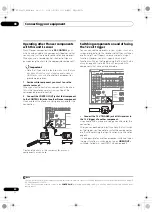
Connect the IR receiver sensor to the IR IN jack on
the rear of this receiver.
2
Connect the IR IN jack of another component to the
IR OUT jack on the rear of this receiver to link it to the
IR receiver.
Please see the manual supplied with you
r
IR
r
eceive
r
fo
r
the type of cable necessa
r
y fo
r
the connection.
• If you want to link a Pionee
r
component to the IR
r
eceive
r
, see
Operating other Pioneer components
with this unit’s sensor
below to connect to the
CONTROL
jacks instead of the
IR OUT
jack.
Note
1 This
r
eceive
r
does not suppo
r
t a USB hub.
2 The va
r
ious pa
r
amete
r
s and the
r
eve
r
b cha
r
acte
r
istics data used fo
r
display on the compute
r
a
r
e not clea
r
ed when the powe
r
is tu
r
ned off (see
Output MCACC data
on page 107).
PHONES
SPEAKERS
CONTROL
MULTI-ZONE
ON/OFF
MCACC
SETUP MIC
TUNER EDIT
USB
HDMI 5
VIDEO CAMERA
iPod
iPhone
AUTO SURR/ALC/
STREAM DIRECT
HOME
THX
STANDARD
SURROUND
ADVANCED
SURROUND
STEREO
BAND
USB mass
sto
r
age device
USB keyboa
r
d
3 • Remote ope
r
ation may not be possible if di
r
ect light f
r
om a st
r
ong fluo
r
escent lamp is shining on the IR
r
eceive
r
r
emote senso
r
window.
• Note that othe
r
manufactu
r
e
r
s may not use the IR te
r
minology. Refe
r
to the manual that came with you
r
component to check fo
r
IR
compatibility.
• If using two
r
emote cont
r
ols (at the same time), the IR
r
eceive
r
’s
r
emote senso
r
takes p
r
io
r
ity ove
r
the
r
emote senso
r
on the f
r
ont panel.
RS-232C
HDMI
ASSIGNABLE
COMPONENT VIDEO
ASSIGNABLE
MONITOR OUT
ZONE 2 OUT
IN
Y
ANTENNA
FM UNBAL 75
AM LOOP
ZONE2
OUT
ZONE3
OUT
DVD
IN
TV/SAT
IN
VIDEO
IN
DVR/
OUT
P
R
P
B
1
IN
BD
IN
1
IN
2
IN
3
1
4
(DVD)
IN
2
(DVR/BDR)
IN
3
(VIDEO)
CONTROL
CU-RF100
IR
12 V
TRIGGER
IN
IN
IN
OUT
OUT
1
2
1
2
(OUTPUT
12 V
TOTAL
150 mA MAX)
IN
4
(OUTPUT 5 V
150 mA MAX)
SPEAKERS
IN
IR
IN
OUT
CONTROL
IR
r
eceive
r
Closet o
r
shelving unit
Non-Pionee
r
component
Pionee
r
component
SC-LX83_73_DLPW.book 39 ページ 2010年5月19日 水曜日 午後2時7分

