– 181 –
Chapter 9 Connecting to External Devices — Connection through the <USB2.0> terminal
t
The remaining free space of the corresponding partition can be checked in the main menu
→
[CLIP]
→
[PROPERTY]
→
[FREE CAP. OF
PARTITION].
Selecting the target folder/partition in the explorer screen
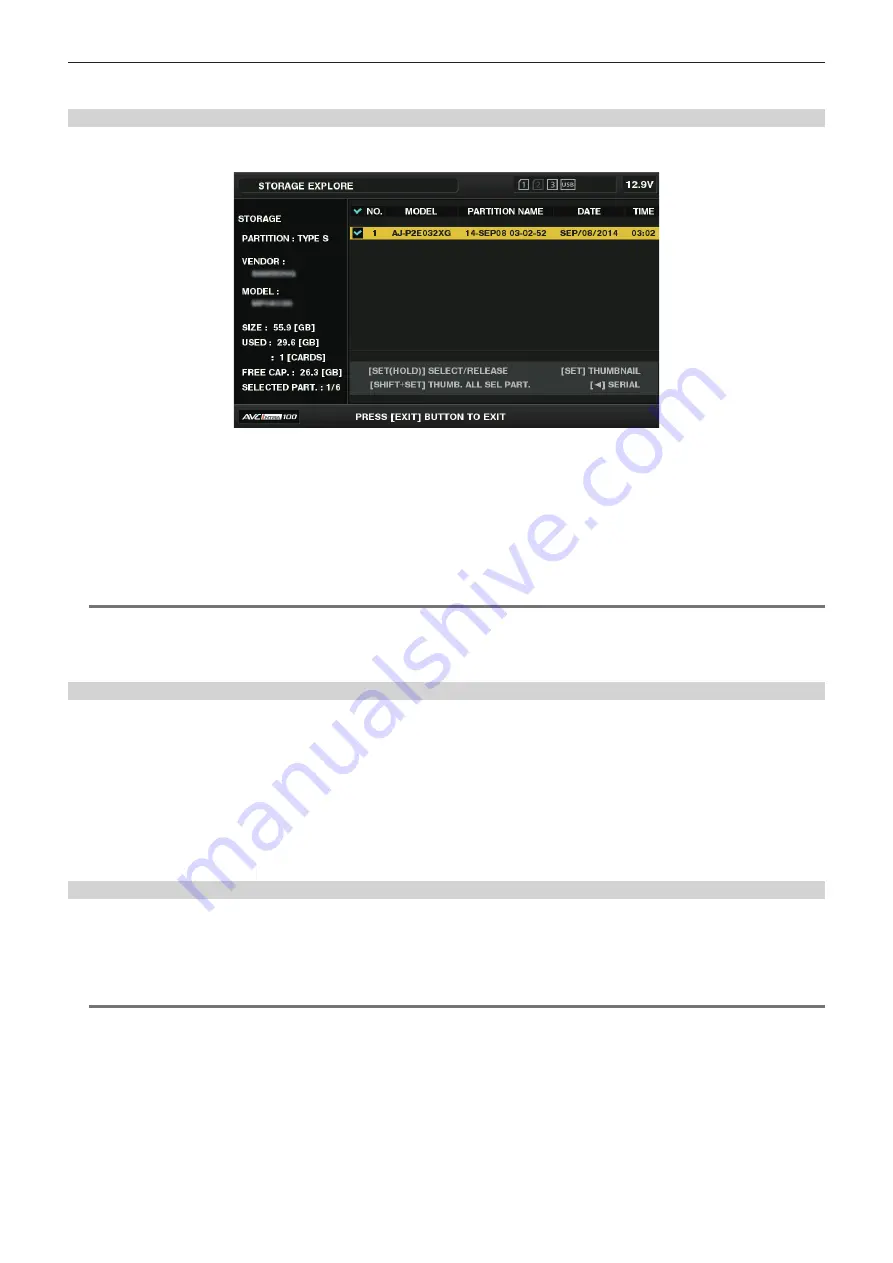
You can display all clips included in the selected partition/folder as thumbnails by selecting partitions/folders as targets. You can display up to six
partitions/folders. When the seventh partition/folder is specified, setting is disabled and a warning is displayed.
Fig. 1
1
In the explorer screen, place the cursor on the partition/folder.
2
Press and hold the <SET> button (for one second or more).
The partition/folder is selected and a checkmark is displayed. (Fig. 1)
The selected target partition/folder is valid until the storage device is disconnected or the power is turned off. To cancel the selected partition/folder,
hold down the <SET> button (for one second or more) again on the selected partition.
Press the <CANCEL> button to deselect all partitions/folders.
@
@
NOTE
t
In [TYPE S] storage devices, [MODEL] is [UNKNOWN] and clips recorded across other partitions will not be one normal clip. Copying clips to a [TYPE
S] storage device changes the partition of the copy destination [MODEL] to [UNKNOWN].
t
The partition name can be set when a [TYPE S] storage device is used. The partition name that has been set is displayed in [PARTITION NAME] on
the explorer screen.
Setting a partition name in the explorer screen
When the storage device is [TYPE S], the name (up to 20 characters) can be set to the partition. The preset partition name is displayed in [PARTITION
NAME] on the explorer screen.
1
In the explorer screen, place the cursor on the partition you want to set up.
You can display the thumbnail list and set a name for the partition by pressing the <SET> button.
2
Select [CHANGE PARTITION NAME] in the main menu
→
[CLIP].
This displays the soft keyboard.
3
Enter the partition name and select [OK].
The partition name is set.
Deleting the last partition in the explorer screen
You can delete the last partition on a [TYPE S] type storage device.
1
In the explorer screen, place the cursor on the last partition.
2
Select [DELETE LAST PARTITION] in the main menu
→
[CLIP].
@
@
NOTE
t
You can only delete the last partition when using a [TYPE S] storage device. You can only delete the last partition. You cannot delete other partitions.
t
Since deleted partitions cannot be recovered, perform a check thoroughly before deleting.
Содержание AJ-PX380G
Страница 9: ...Before using the camera read this chapter Chapter 1 Overview ...
Страница 165: ...Details displayed on the viewfinder are described Chapter 8 Display ...
Страница 192: ...This chapter describes how to use the camera by connecting to network Chapter 10 Network Connection ...
Страница 213: ...Maintenance and error messages of the camera are described Chapter 11 Maintenance ...
Страница 219: ...This chapter describes the specifications of this product Chapter 12 Specification ...


