Editing: Creating Playlists
107
Ed
iti
n
g
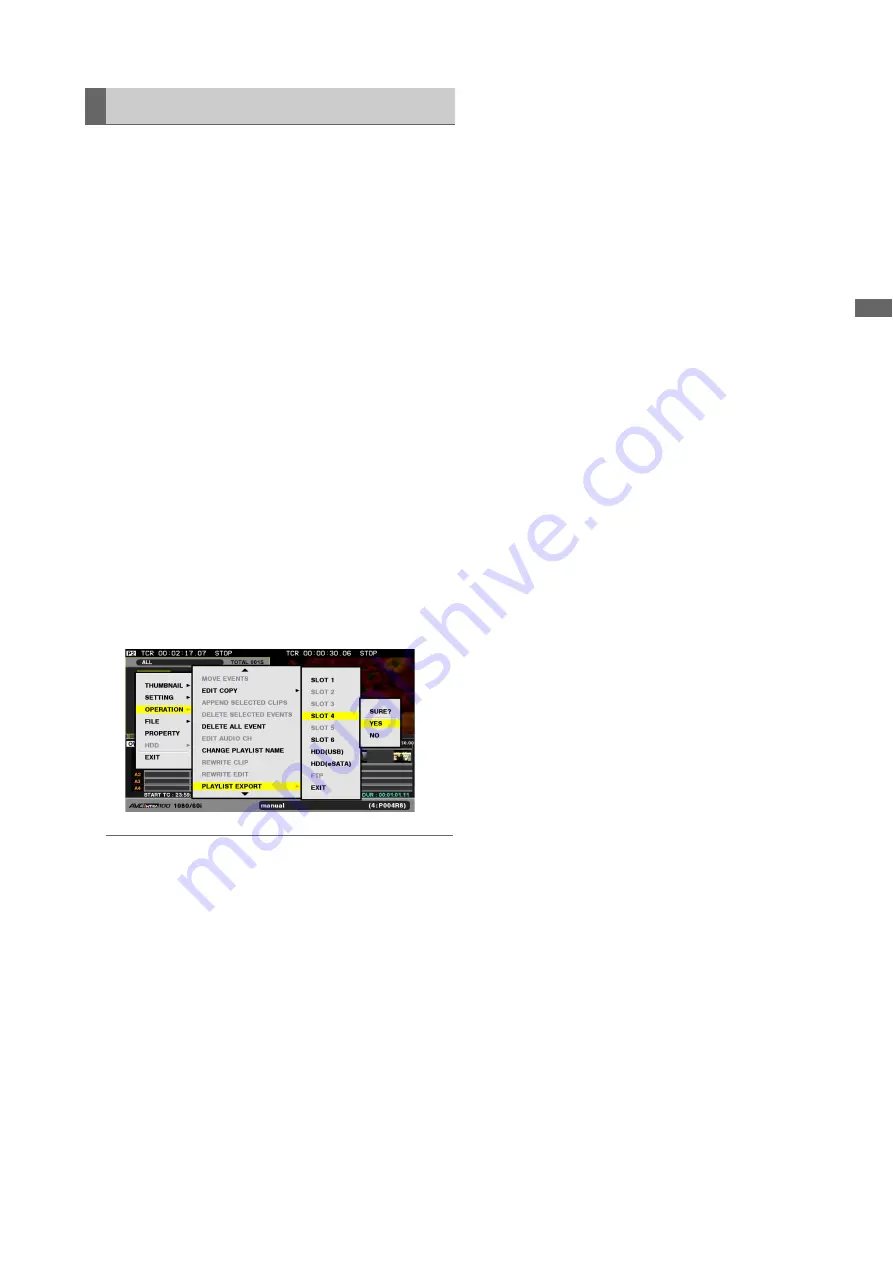
The registered events can be exported to a P2 card, hard
disk, or FTP server. When being exported, the playlist file is
also created automatically in the export destination.
1
Press the PLAY LIST button to open the playlist
screen.
2
Press the MENU button.
3
Use the cursor buttons to choose [OPERATION] –
[PLAYLIST EXPORT] and press the SET button.
4
Select the destination for export and press the SET
button.
To export to a hard disk or FTP server, select the details for
the destination.
➝
For details on the hard disk or FTP server, refer to
“Using This Unit With a Hard Disk” (page 124) or
“Connecting This Unit to a Network” (page 137).
5
Select [YES] in the confirmation dialog and press the
SET button.
◆
NOTE:
• The entire area of source clips cannot be exported. Only the
area referenced on the timeline and the area within two seconds
before and after the referenced area is exported separately. If
the data are less than two seconds before and after the
reference area, the actual area is exported.
• When there is not enough space to store the expected size of
the clip created upon export, “LACK OF REC CAPACITY!”
appears, and export will not start. If the destination is an FTP
server, export starts, and a warning will appear once there is no
space left in the FTP server.
• Export can be made to multiple P2 cards. If the specified card
does not have enough space to store all the data, the remaining
data are automatically exported to the P2 card in the next slot.
The numbers of the slots where the data are exported are
displayed during exporting and when exporting ends.
• To cancel an ongoing export operation, use the SET button or
the CANCEL (SHIFT + EXIT) button to select [YES] and press
the SET button.
• Export is not available for events without video (a video event
indicated in a red frame or a blank space).
• Do not remove a P2 card for which export is being executed and
the LED of the card slot flashes.
Exporting a Playlist


