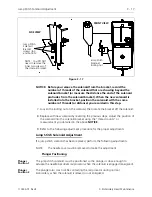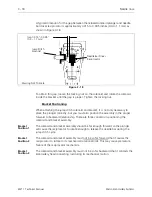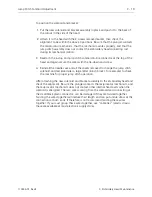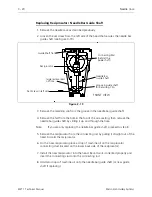
10. Remove the rotary hook
assembly for cleaning and
reinstallation, or for replacing
with a new one.
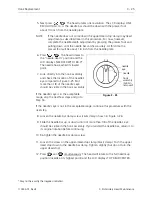
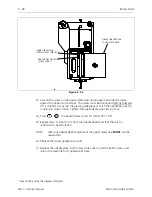
11. Press the keys to
again rotate the head to Head
Up.
12. Press the keys. The
head rotates to the ‘‘Needle
Depth’’ position without bringing
the needle down and the LCD
displays NEEDLE DEPTH 180.0*.
13. Press and the head
rotates to the ‘‘Hook Timing’’
position. The LCD displays
HOOK TIMING 201.0*.
14. Clean and replace the current
hook, or place a new rotary
hook on the hook shaft.
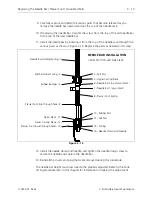
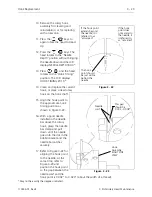
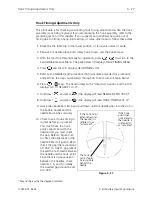
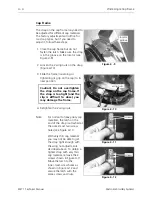
15. Align the hook point to
the approximate hook
timing position as
shown in Figure 3-22.
16. With a good needle
installed in the needle
bar above the rotary
hook, grasp the needle
bar clamp and pull
down until the needle
goes into the slot in the
bobbin basket and the
needle bar catches
securely.
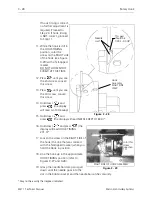
17. Refer to Figure 3-22 for
aligning the hook point
to the needle. At the
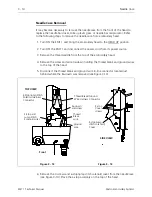
same time, refer to
Figure 3-23 and
position the hook point
so the gap between the
needle scarf and the
hook point is 0.002" to 0.020" (about the width of a thread).
* May not be exactly the degrees indicated.
The hook
point should
be just visible
behind the
needle
If the hook
point does
not extend to
the needle, it
is referred to
as "retarded"
If the hook point
extends beyond
the needle, it is
referred to as
"advanced"
Figure 3 - 22
This gap
should be
0.002 - 0.008"
Needle
scarf
Hook
Assembly
RIGHT SIDE
VIEW
Figure 3 - 23
Hook Replacement
3 - 23
110344-01, Rev B
3. Embroidery Head Maintenance
Содержание EMT 1
Страница 6: ...This page intentionally left blank Table of Contents 110344 01 Revision B iv EMT 1 Technical Manual ...
Страница 44: ...This page intentionally left blank 2 30 X Beam Assembly EMT 1 Technical Manual Melco Embroidery Systems ...
Страница 74: ...This page intentionally left blank 3 30 Rotary Hook EMT 1 Technical Manual Melco Embroidery Systems ...

