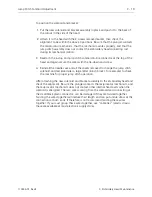
Replacing The Needle Bar / Presser Foot / Associated Parts
To replace the needle bar, presser foot or other associated parts, refer to the steps
below. Then turn to the Hook Timing procedure later in this chapter of the manual.
1. Turn ON the EMT 1 and bring the
embroidery head to the HEAD UP
position.
2. Turn OFF the EMT 1 and
disconnect the power cord from
its power source.
3. Remove the thread saddle from
the top of the embroidery head.
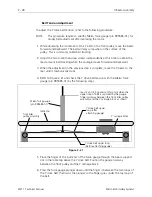
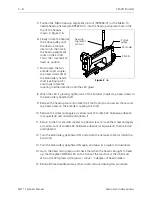
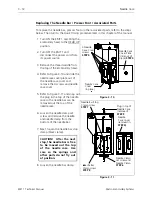
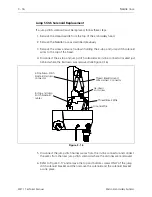
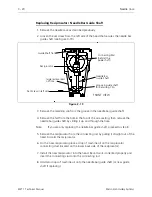
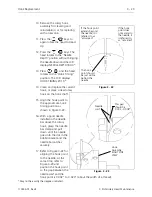
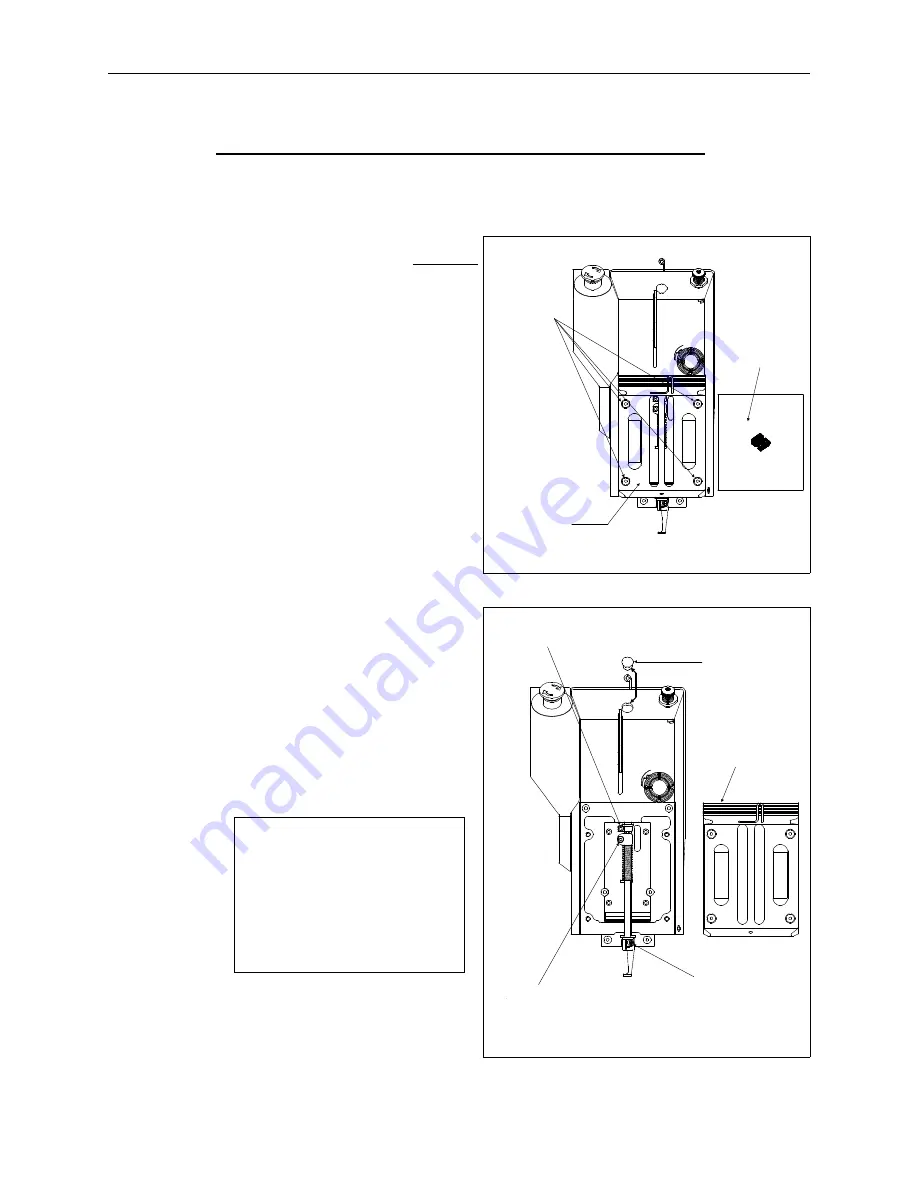
4. Refer to Figure 3-10 and slide the
needle case cover plate out of
the needle case cover and
remove the 4 screws and needle
case cover.
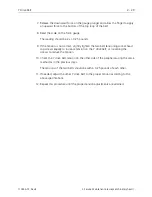
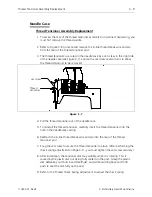
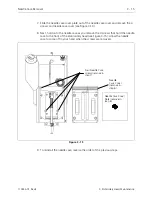
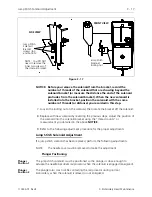
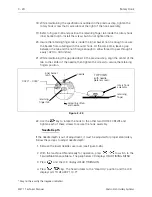
5. Refer to Figure 3-11 and snap out
the plug in the top of the needle
case so the needle bar can be
removed out the top of the
needle case.
6. Loosen the needle clamp set
screw and remove the needle
and needle clamp from the
bottom of the needle bar.
7. Next, loosen the needle bar stop
clamp (black clamp).
CAUTION! After the next
step, the needle bar is free
to be moved out the top
of the needle case. Use
care so the springs and
other parts do not fly out
of position.
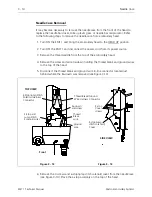
8. Loosen the needle bar clamp.
Needle Case
Cover Plate
(slide out of
place)
STEP 4
4 Needle
Case Cover
screws
STEP 4
Needle Case
Cover
(in place)
Figure 3 - 10
Plug in top of
Needle Case
(removed)
STEP 5
Needle
Case Cover
(removed in
STEP 4)
Needle Clamp
set screw and
Needle Clamp
STEP 6
Needle Bar Stop
Clamp screw
STEP 7
Needle Bar
Clamp screw
STEP 8
Figure 3 - 11
3 - 12
Needle Case
EMT 1 Technical Manual
Melco Embroidery Systems
Содержание EMT 1
Страница 6: ...This page intentionally left blank Table of Contents 110344 01 Revision B iv EMT 1 Technical Manual ...
Страница 44: ...This page intentionally left blank 2 30 X Beam Assembly EMT 1 Technical Manual Melco Embroidery Systems ...
Страница 74: ...This page intentionally left blank 3 30 Rotary Hook EMT 1 Technical Manual Melco Embroidery Systems ...

