MEDRAD
®
Mark 7 Arterion Injection System
16 - 102
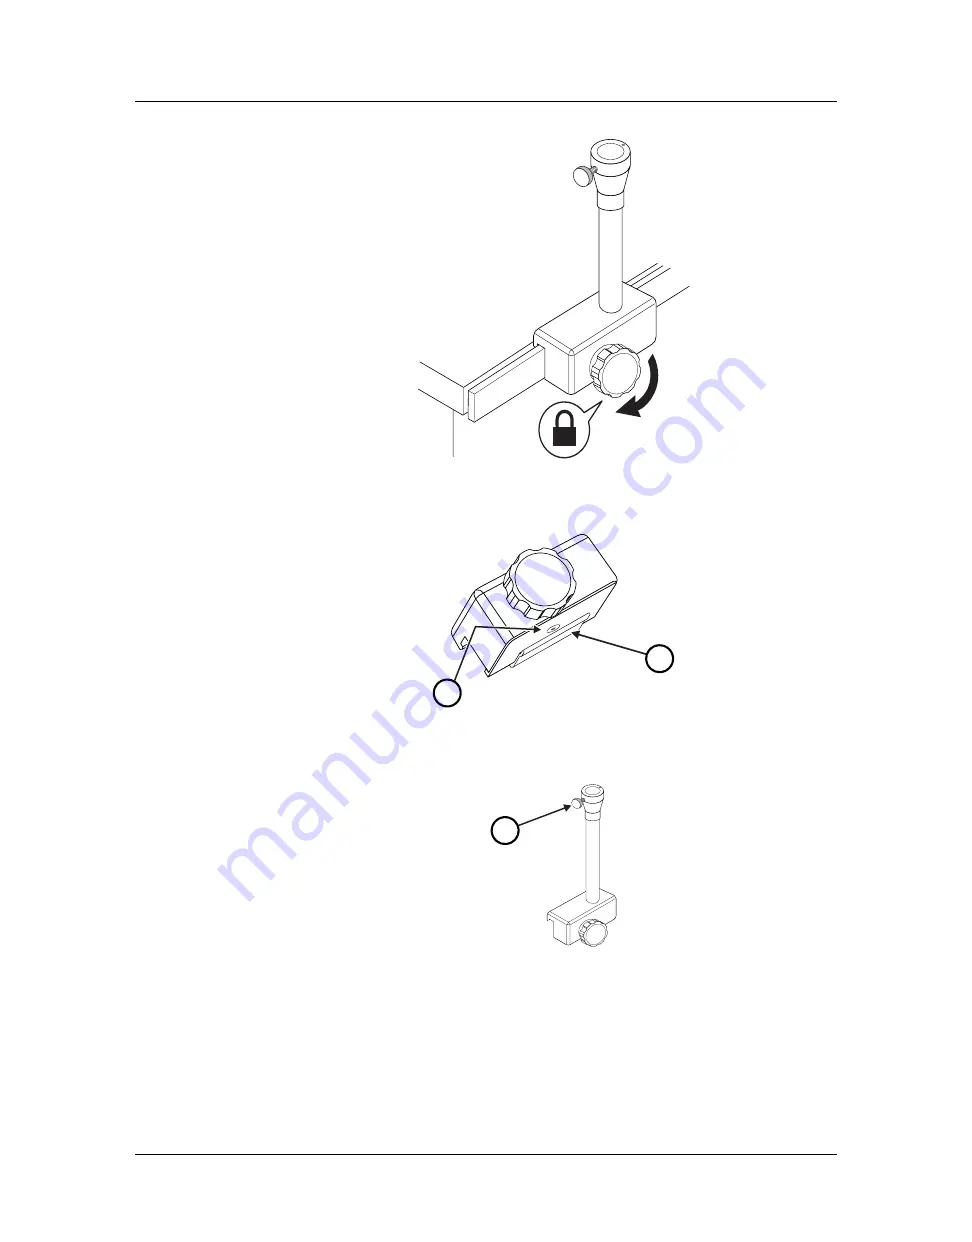
Figure 16 - 20: Tightening the Clamp Knob
4.
Using the 3/16” Hex Key provided, turn the adjusting screw (A) clockwise until Mounting
Lever (B) contacts the bottom of the rail.
Figure 16 - 21: Adjust Screw and Mounting Lever
5.
Turn the same adjusting screw (A) counterclockwise approximately 45 degrees; remove the
Hex Key.
Figure 16 - 22: Table Mount Knob
6.
Tighten the Clamp Knob until the Bracket Mount is firmly attached to the rail.
7.
Loosen the knob (C) by turning as far as possible counterclockwise.
8.
With the Display Control Unit attached to the Fulcrum Mount, insert the Fulcrum Mount pin
into the top of the Fixed Table Mount bracket.
9.
Secure the Display Control Unit by turning the knob (C) clockwise. When tightened properly,
the Display Control Unit should not move when pressing the touch screen.
A
B
C
Содержание Mark 7 Arterion
Страница 1: ...Operation Manual READ BEFORE USING...
Страница 2: ......
Страница 8: ...MEDRAD Mark 7 Arterion Injection System vi...
Страница 10: ...MEDRAD Mark 7 Arterion Injection System 1 2...
Страница 16: ...MEDRAD Mark 7 Arterion Injection System 2 8...
Страница 23: ...Symbols and Icons 3 15 This Way Up Not made with natural rubber latex...
Страница 24: ...MEDRAD Mark 7 Arterion Injection System 3 16...
Страница 36: ...MEDRAD Mark 7 Arterion Injection System 5 28...
Страница 48: ...MEDRAD Mark 7 Arterion Injection System 8 40...
Страница 58: ...MEDRAD Mark 7 Arterion Injection System 9 50...
Страница 68: ...MEDRAD Mark 7 Arterion Injection System 10 60 Figure 10 5 ISI Enabled...
Страница 80: ...MEDRAD Mark 7 Arterion Injection System 11 72...
Страница 90: ...MEDRAD Mark 7 Arterion Injection System 14 82...
Страница 146: ...MEDRAD Mark 7 Arterion Injection System 17 138...
Страница 152: ...MEDRAD Mark 7 Arterion Injection System 18 144...
Страница 156: ...MEDRAD Mark 7 Arterion Injection System A 148...
Страница 161: ......


