


3
4
5
1
2
1
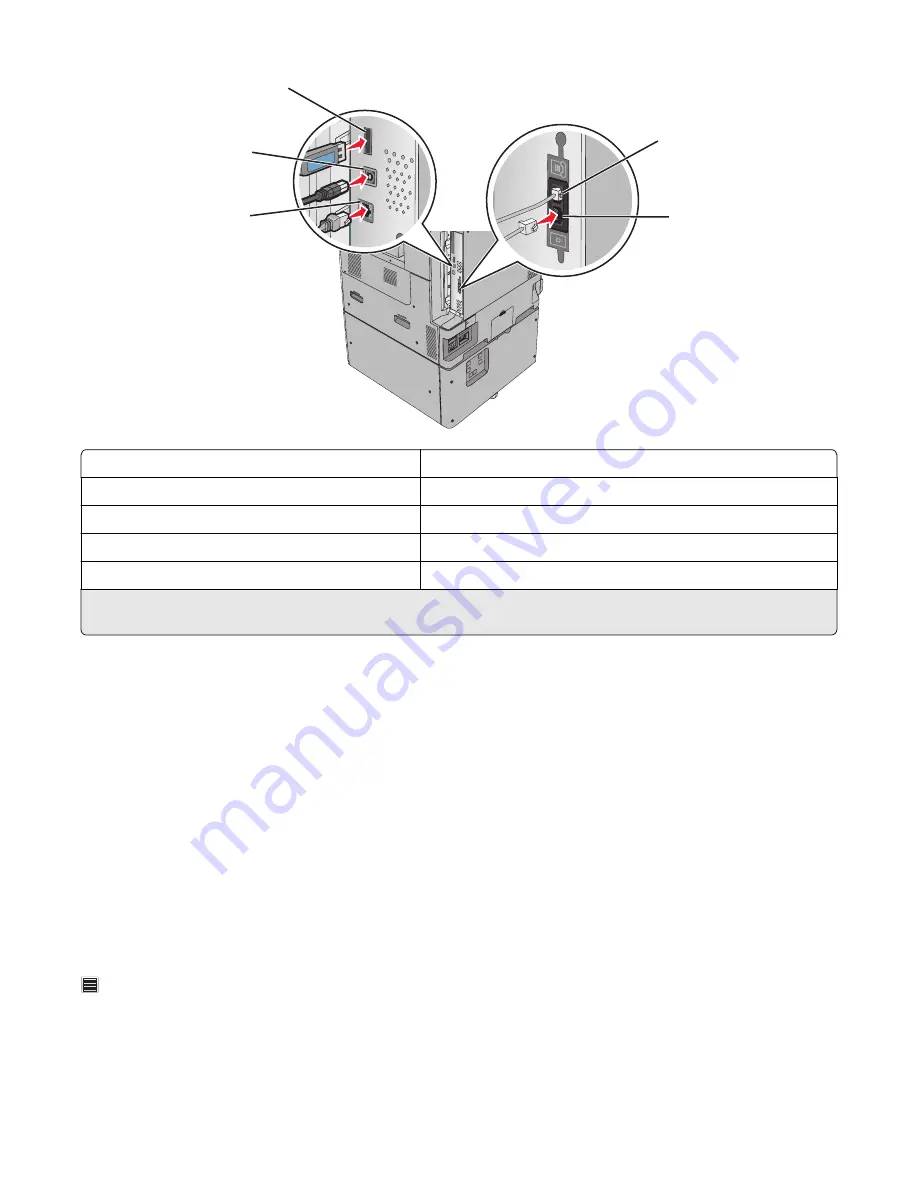
Telephone port
2
Fax port
3
Ethernet port
4
USB printer port
5
USB port
Warning—Potential Damage:
Do not touch the USB cable, any network adapter, or the printer in the area shown while
actively printing. A loss of data or a malfunction can occur.
Verifying printer setup
Once all hardware and software options are installed and the printer is turned on, verify that the printer is set up
correctly by printing the following:
•
Menu settings page
—Use this page to verify that all printer options are installed correctly. A list of installed options
appears toward the bottom of the page. If an option you installed is not listed, then it is not installed correctly.
Remove the option and install it again.
•
Network setup page
—If your printer is a network model and is attached to a network, print a network setup page
to verify the network connection. This page also provides important information that aids network printing
configuration.
Printing a menu settings page
From the home screen, navigate to:
>
Reports
>
Menu Settings Page
Additional printer setup
53
Содержание X950 Series
Страница 28: ...Touch To Reset Reset values on the screen Understanding the home screen 28 ...
Страница 242: ...4 Locate the printhead wipers Maintaining the printer 242 ...
Страница 244: ...7 Slide the release lever to the right to lock the cover 8 Close the front door Maintaining the printer 244 ...
Страница 245: ...Emptying the hole punch box 1 Open door G 2 Pull out the hole punch box Maintaining the printer 245 ...
Страница 254: ...11 Close the cover 12 Rotate the release lever clockwise to lock the cover Maintaining the printer 254 ...
Страница 259: ...7 Lower the cover 8 Slide out the printhead wipers 3x 3x 3x Maintaining the printer 259 ...
Страница 260: ...9 Slide the printhead wipers back into place 10 Close the cover Maintaining the printer 260 ...
Страница 266: ...3 Hold the tabs on both sides of the staple cartridge Maintaining the printer 266 ...
Страница 267: ...4 Rotate the booklet staple cartridge at an angle Maintaining the printer 267 ...
Страница 285: ...2 Open the top cover 1 2 2 3 Firmly grasp the jammed paper on each side and then gently pull it out Clearing jams 285 ...


