


Installing an Internal Solutions Port
The system board supports one optional Lexmark Internal Solutions Port (ISP).
Note:
This task requires a flathead screwdriver.
CAUTION—SHOCK HAZARD:
If you are accessing the system board or installing optional hardware or memory
devices sometime after setting up the printer, then turn the printer off, and unplug the power cord from the
wall outlet before continuing. If you have any other devices attached to the printer, then turn them off as well,
and unplug any cables going into the printer.
Warning—Potential Damage:
System board electronic components are easily damaged by static electricity. Touch
something metal on the printer before touching any system board electronic components or connectors.
1
Access the system board.
For more information, see “Accessing the system board” on page 36.
2
Remove the printer hard disk.
For more information, see “Removing a printer hard disk” on page 48
3
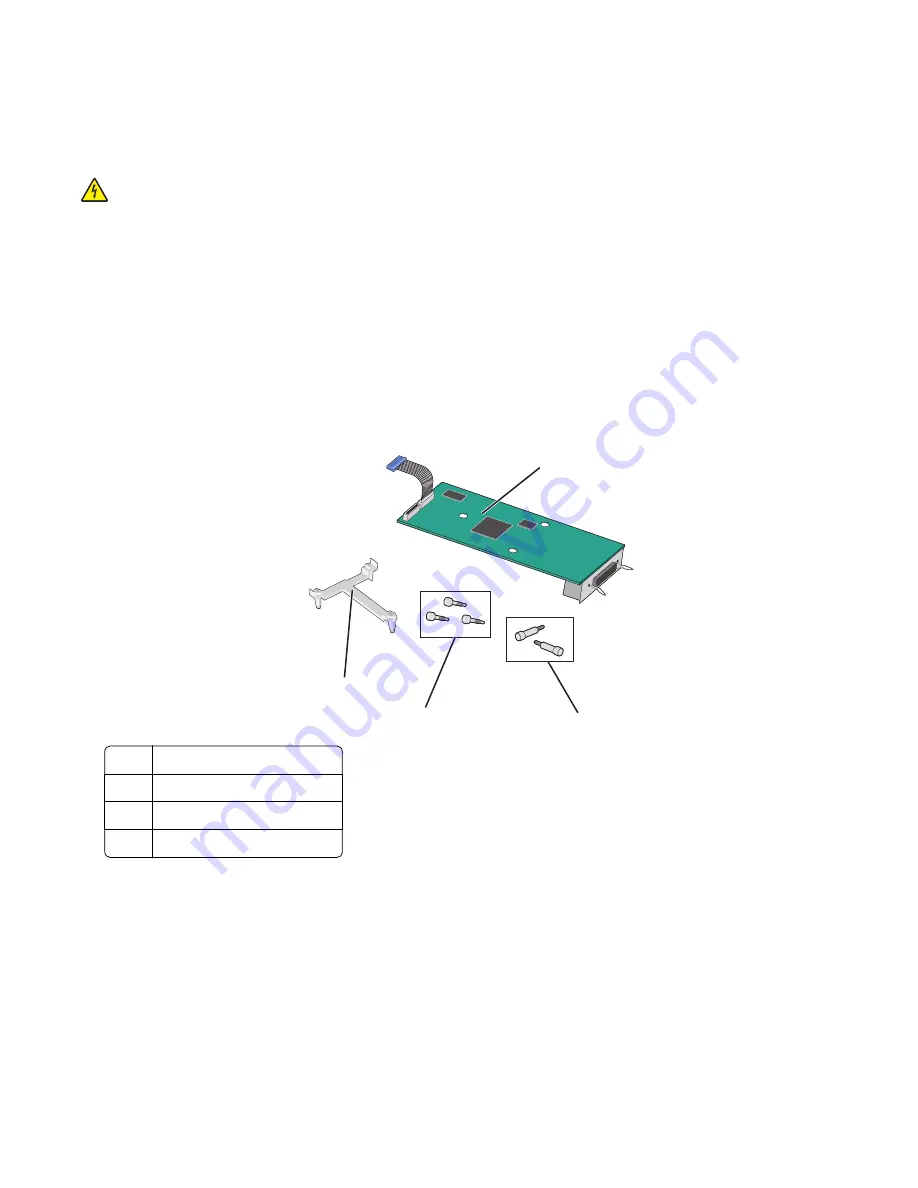
Unpack the ISP kit.
2
3
4
1
1
ISP solution
2
Screws for the ISP solution
3
Screws for the plastic bracket
4
Plastic bracket
Additional printer setup
41
Содержание X950 Series
Страница 28: ...Touch To Reset Reset values on the screen Understanding the home screen 28 ...
Страница 242: ...4 Locate the printhead wipers Maintaining the printer 242 ...
Страница 244: ...7 Slide the release lever to the right to lock the cover 8 Close the front door Maintaining the printer 244 ...
Страница 245: ...Emptying the hole punch box 1 Open door G 2 Pull out the hole punch box Maintaining the printer 245 ...
Страница 254: ...11 Close the cover 12 Rotate the release lever clockwise to lock the cover Maintaining the printer 254 ...
Страница 259: ...7 Lower the cover 8 Slide out the printhead wipers 3x 3x 3x Maintaining the printer 259 ...
Страница 260: ...9 Slide the printhead wipers back into place 10 Close the cover Maintaining the printer 260 ...
Страница 266: ...3 Hold the tabs on both sides of the staple cartridge Maintaining the printer 266 ...
Страница 267: ...4 Rotate the booklet staple cartridge at an angle Maintaining the printer 267 ...
Страница 285: ...2 Open the top cover 1 2 2 3 Firmly grasp the jammed paper on each side and then gently pull it out Clearing jams 285 ...


