


Connecting to a DSL service
If you subscribe to a DSL service, then contact the DSL provider to obtain a DSL filter and telephone cord, and then
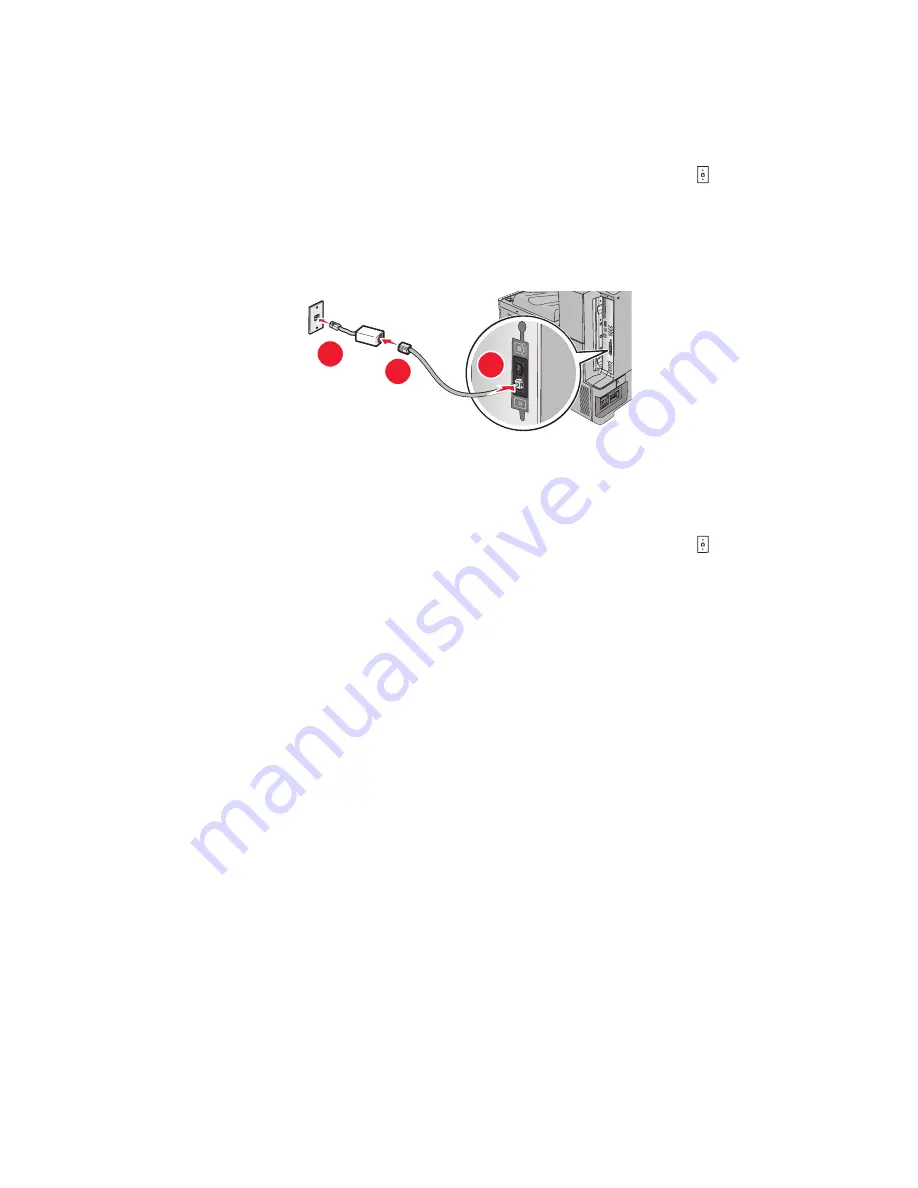
follow these steps to connect the equipment:
1
Connect one end of the telephone cable that came with the printer to the printer LINE port .
2
Connect the other end of the telephone cable to the DSL filter.
Note:
Your DSL filter may look different than the one in the illustration.
3
Connect the DSL filter cable to an active telephone wall jack.
3
2
1
Connecting to a PBX or ISDN system
If you use a PBX or ISDN converter or terminal adapter, then follow these steps to connect the equipment:
1
Connect one end of the telephone cable that came with the printer to the printer LINE port .
2
Connect the other end of the telephone cable to the port designated for fax and telephone use.
Notes:
•
Make sure the terminal adapter is set to the correct switch type for your region.
•
Depending on the ISDN port assignment, you may have to connect to a specific port.
•
When using a PBX system, make sure the call waiting tone is off.
•
When using a PBX system, dial the outside line prefix before dialing the fax number.
•
For more information on using the fax with a PBX system, see the documentation that came with your PBX
system.
Faxing
126
Содержание X950 Series
Страница 28: ...Touch To Reset Reset values on the screen Understanding the home screen 28 ...
Страница 242: ...4 Locate the printhead wipers Maintaining the printer 242 ...
Страница 244: ...7 Slide the release lever to the right to lock the cover 8 Close the front door Maintaining the printer 244 ...
Страница 245: ...Emptying the hole punch box 1 Open door G 2 Pull out the hole punch box Maintaining the printer 245 ...
Страница 254: ...11 Close the cover 12 Rotate the release lever clockwise to lock the cover Maintaining the printer 254 ...
Страница 259: ...7 Lower the cover 8 Slide out the printhead wipers 3x 3x 3x Maintaining the printer 259 ...
Страница 260: ...9 Slide the printhead wipers back into place 10 Close the cover Maintaining the printer 260 ...
Страница 266: ...3 Hold the tabs on both sides of the staple cartridge Maintaining the printer 266 ...
Страница 267: ...4 Rotate the booklet staple cartridge at an angle Maintaining the printer 267 ...
Страница 285: ...2 Open the top cover 1 2 2 3 Firmly grasp the jammed paper on each side and then gently pull it out Clearing jams 285 ...


