


Connecting to a distinctive ring service
A distinctive ring service may be available from your telephone service provider. This service allows you to have multiple
telephone numbers on one telephone line, with each telephone number having a different ring pattern. This may be
useful for distinguishing between fax and voice calls. If you subscribe to a distinctive ring service, then follow these
steps to connect the equipment:
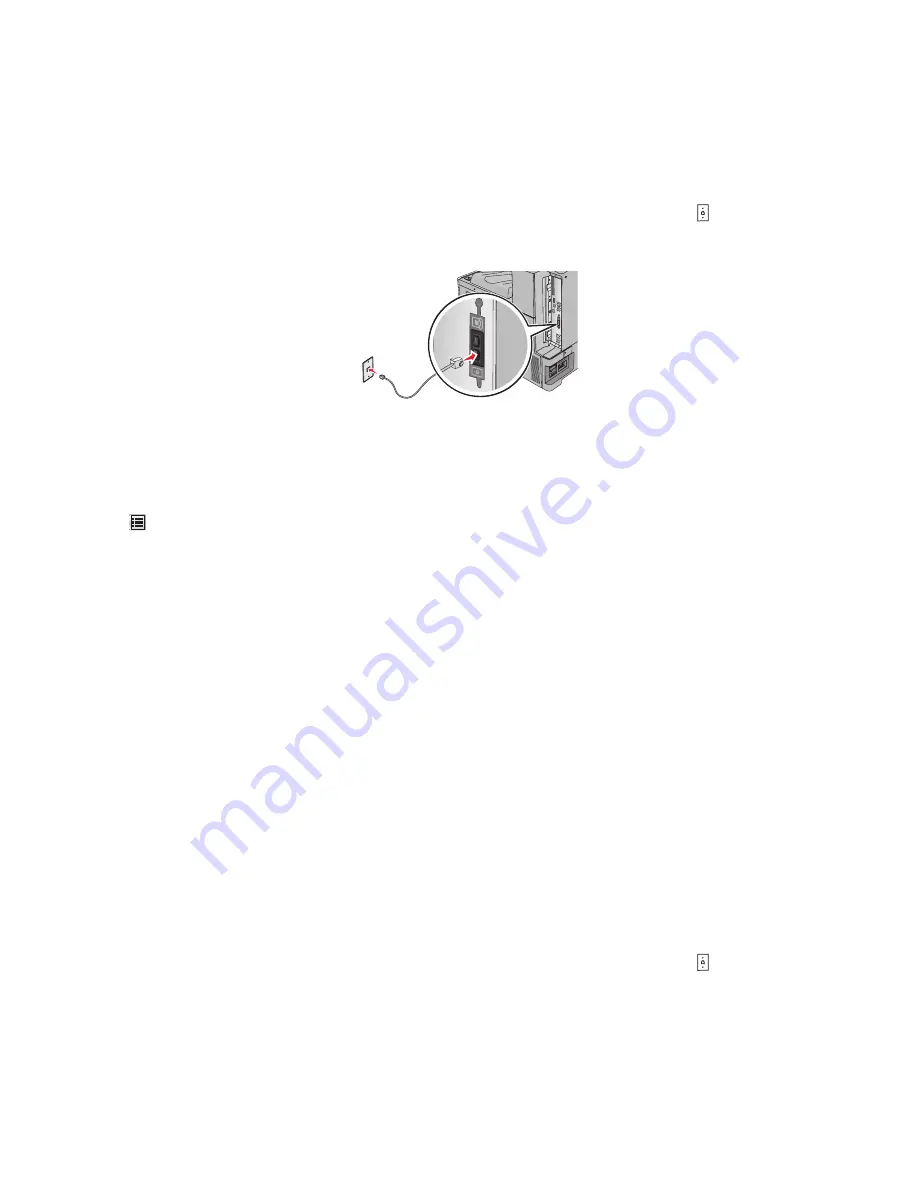
1
Connect one end of the telephone cable that came with the printer to the printer LINE port .
2
Connect the other end of the telephone cable to an active analog telephone wall jack.
3
Change the Distinctive Rings setting to match the setting you want for the printer to answer:
Note:
The factory default setting for distinctive rings is
On
. This allows the printer to answer single, double, and
triple ring patterns.
a
From the home screen, navigate to:
>
Settings
>
Fax Settings
>
Analog Fax Settings
>
Distinctive Rings
b
Select the pattern setting you want to change, and then touch
Submit
.
Connecting to an adapter for your country or region
The following countries or regions may require a special adapter to connect the telephone cable to the active telephone
wall jack:
Country/Region
•
Austria
•
Cyprus
•
Denmark
•
Finland
•
France
•
Germany
•
Ireland
•
Italy
•
New Zealand
•
Netherlands
•
Norway
•
Portugal
•
Sweden
•
Switzerland
•
United Kingdom
For some countries or regions, a telephone line adapter is included in the box. Use this adapter to connect an answering
machine, telephone, or other telecommunications equipment to the printer.
1
Connect one end of the telephone cable that came with the printer to the printer LINE port
2
Connect the other end of the telephone cable to the adapter, and then connect the adapter to the active telephone
wall jack.
Note:
Your telephone adapter may look different than the one shown. It will fit the wall jack used in your
location.
Faxing
127
Содержание X950 Series
Страница 28: ...Touch To Reset Reset values on the screen Understanding the home screen 28 ...
Страница 242: ...4 Locate the printhead wipers Maintaining the printer 242 ...
Страница 244: ...7 Slide the release lever to the right to lock the cover 8 Close the front door Maintaining the printer 244 ...
Страница 245: ...Emptying the hole punch box 1 Open door G 2 Pull out the hole punch box Maintaining the printer 245 ...
Страница 254: ...11 Close the cover 12 Rotate the release lever clockwise to lock the cover Maintaining the printer 254 ...
Страница 259: ...7 Lower the cover 8 Slide out the printhead wipers 3x 3x 3x Maintaining the printer 259 ...
Страница 260: ...9 Slide the printhead wipers back into place 10 Close the cover Maintaining the printer 260 ...
Страница 266: ...3 Hold the tabs on both sides of the staple cartridge Maintaining the printer 266 ...
Страница 267: ...4 Rotate the booklet staple cartridge at an angle Maintaining the printer 267 ...
Страница 285: ...2 Open the top cover 1 2 2 3 Firmly grasp the jammed paper on each side and then gently pull it out Clearing jams 285 ...


