


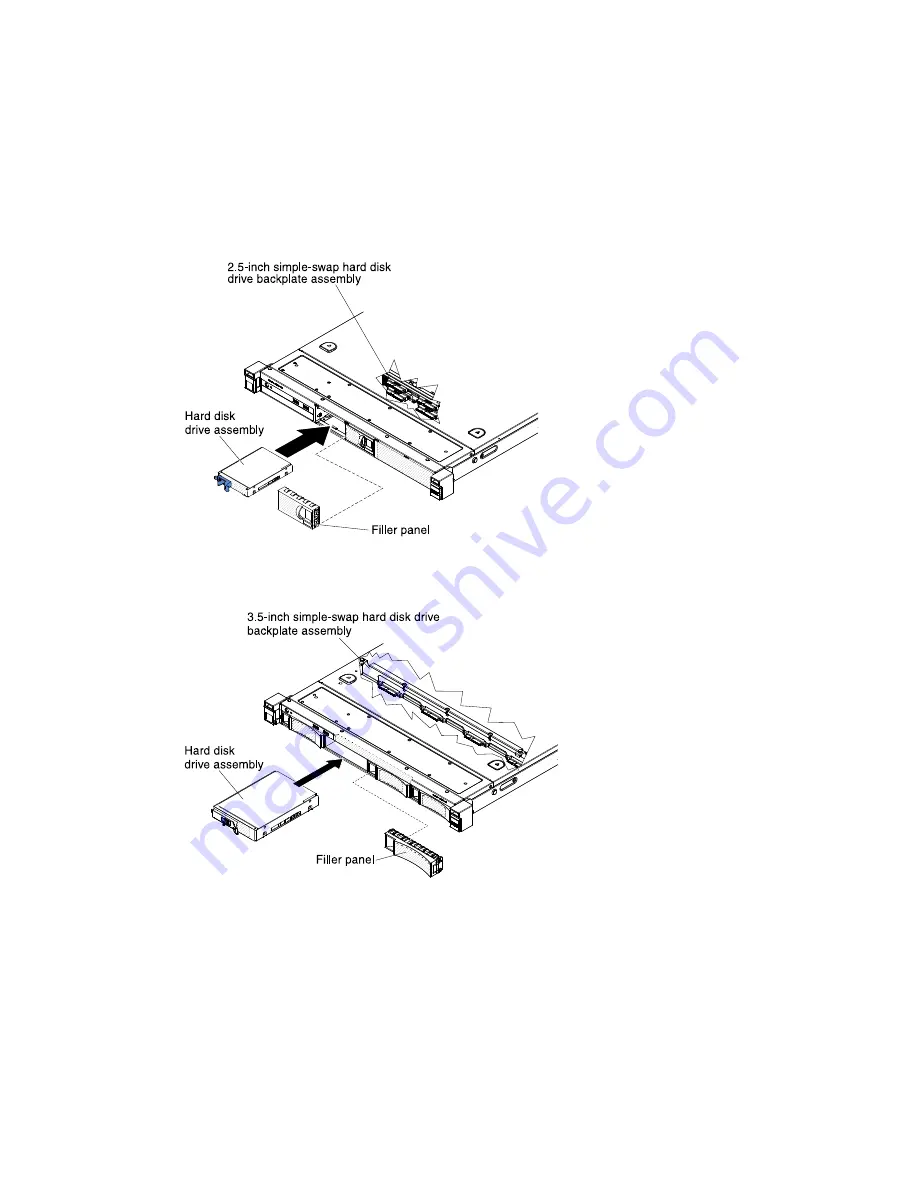
Step 1.
Remove the filler panel from the empty drive bay.
Step 2.
Touch the static-protective package that contains the drive to any unpainted metal surface on the
server; then, remove the drive from the package and place it on a static-protective surface.
Step 3.
Install the hard disk drive in the drive bay:
a.
Grasp the black drive handle and slide the blue release latch to the right and align the drive
assembly with the guide rails in the bay.
000
000
000
000
000
000000
000000
000000
000000
000000
000
000
Figure 105. 2.5-inch simple-swap hard disk drive installation
0000
0000
0000
0000
00
00
0000
0000
000
000
000
000
00000000
00000000
00000000
00000000
00000000
Figure 106. 3.5-inch simple-swap hard disk drive installation
b.
Gently push the drive into the bay until the drive stops.
Step 4.
Reinstall the drive bay filler panel that you removed earlier.
Step 5.
If you are installing additional simple-swap hard disk drives, do so now.
What to do next
1. Install the server into the rack enclosure and push the server into the rack until it clicks into place.
178
Lenovo System x3250 M5Installation and Service Guide
Содержание System x3250 M5
Страница 1: ...Lenovo System x3250 M5 Installation and Service Guide Machine Type Type 5458 ...
Страница 6: ...iv Lenovo System x3250 M5Installation and Service Guide ...
Страница 36: ...22 Lenovo System x3250 M5Installation and Service Guide ...
Страница 98: ...84 Lenovo System x3250 M5Installation and Service Guide ...
Страница 122: ...108 Lenovo System x3250 M5Installation and Service Guide ...
Страница 162: ...Figure 84 Server components 148 Lenovo System x3250 M5Installation and Service Guide ...
Страница 546: ...532 Lenovo System x3250 M5Installation and Service Guide ...
Страница 722: ...708 Lenovo System x3250 M5Installation and Service Guide ...
Страница 738: ...724 Lenovo System x3250 M5Installation and Service Guide ...
Страница 739: ......
Страница 740: ......


