54
IDS X-Series Training v2.7
Sub-location 1: Add Wireless Detector
Note: Do not place batteries into multiple Xwave
2
devices while learning, only do one at a time and close
the housing once complete as if left open in the tamper state, each device will continuously send join
requests.
Using an LED Keypad
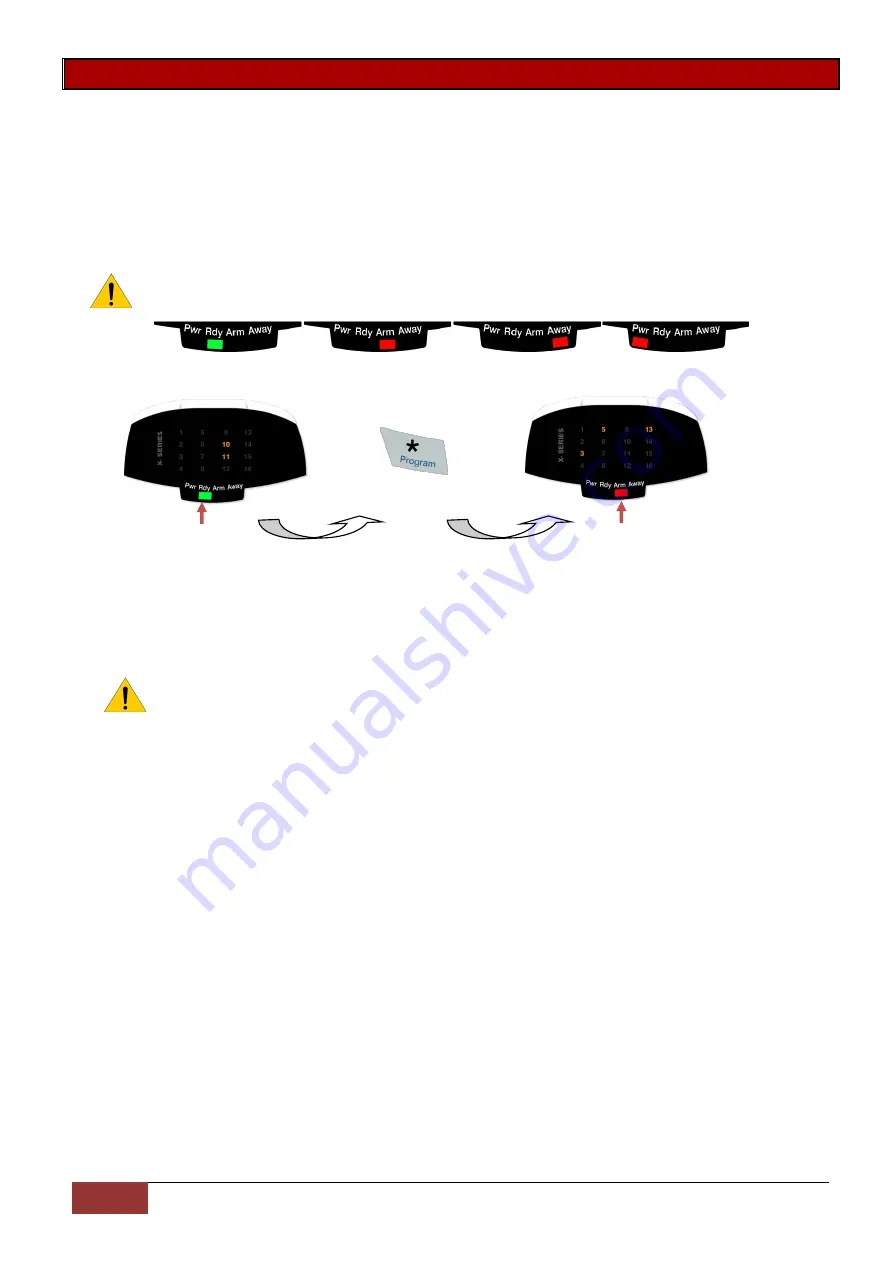
When working with more than 16 zones on an LED keypad press the [*] key to page through to the
next 16 zones.
Note: Each time a new page of zones are shown the Pwr, Rdy, Arm and Away LEDs will change
to show which zones are being displayed.
Zones 1 to 16 Zones 17 to 32
Zones 33 to 49
Zones 49 to 64
Example:
Press
On
On
Zones 1 to 16
Zones 17 to 32
Wireless zones 10 & 11
Wireless zones 19, 21 & 29
1.
Zone LEDs will be ON if the zone already has a wireless detector assigned.
The menu is now waiting for the user to select which zone to add a detector. If the user selects
a pre-allocated zone then the keypad will sound 3 error beeps and wait for a valid zone entry.
Note: Detectors may only be added on LED keypads via the tamper method.
2.
Upon valid zone selection the keypad will sound an OK (single beep) and the zone LED will
start flashing. The system is now waiting for the new detector to be tampered.
When the user triggers the tamper the system will receive a notification and determine whether
the detector has already been assigned to any other zones. If this is the case the user will be
notified by 3 error beeps and the menu will keep waiting for a tamper from an unassigned
detector.
If the detector has not been assigned then it will be automatically added to the system. The
user will be notified via keypad by a long beep as well as the zone LED previously flashing will
now be ON.
3.
The system will now wait for a new zone to be selected.
4.
[#] key at any time will return the user back to the sub menu selection menu.


