CAUTION:
To avoid damaging the hardware or losing data, always confirm that the drive is
ready for removal by its solid amber fault LED.
IMPORTANT:
If you do not see a solid amber fault LED on the drive, it could be the data has
not been vacated yet. When the drive has failed and been spun down, the fault LED becomes
lit solid amber and only then can you proceed with removal. This process may take several
hours.
Removal
IMPORTANT:
Do not remove the failed drive until you have the replacement drive ready. To prevent
overheating, do not leave the drive bay unpopulated for more than 10 minutes.
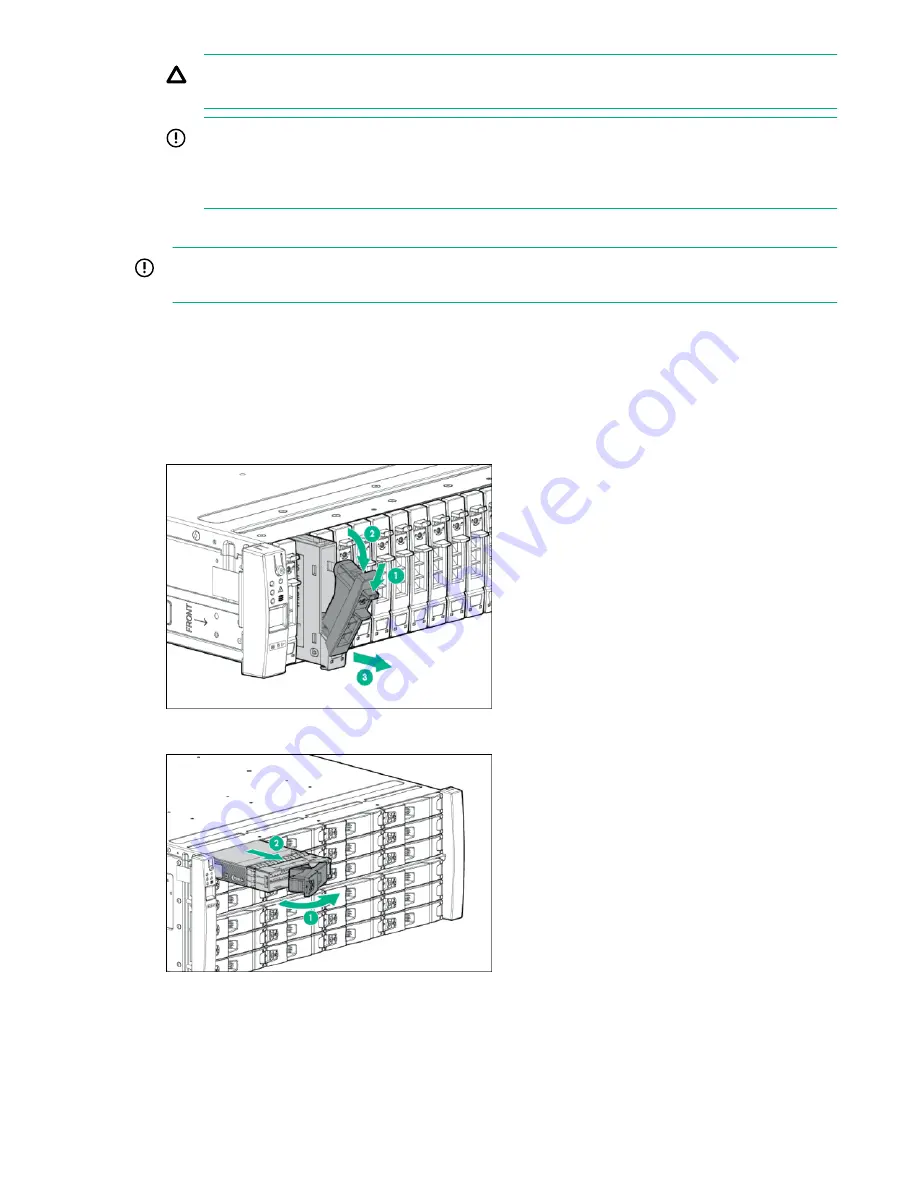
9.
Remove the drive.
a.
To release the handle into the open position, pinch the latch handle to release the handle into the
open position (1).
b.
Extend the latch handle (2).
c.
Slide the drive out of the bay (3) and place on an ESD safe mat.
Figure 15: Removing an SFF drive
Figure 16: Removing an LFF drive
Replacement
10.
Install the drive.
Service
23


