CPU heatsink
This section describes how to remove and install a CPU heatsink.
Removing the CPU heatsink
To remove a heatsink:
1.
Power down the workstation (see
Predisassembly procedures on page 75
).
2.
Disconnect power from the workstation (see
Predisassembly procedures on page 75
).
3.
Remove the side access panel (see
Removing the side access panel on page 78
).
4.
If your system has an airflow guide, remove it (see
Removing the airflow guide on page 110
).
5.
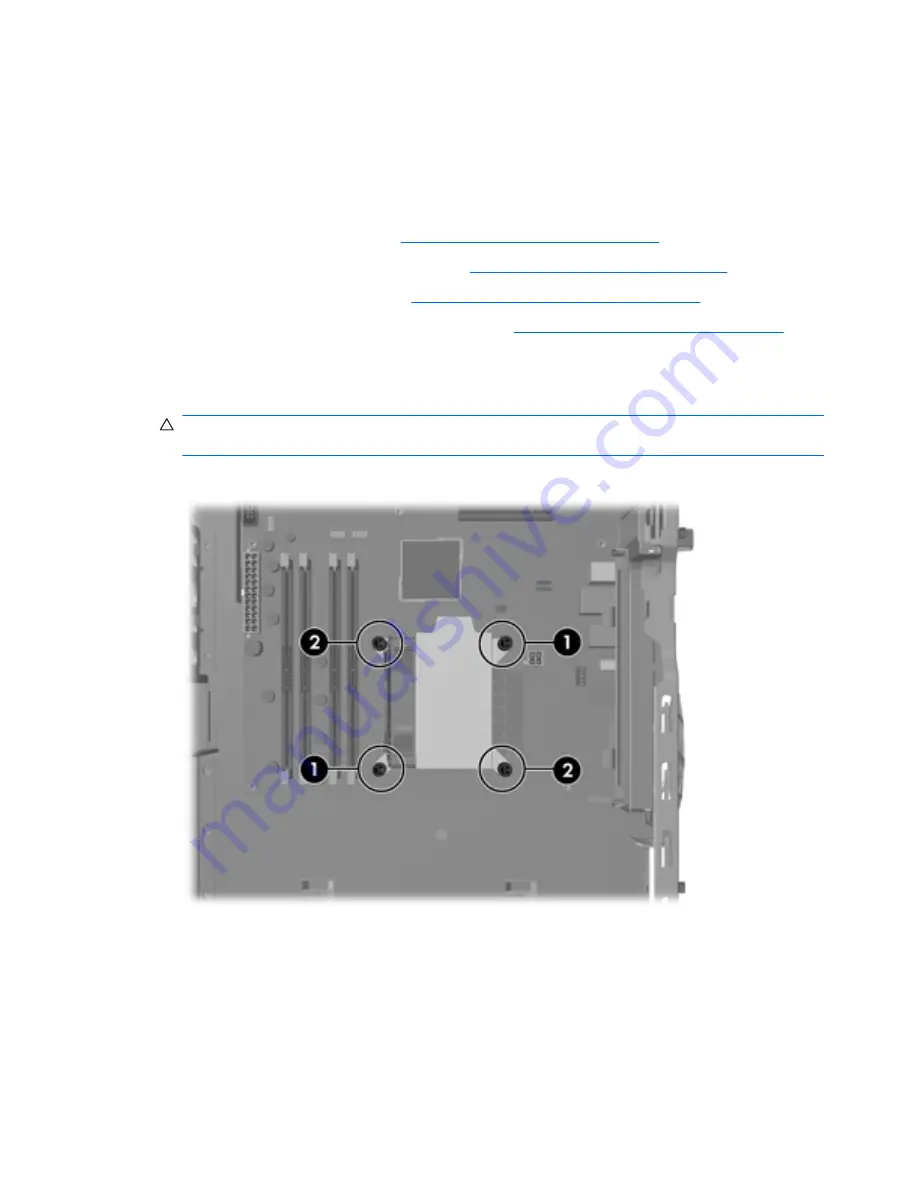
Slowly and evenly loosen one pair of diagonally opposite screws (1) from the CPU until the screw
shanks disengage from the system board, and then loosen the remaining pair (2), as shown
below.
CAUTION:
Do
not
fully loosen one screw, and then move on to the next. Instead, loosen all
screws a little at a time, ensuring that the CPU heatsink remains level.
Figure 5-79
Loosening heatsink screws in sequence
154
Chapter 5 Replacing components
ENWW
Содержание Z400 - Workstation
Страница 1: ...HP Z400 Workstation Maintenance and Service Guide ...
Страница 4: ...iv About this guide ENWW ...
Страница 12: ...Index 241 xii ENWW ...


