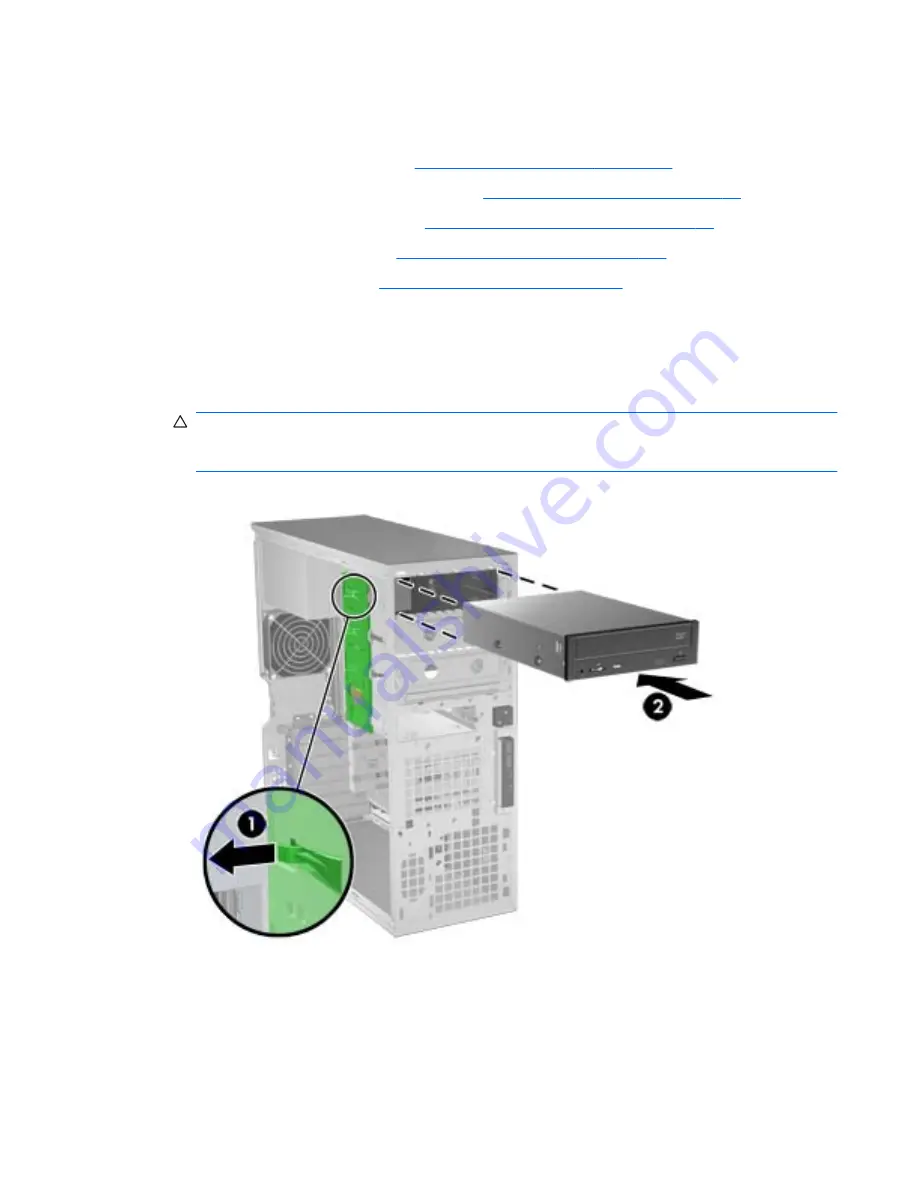
Installing an optical disk drive in the optical bay (mini-tower configuration)
To install an optical disk drive:
1.
Power down the workstation (see
Predisassembly procedures on page 75
).
2.
Disconnect power from the workstation (see
Predisassembly procedures on page 75
).
3.
Remove the side access panel (see
Removing the side access panel on page 78
).
4.
Remove the airflow guide (see
Removing the airflow guide on page 110
).
5.
Remove the front bezel (see
Removing the front bezel on page 83
).
6.
Remove the bezel blank where you want to add the drive.
7.
Install the four black metric M3 guide screws into the sides of the drive.
8.
Lift the green release lever (1), align the screws with the grooves in the drive bay, and gently slide
the drive into the bay until it snaps into place (2)..
CAUTION:
Ensure that the optical drive is secure in the workstation chassis by pulling on the
drive to see if it can be disengaged. Failure to properly secure the drive can cause damage to the
drive when moving the workstation.
Figure 5-17
Installing the optical disk drive
9.
Connect the power and data cables to the drive as shown in the following figure. (See the service
label on the side access panel for component locations in your model of Z400.)
ENWW
Removing and installing components
91
Содержание Z400 - Workstation
Страница 1: ...HP Z400 Workstation Maintenance and Service Guide ...
Страница 4: ...iv About this guide ENWW ...
Страница 12: ...Index 241 xii ENWW ...


