


190
LiveTouch Setup on the Desktop Client
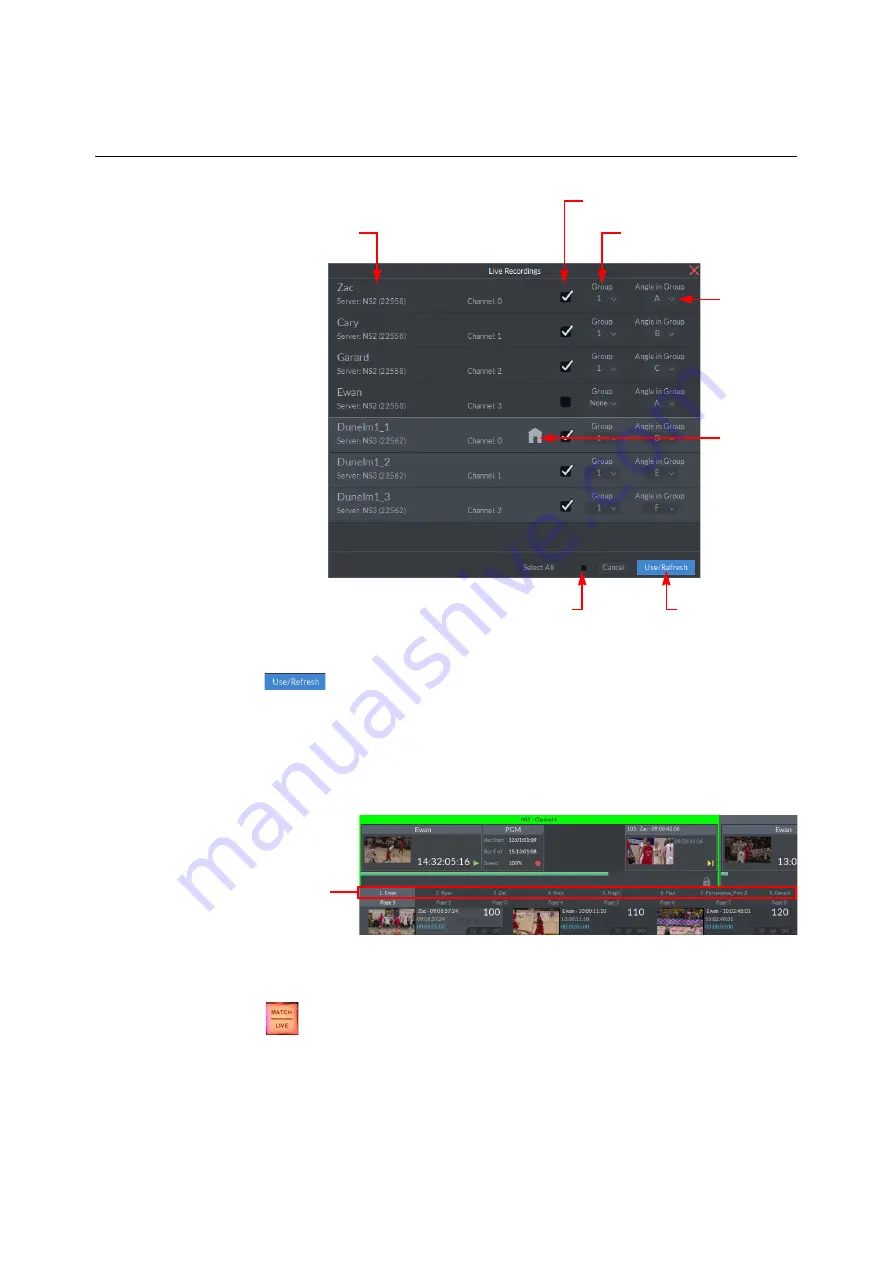
Selecting Live Recordings
3 Click
to save your changes and use the selected channels for the live
recordings being monitored.
The
Refresh
function is also useful when elements such as recording names are
changed.
LiveTouch displays the available channels you can select in a series of tabs directly
below the Port windows on the Desktop.
To switch to a different live recording, click the appropriate tab or use the live recording key
on the Panel, possibly in combination with the camera number, for example:
12
+
.
Fig. 5-7: Defining Live Recordings
Camera Angle
Groupings
Channel Selection Checkboxes
Available Servers
Use Selected
Ports for Live
Recordings
Select All Checkboxes
Group Numbers
Home Angle
in Group
Fig. 5-8: LiveTouch Live Recording Tabs
Live Recording
Tabs
Содержание LIVETOUCH
Страница 16: ...xvi Notices ...
Страница 52: ...52 Getting Started Closing the Live Ports ...
Страница 99: ...99 Live Touch User Guide Fig 3 41 Aux Audio Edit Client Fig 3 42 Aux Audio Edit Client ...
Страница 164: ...164 Configuring the LiveTouch Panel Settings Server Publish Settings Fig 4 13 Server Publish Settings Metadata Fields ...
Страница 193: ...193 LiveTouch Desktop Application ...
Страница 254: ...254 Configuring the LiveTouch Desktop Settings Play through ...


