RX II Series User Manual
Installation
2-20
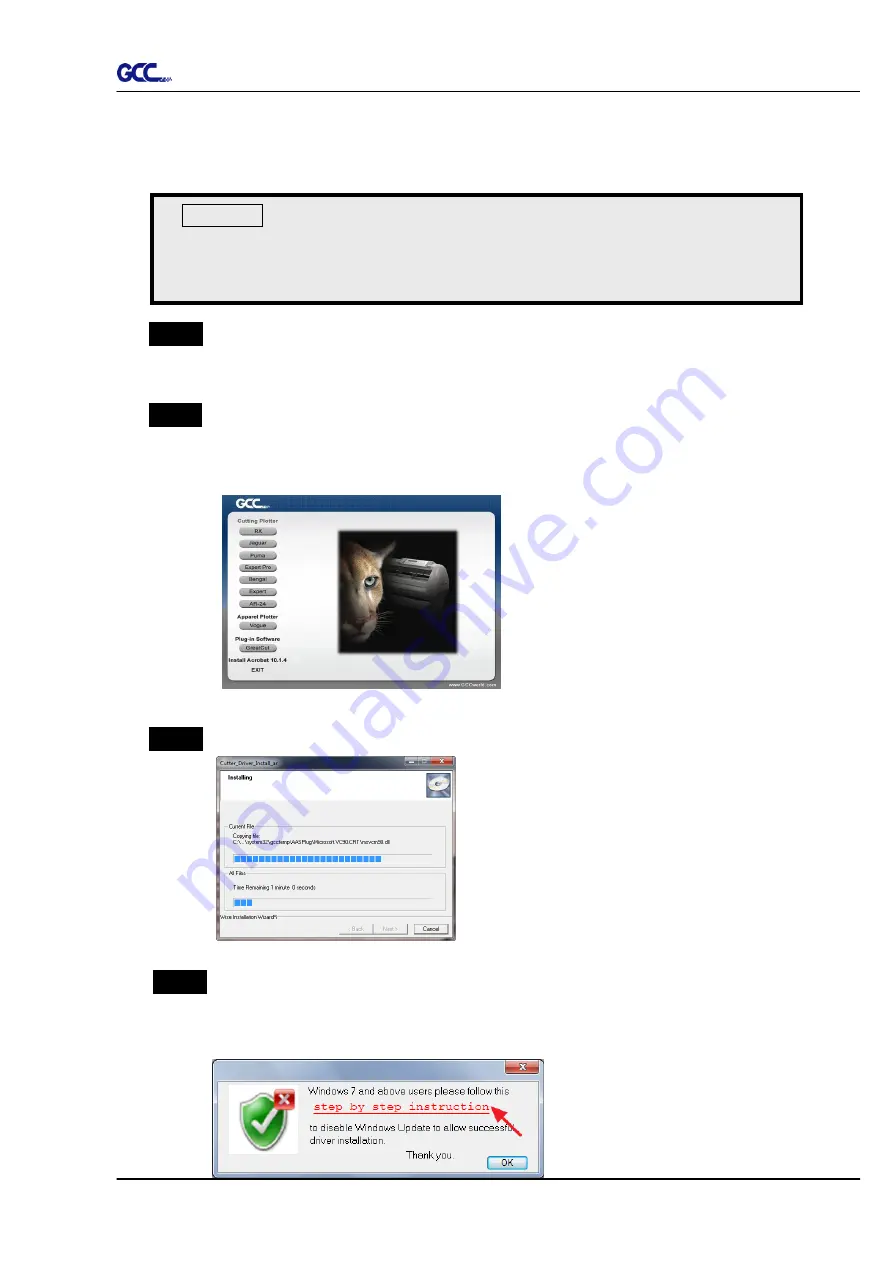
2.8.1.2 Installing the driver
Use the USB One-click Installation for quick driver installation. Follow the simple
steps below for driver setup.
Step 1
Put the installation DVD into your CD-ROM.
Please make sure that the USB
device is connected before you start the driver installation.
Step 2
Choose the model you want to install from the driver list and click on Windows
Driver (Win 7 and Above) (Automatic Detection) or Windows Driver (Win 7
and Above) (Manual Selection) to start installing the Driver and AAS plug-in.
Step 3
Click “Next” to start the driver installation.
Step 4
If you were Windows 7
and above users, please click on the
red words
to
instruct you how to disable Windows Update to allow success driver
installation. And then click OK to next step.
Caution!!
If you are using Windows 7 and above as your operating system,
make s
ure you log in using the “Administrator” account.
Содержание RX II Series
Страница 1: ...V 24 2020 May RX II Series User Manual http www GCCworld com...
Страница 160: ...RX II User Manual GreatCut Plug In A 6 Step 5 Click output and the object will be sent to GCC Cutting Plotter...
Страница 174: ...RX II User Manual GreatCut Plug In A 6 Step 5 Press the button on the right of Jog marks...
Страница 179: ...RX II User Manual GreatCut Plug In A 6 Step 5 Click output and the object will be sent to GCC Cutting Plotter...
Страница 190: ...RX II User Manual GreatCut Plug In A 6 Step 11 Go to GreatCut window press Output button...
Страница 191: ...RX II User Manual GreatCut Plug In A 6...
Страница 205: ...RXII User Manual SignPal 12 Instruction A 6...
Страница 206: ...RXII User Manual SignPal 12 Instruction A 6 3 Select File Print Setup in SignPal Software and select the printer...
Страница 207: ...RXII User Manual SignPal 12 Instruction A 6 4 Select File Document Setup in SignPal and select paper size...
Страница 212: ...RXII User Manual SignPal 12 Instruction A 6...


