RX II Series User Manual
Installation
2-19
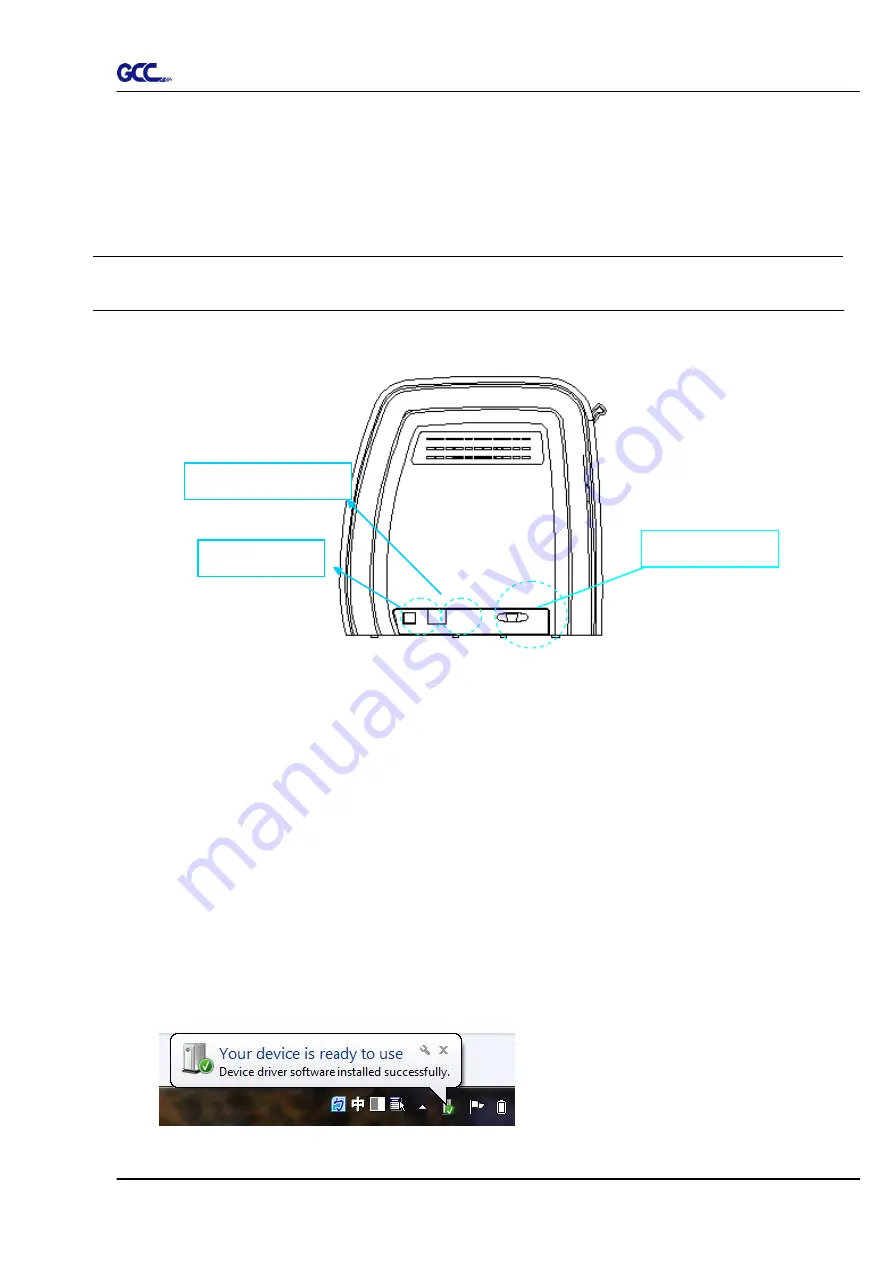
2.8 Cable Connection
The cutting plotter communicates with a computer through a
USB (Universal Serial Bus), Serial
port
(RS-232C) or
an
Ethernet port
. This chapter shows you how to connect the cutting plotter
to a host computer and how to set up the computer/cutting plotter interconnection.
!!
Notice:
When USB connection is enabled, the serial port will be disabled automatically.
2.8.1 USB Interface
RX II series build-in USB interface are based on the Universal Serial Bus Specifications
Revision 2.0 (Full Speed).
2.8.1.1 Connecting your GCC cutter
1. Turn on the machine.
2. Connect the USB connector to the machine and then USB driver will installed
automatically. It will take a few minutes to find the device. Please DO NOT disconnect
the USB cable until the installation has completed.
3. You can double click the USB icon on the taskbar to make sure the USB device is
detected.
Figure 2-30
Serial port
USB port
Ethernet port
Содержание RX II Series
Страница 1: ...V 24 2020 May RX II Series User Manual http www GCCworld com...
Страница 160: ...RX II User Manual GreatCut Plug In A 6 Step 5 Click output and the object will be sent to GCC Cutting Plotter...
Страница 174: ...RX II User Manual GreatCut Plug In A 6 Step 5 Press the button on the right of Jog marks...
Страница 179: ...RX II User Manual GreatCut Plug In A 6 Step 5 Click output and the object will be sent to GCC Cutting Plotter...
Страница 190: ...RX II User Manual GreatCut Plug In A 6 Step 11 Go to GreatCut window press Output button...
Страница 191: ...RX II User Manual GreatCut Plug In A 6...
Страница 205: ...RXII User Manual SignPal 12 Instruction A 6...
Страница 206: ...RXII User Manual SignPal 12 Instruction A 6 3 Select File Print Setup in SignPal Software and select the printer...
Страница 207: ...RXII User Manual SignPal 12 Instruction A 6 4 Select File Document Setup in SignPal and select paper size...
Страница 212: ...RXII User Manual SignPal 12 Instruction A 6...


