RX II Series User Manual
Illustrator Plug-In A-5
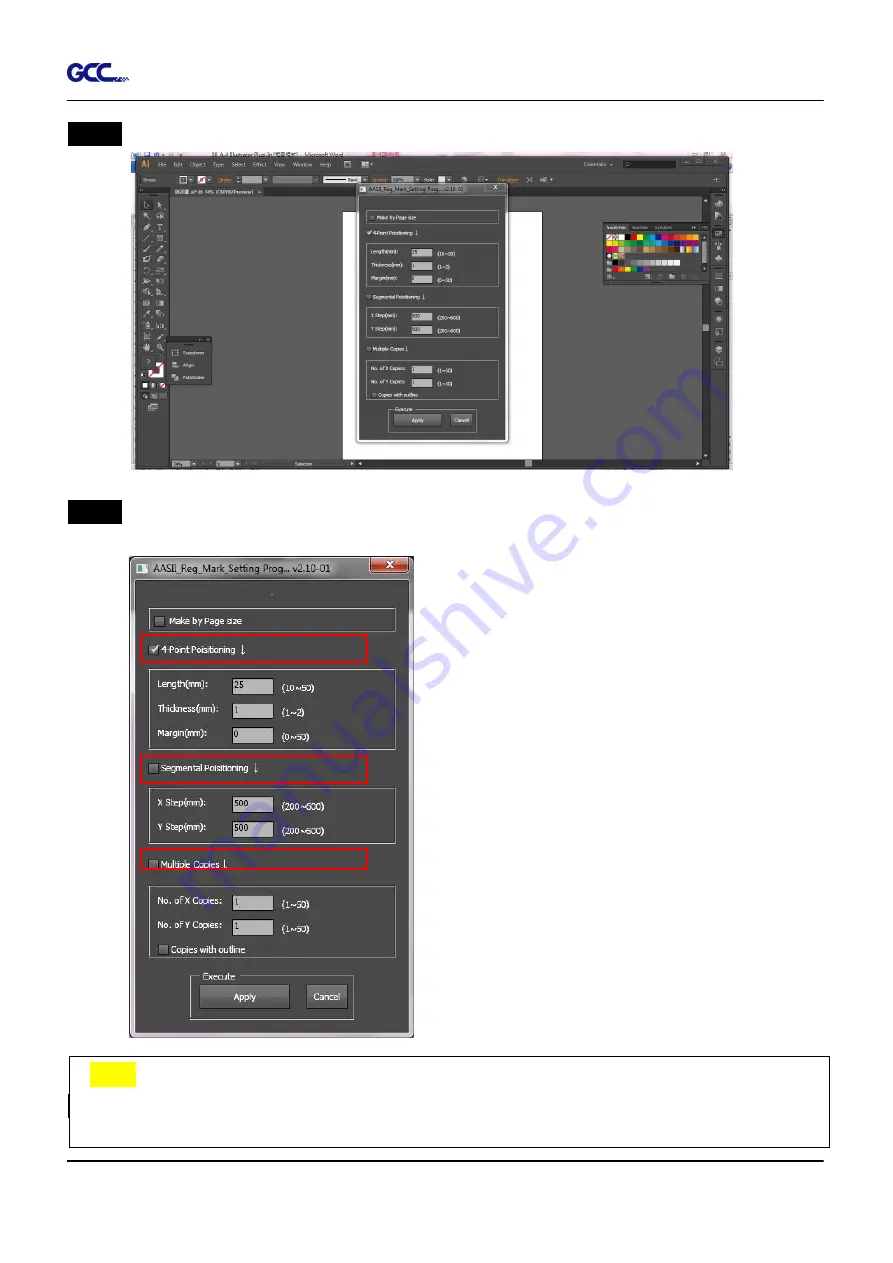
Step 4
Select the registration marks needed
Step 5
Three types of registration marks are introduced here: 4-Point Positioning, Segmental
Positioning and Multiple Copies.
Step 6
Confirm the registration marks (the 4-Point Position mark is used as an illustration in the
following steps).
Note:
The values entered in the “4-Point Positioning” section (length, thickness and margin)
will still be applied when you tick “Segmental Positioning” or “Multiple Copies.”
Содержание RX II Series
Страница 1: ...V 24 2020 May RX II Series User Manual http www GCCworld com...
Страница 160: ...RX II User Manual GreatCut Plug In A 6 Step 5 Click output and the object will be sent to GCC Cutting Plotter...
Страница 174: ...RX II User Manual GreatCut Plug In A 6 Step 5 Press the button on the right of Jog marks...
Страница 179: ...RX II User Manual GreatCut Plug In A 6 Step 5 Click output and the object will be sent to GCC Cutting Plotter...
Страница 190: ...RX II User Manual GreatCut Plug In A 6 Step 11 Go to GreatCut window press Output button...
Страница 191: ...RX II User Manual GreatCut Plug In A 6...
Страница 205: ...RXII User Manual SignPal 12 Instruction A 6...
Страница 206: ...RXII User Manual SignPal 12 Instruction A 6 3 Select File Print Setup in SignPal Software and select the printer...
Страница 207: ...RXII User Manual SignPal 12 Instruction A 6 4 Select File Document Setup in SignPal and select paper size...
Страница 212: ...RXII User Manual SignPal 12 Instruction A 6...


