7.9 Adjusting the Color Registration
165
7.9
Adjusting the Color Registration
When you first install the printer, or if you move it to another location, adjust the color
registration.
If colors are not adjusted correctly when printed, print the Color Registration Chart and
adjust the color registration.
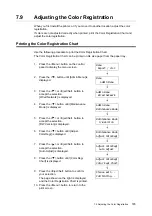
Printing the Color Registration Chart
Use the following procedure to print the Color Registration Chart.
The Color Registration Chart can be printed on A4 size paper from the paper tray.
1.
Press the <Menu> button on the control
panel to display the menu screen.
2.
Press the < > button until [Admin Menu] is
displayed.
3.
Press the < > or <Eject/Set> button to
accept the selection.
[Wired Network] is displayed.
4.
Press the < > button until [Maintenance
Mode] is displayed.
5.
Press the < > or <Eject/Set> button to
accept the selection.
[F/W Version] is displayed.
6.
Press the < > button until [Adjust
ColorRegi] is displayed.
7.
Press the < > or <Eject/Set> button to
accept the selection.
[Auto Adjust] is displayed.
8.
Press the < > button until [Color Regi
Chart] is displayed.
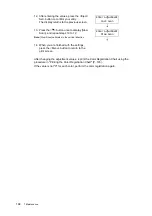
9.
Press the <Eject/Set> button to confirm
your selection.
The page shown on the right is displayed
and the Color Registration Chart is printed.
10. Press the <Menu> button to return to the
print screen.
Menu
Report / List
Menu
Admin Menu
Admin Menu
Wired Network
Admin Menu
Maintenance Mode
Maintenance Mode
F/W Version
Maintenance Mode
Adjust ColorRegi
Adjust ColorRegi
Auto Adjust
Adjust ColorRegi
Color Regi Chart
Please wait...
Calibrating...


