138
7 Maintenance
5.
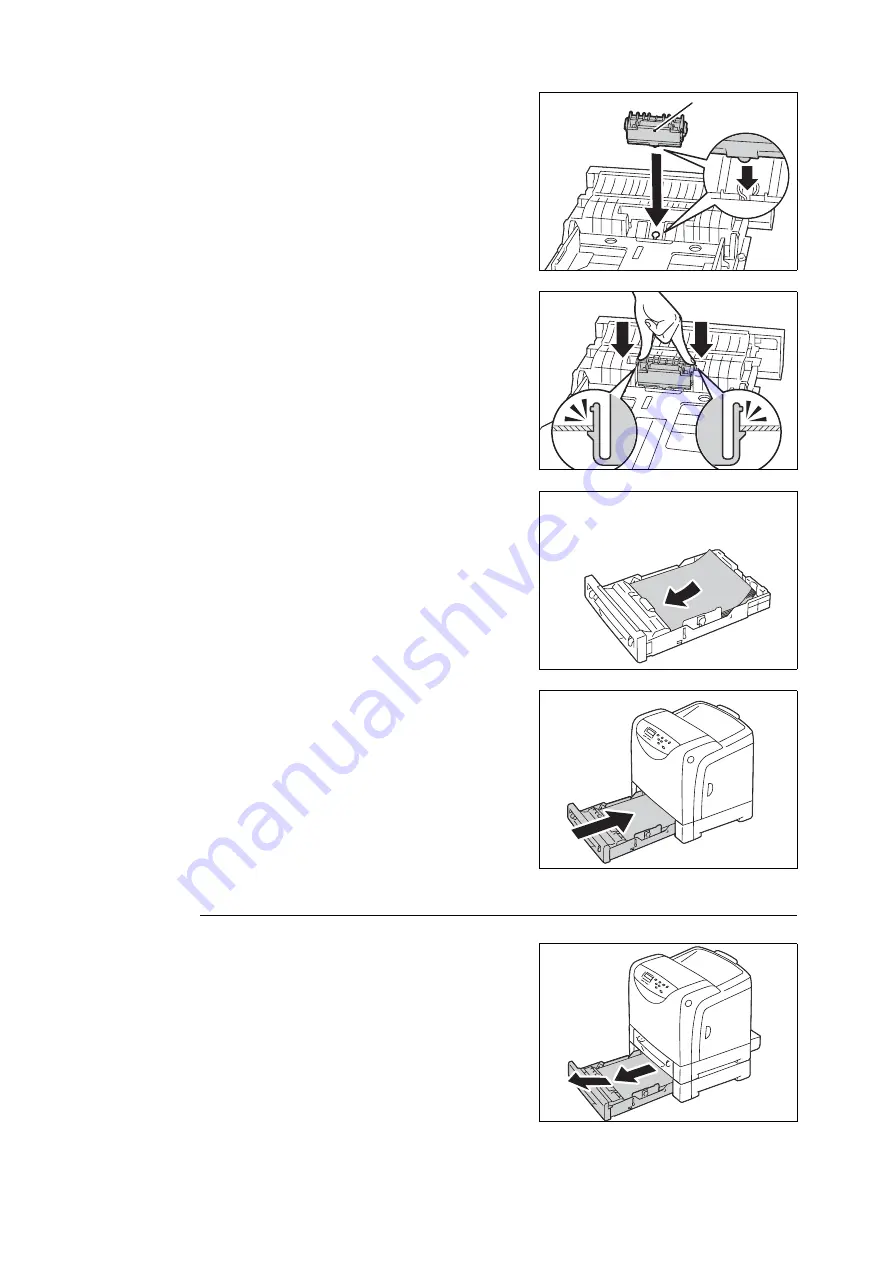
Insert the protrusion at the bottom of the
new Feed Roller Unit in the slot of Tray 1 as
instructed by the arrow.
6.
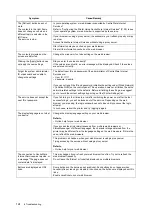
Press down on both ends of the Feed
Roller Unit until it snaps into place.
Note
• Be sure to insert the protrusion of the Feed Roller Unit
in the slot of Tray 1 so that the Feed Roller Unit fits
perfectly in the grooves.
7.
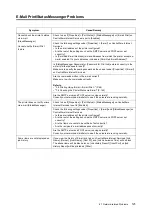
Reload the paper in Tray 1.
8.
Return Tray 1 to the printer.
Replacing the Feed Roller Unit in Tray 2 (Optional)
1.
Pull out the tray from the printer. Hold the
tray with both hands and remove it from the
printer.
2.
Remove any paper in the tray.
To continue replacing the Feed Roller Unit, refer to steps 3-10 of "Replacing the Feed Roller
Unit in Tray 1" (P. 137).
New Feed Roller Unit


