INSTALLATION
EATON
Powerware
®
BladeUPS
®
(12 kVA) User's Guide
S
164201649 Rev 3
www.powerware.com
37
4.
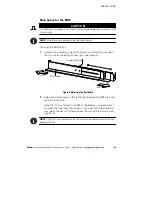
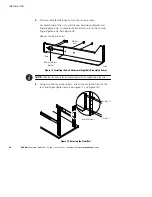
Adjust the rail size on the rail assembly for the depth of your rack.
5.
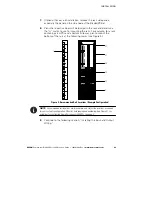
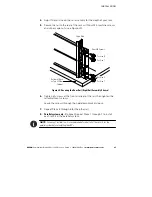
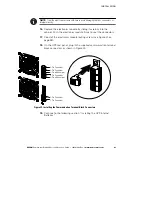
Secure the rail to the rear of the rack with four M5 machine screws
and clip or cage nuts (see Figure 20).
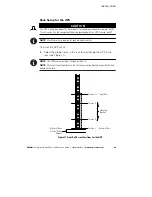
Position 2
Position 7
Position 8
Position 1
Bottom of Rack
or Top of Other
Cabinet
Rear M5 Screws
Cage Nuts
Figure 20. Securing the Rear Rail (Right Rail Assembly Shown)
6.
Tighten all screws at the front and rear of the rail, then tighten the
rail adjustment screws.
Leave the screws through the hold-down brackets loose.
7.
Repeat Steps 3 through 6 for the other rail.
8.
Parallel system only.
(Optional) Repeat Steps 1 through 7 to install
each rail kit in the parallel system.
NOTE
For ease of installation, it is recommended to install all of the rail kits for the
parallel system before installing the UPSs.
Содержание Powerware BladeUPS
Страница 1: ...Powerware BladeUPS 12 kVA User s Guide ...
Страница 8: ...TABLE OF CONTENTS EATON Powerware BladeUPS 12 kVA User s Guide S 164201649 Rev 3 www powerware com iv ...
Страница 108: ...COMMUNICATION EATON Powerware BladeUPS 12 kVA User s Guide S 164201649 Rev 3 www powerware com 100 ...
Страница 132: ...TROUBLESHOOTING EATON Powerware BladeUPS 12 kVA User s Guide S 164201649 Rev 3 www powerware com 124 ...
Страница 136: ...WARRANTY EATON Powerware BladeUPS 12 kVA User s Guide S 164201649 Rev 3 www powerware com 128 ...
Страница 137: ......
Страница 138: ... 1642016493 164201649 3 ...

