INSTALLATION
EATON
Powerware
®
BladeUPS
®
(12 kVA) User's Guide
S
164201649 Rev 3
www.powerware.com
26
5.
Use a Greenlee
®
punch to provide one or more holes in the conduit
landing plate to accommodate the input and output wiring from the
utility to the BladeUPS Bar.
Replace the conduit landing plate.
6.
Skip to Step 8.
7.
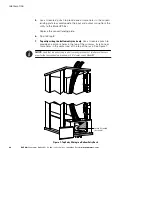
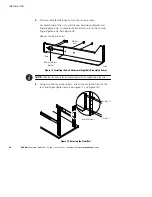
Top entry wiring in a bottom entry rack only.
Use a Greenlee punch to
provide one or more holes in the top of the wireway. Install one or
more holes in the center rear of the top of the rack. See Figure 7.
NOTE
Verify that top entry wiring in a bottom entry rack does not interfere with access
areas for the fans, connectors, breakers, or X-Slot cards on any BladeUPS.
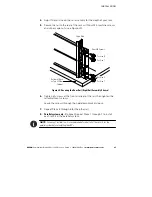
Ferrite Assembly
(loosened)
Figure 7. Top Entry Wiring in a Bottom Entry Rack
Содержание Powerware BladeUPS
Страница 1: ...Powerware BladeUPS 12 kVA User s Guide ...
Страница 8: ...TABLE OF CONTENTS EATON Powerware BladeUPS 12 kVA User s Guide S 164201649 Rev 3 www powerware com iv ...
Страница 108: ...COMMUNICATION EATON Powerware BladeUPS 12 kVA User s Guide S 164201649 Rev 3 www powerware com 100 ...
Страница 132: ...TROUBLESHOOTING EATON Powerware BladeUPS 12 kVA User s Guide S 164201649 Rev 3 www powerware com 124 ...
Страница 136: ...WARRANTY EATON Powerware BladeUPS 12 kVA User s Guide S 164201649 Rev 3 www powerware com 128 ...
Страница 137: ......
Страница 138: ... 1642016493 164201649 3 ...

