background image

218

219

It

a

li

a

n

o

  Questo ciclo di distensione viene ripetu-

to 10 volte.

  immediatamente dopo l’apparecchia-

tura per la mobilizzazione si porta sul 
massimo valore programmato per la 
supinazione, per ricominciare con un 
ciclo di distensione pronazione.

  Questa fase può essere ripetuta ogni 

volta che si ritiene necessario. il tratta-
mento termina premendo il tasto 

STOP


o al termine della durata della terapia 
programmata.

  Impostazione standard: disattivato

Nota!

•  se nell’attivare questa funzione vi 

dovesse essere una pausa program-
mata, questa sarà osservata ogni 
volta che si raggiunge il massimo 
punto della distensione.

•  Qualora fosse attivata la funzione 

“distensione pronazione”, il motore A 
sarà disattivato automaticamente. si 
attua, quindi, un’esclusiva mobilizza-
zione di pronazione/supinazione.

•  la funzione speciale “distensione 

pronazione” non può essere attivata 
contemporaneamente a un’altra 
funzione di distensione.

•  in modalità di funzionamento, nella 

parte sinistra superiore del display 
appare il simbolo 

.

n


Distensione supinazione


  la funzione speciale “distensione 

supinazione” consente una distensione 
delicata dell’articolazione nella direzione 
della supinazione. Viene trattata esclu-
sivamente la pronazione/supinazione, 
il motore A viene automaticamente 
disattivato, la posizione del motore A 
non è più modiicabile dopo l’attivazione 
della funzione speciale.

  Partendo dalla posizione centrale, 

l’apparecchiatura per la mobilizzazione 
si porta prima di tutto sul valore pro-
grammato della pronazione e quindi sul 
valore programmato della supinazione.

  l’apparecchio si sposta inine di 5° indie-

tro nella direzione pronazione e quindi 
molto lentamente ritorna verso il valore 
programmato di supinazione (display: 

) e quindi tenta di raggiungere, ancora 

più lentamente, 5° oltre quest’ultimo 
(display:  ).

  se la resistenza contro i 5° supplemen-

tari dovesse diventare troppo forte, 
l’inversione del carico si attiva automa-
ticamente e l’apparecchiatura si sposta 
nella direzione opposta.

  Questo ciclo di distensione viene ripetu-

to 10 volte.

  immediatamente dopo l’apparecchia-

tura per la mobilizzazione si porta sul 
massimo valore programmato per la 
pronazione, per ricominciare con un 
ciclo di distensione supinazione.

  Questa fase può essere ripetuta ogni 

volta che si ritiene necessario. il tratta-
mento termina premendo il tasto 

STOP


o al termine della durata della terapia 
programmata.

  Impostazione standard: disattivato

Nota!

•  se nell’attivare questa funzione vi 

dovesse essere una pausa program-
mata, questa sarà osservata ogni 
volta che si raggiunge il massimo 
punto della distensione.

•  Qualora fosse attivata la funzione 

“distensione supinazione”, il motore A 
sarà disattivato automaticamente. si 
attua, quindi, un’esclusiva mobilizza-
zione di pronazione/supinazione.

•  la funzione speciale “distensione 

supinazione” non può essere attivata 
contemporaneamente a un’altra 
funzione di distensione.

•  in modalità di funzionamento, nella 

parte sinistra superiore del display 
appare il simbolo 

.

Nota!

•  se nell’attivare questa funzione vi 

dovesse essere una pausa program-
mata, questa sarà osservata ogni 
volta che si raggiunge il massimo 
punto della distensione.

•  Qualora fosse attivata la funzione 

“distensione estensione”, il motore b 
sarà disattivato automaticamente. si 
attua, quindi, un’esclusiva mobilizza-
zione di estensione/lessione.

•  la funzione speciale “distensione 

estensione” non può essere attivata 
contemporaneamente a un’altra 
funzione di distensione.

•  in modalità di funzionamento, nella 

parte sinistra superiore del display 
appare il simbolo

.

n


Distensione lessione 


  la funzione speciale “distensione les-

sione” consente una distensione delicata 
dell’articolazione nella direzione della 
lessione del braccio. Viene trattata 
esclusivamente l’estensione/lessione, il 
motore b viene automaticamente disat-
tivato, la posizione del motore b non è 
più modiicabile dopo l’attivazione della 
funzione speciale.

  Partendo dalla posizione centrale, l’ap-

parecchiatura per la mobilizzazione si 
porta prima di tutto sul valore program-
mato dell’estensione e quindi sul valore 
programmato della lessione.

  l’apparecchio si sposta inine di 5° indie-

tro nella direzione estensione e quindi 
molto lentamente ritorna verso il valore 
programmato di lessione (display: 

 ) 

 e quindi tenta di raggiungere, ancora 
più lentamente, 5° oltre quest’ultimo 
(display: 

).

  se la resistenza contro i 5° supplemen-

tari dovesse diventare troppo forte, 
l’inversione del carico si attiva automa-
ticamente e l’apparecchiatura si sposta 
nella direzione opposta.

  Questo ciclo di distensione viene ripetu-

to 10 volte.

  immediatamente dopo l’apparecchia-

tura per la mobilizzazione si porta sul 
massimo valore programmato per 
l’estensione, per ricominciare con un 
ciclo di distensione lessione.

  Questa fase può essere ripetuta ogni 

volta che si ritiene necessario. il tratta-
mento termina premendo il tasto 

STOP


o al termine della durata della terapia 
programmata.

  Impostazione standard: disattivato

Nota!

•  se nell’attivare questa funzione vi 

dovesse essere una pausa program-
mata, questa sarà osservata ogni 
volta che si raggiunge il massimo 
punto della distensione.

•  Qualora fosse attivata la funzione 

“distensione lessione”, il motore b 
sarà disattivato automaticamente. si 
attua, quindi, un’esclusiva mobilizza-
zione di estensione/lessione.

•  la funzione speciale “distensione 

lessione” non può essere attivata 
contemporaneamente a un’altra 
funzione di distensione.

•  in modalità di funzionamento, nella 

parte sinistra superiore del display 
appare il simbolo 

.

n


Distensione pronazione 


  la funzione speciale “distensione prona-

zione” consente una distensione delicata 
dell’articolazione nella direzione della 
pronazione. Viene trattata esclusiva-
mente la pronazione/supinazione, il 
motore A viene automaticamente disat-
tivato, la posizione del motore A non è 
più modiicabile dopo l’attivazione della 
funzione speciale.

  Partendo dalla posizione centrale, 

l’apparecchiatura per la mobilizzazione 
si porta prima di tutto sul valore pro-
grammato della supinazione e quindi sul 
valore programmato della pronazione.

  l’apparecchio si sposta inine di 5° indie-

tro nella direzione supinazione e quindi 
molto lentamente ritorna verso il valore 
programmato di pronazione (display:


 ) e quindi tenta di raggiungere, anco-

ra più lentamente, 5° oltre quest’ultimo 
(display:  ).

  se la resistenza contro i 5° supplemen-

tari dovesse diventare troppo forte, 
l’inversione del carico si attiva automa-
ticamente e l’apparecchiatura si sposta 
nella direzione opposta.

Содержание ARTROMOT-E2 COMPACT

Страница 1: ......

Страница 2: ... this page Déplier cette page Desplegar esta página Aprire questa pagina Deze bladzijden uitvouwen Hinweis Note Remarque Nota Avverenza Aanwijzing Sicherungen Fuses Fusibles Fusibili Zekeringen S 20 000 T1A L250Vac S 20 000 T2A H250Vac ...

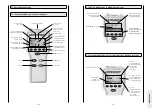
Страница 3: ...scripción del aparato Descrizione dell apparecchiatura Beschrijving van het apparaat Gerätebeschreibung ARTROMOT E2 Device description Description de l appareil Descripción del aparato Descrizione dell apparecchiatura Beschrijving van het apparaat 28 23 24 12 1 13 27 26 9 8 6 25 30 11 7 4 19 20 18 21 14 32 29 17 3 ...

Страница 4: ...iV Abbildungen ARTROMOT E2 Figures Illustrations Ilustraciones Illustrazioni A B C D E F ...

Страница 5: ... 15 Hinweis Siehe Gerätebeschreibung Seiten II III und VIII IX 4 1 Anschließen der ARTROMOT E2 E2 compact Funktionskontrolle 15 4 2 Einstellen des Gerätes auf die Patientenmaße 16 5 Behandlungswerte einstellen 19 5 1 Allgemeine Programmierhinweise für die ARTROMOT E2 E2 compact 19 5 2 ARTROMOT E2 E2 compact programmieren 21 5 3 informationen zu den behandlungswerten 22 5 4 Anwendungs Programmierbe...

Страница 6: ...für Geräteanschlussleitung 19 hauptschalter ein aus 20 sicherung 21 stecker für bewegungselement 22 sicherungssplinte 23 Gurte für unterarmschale 24 Motor A 25 Motor b 26 schale handinnenseite 2 Beschreibung der ARTROMOT E2 E2 compact 1 1 Einsatzmöglichkeiten die ARTROMOT E2 E2 compact ist eine motorisierte bewegungsschiene zur kontinuierlichen passiven bewegung Continuous Passive Motion CPM des E...

Страница 7: ...8 2 2 Erklärung der Funktionselemente der ARTROMOT E2 compact Hinweis Siehe Gerätebeschreibung Seiten VIII und IX 1 schraube für höheneinstellung 2 schraube für Ellenbogen winkeleinstellung 3 Exzenterhebel zur Einstellung der unterarmlänge 4 Gleitschlitten 5 bolzen für Oberarmschale schwenkung 6 schraube für unterarmelement schwenkung 7 Feststell schraube für Rechts links Positionierung 8 sicherun...

Страница 8: ...ge Parametertasten Aktueller winkel der bewegungsschiene in Pronation supination Ausgewählte Funktion Aktivierter Parameter hier Extension Aktueller programmierter Maximalwert der Flexion oder supination hier Flexion Aktueller winkel der bewegungsschiene Extension Flexion oder Pronation supination Aktueller programmierter Maximalwert der Extension Pronation hier Extension 2 3 2 Programmiereinheit ...

Страница 9: ...ie seriennummer angegeben m Vorsicht warnhinweise in Gebrauchsanweisung beachten Gebrauchsanweisung beachten nicht mit dem unsortierten hausmüll entsorgen Vor nässe schützen 2 5 Erklärung der Symbole Anschlüsse und Typenschild Extension Flexion Pronation supination Pause Timer Geschwindigkeit Aufwärmprogramm lastumkehr Motor A lastumkehr Motor b Motor A Ein Aus Motor b Ein Aus isolationsprogramm G...

Страница 10: ...emäßen zustand des Gerätes zu überzeugen insbesondere sind leitungen und steckvorrichtungen auf beschädigungen zu überprüfen beschädigte Teile müssen sofort ersetzt werden Vor Behandlungsbeginn muss ein Probelauf mit mehreren bewegungs zyklen ohne und anschließend mit Patient durchgeführt werden Alle Einstellschrauben sind auf festen sitz zu prüfen die Therapie muss sofort abgebro chen werden wenn...

Страница 11: ...len m Vorsicht Patientengefährdung beschädigung der schiene die schiene ARTROMOT E2 darf nicht zum Transportieren von Personen ver wendet werden m Warnung Patientengefährdung die anatomisch korrekte Einstel lung des Gerätes auf den Patienten ist zu beachten dazu sind folgende Einstellungen Positionierungen zu prüfen siehe auch nummerierung am Gerät 1 Ante Retroversion horizontal Extension Flexion ...

Страница 12: ... kon tinuierlich intern eine Funktionskontrolle durch Erkennt es dabei einen Fehler so ertönt ein warnsignal schaltet es unverzüglich ab erscheint auf dem display der hinweis ERROR sowie ein Fehlercode z b ERROR 5 in diesem Fall können sie einen neustart durch kurzes Aus und Einschalten des hauptschalters versuchen Überprüfen sie hierbei während die schiene aus geschaltet ist die stecker auf korre...

Страница 13: ... sich der Patientenarm noch nicht auf der Armaulage beinden Erst wenn sie die schiene auf die Patientenmaße voreingestellt haben müssen sie eine Einstellungskontrolle bzw Feinjus tierung mit dem Patientenarm in der Armaulage durchführen die Einstellungen sind von 1 bis 5 nummeriert Auf der schiene sind diese nummern als Orientierungshilfe an gebracht Führen sie die Einstellungen immer in dieser Re...

Страница 14: ...che Program mierebene sie aufgerufen haben wird in der Mitte des displays mit M1 M2 usw angezeigt um eine Ebene zurück zu wechseln z b von Ebene 2 in Ebene 1 oder auch von Ebene 1 in Ebene 7 halten sie die Taste MEnu etwas länger gedrückt 3 den jeweiligen behandlungsparameter bzw die Funktionen rufen sie mit einer der 4 Parametertasten unterhalb des 5 Behandlungswerte einstellen Höheneinstellung A...

Страница 15: ...kreis neben dem symbol 5 wenn sie alle Parameter programmiert haben speichern sie die werte mit der Taste STOP 6 drücken sie anschließend die Taste START ARTROMOT E2 E2 compact überprüft die eingestellten werte fährt in die Mittelposition zwischen den eingestellten Extension und Flexi onswerten sowie den eingestellten supinations und Pronationswerten und stoppt 7 drücken sie erneut die Taste START...

Страница 16: ... eingestellten werten für Extension Flexion und Pronation supination Mit jedem bewegungszyklus wird das bewegungsausmaß erweitert bis nach insgesamt 15 bewegungszyk len die programmierten Maximalwerte erreicht werden nach Erreichen der Maximalwerte wechselt die schiene automatisch in den normalbetrieb ist eine Therapiezeit aktiviert beginnt die Therapie nach Ablauf der Therapie 5 3 Informationen z...

Страница 17: ...ion Hinweis die Prozentsätze können nur bei akti vierter sonderfunktion häkchen im kreis verändert werden zeit und erneutem starten des Gerätes wieder mit dem Aufwärmprogramm das display zeigt im Aufwärmmodus der schiene im linken oberen Feld das symbol an Standardeinstellung deaktiviert EBENE 3 n Lastumkehr Motor A Sicherheitsschaltung das Gerät schaltet automatisch beide Motoren in die entgegeng...

Страница 18: ...Pronationswert Anschließend fährt die schiene 5 zurück in Richtung supination dann sehr lang sam wieder zurück zum programmier ten Pronationswert Anzeige und versucht anschließend noch langsamer 5 darüber hinaus zu erreichen Anzei ge Falls der widerstand gegen die zusätz n Gesamttherapiezeit unter dem Menüpunkt Gesamtthera piezeit kann die gesamte behandlungs dauer Gesamtdauer der einzelnen Therap...

Страница 19: ...ährt die schiene in die zum Verpacken optimale Position Aktivieren sie die Funktion und drücken sie sTART die Transporteinstellung wird angefah ren im linken oberen Feld des dis plays erscheint siehe auch 6 Transport n Neuer Patient wenn diese Funktion aktiviert wird fährt die schiene in die Grundposition Aktivieren sie die Funktion und drücken sie sTART die Grundposition wird angefahren lichen 5 ...

Страница 20: ...e erneut die Parametertaste Motor A Ein Aus oder die Taste betätigen das häkchen im kreis neben dem symbol darf nicht mehr angezeigt sein 9 speichern sie die vorgenommenen Ein stellungen mit der STOP Taste bringen sie die schiene durch betätigen der START Taste in die startposition und starten sie die Therapie durch erneutes drücken der START Taste die vorhandenen behandlungs parameter werden gelö...

Страница 21: ...wechseln der sicherungen die ARTROMOT E2 E2 compact aus und ziehen sie den netzstecker lösen sie den Rastverschluss des siche rungshalters 20 8 zwischen netz schalter 19 und netzstecker 18 mit geeignetem werkzeug Abb 1 setzen sie nach dem Austausch der sicherungen den halter Abb 2 wieder ein Achten sie darauf dass der halter wieder korrekt einrastet Fig 1 Fig 2 6 1 Plege m Warnung stromschlaggefah...

Страница 22: ... stativsockel sternförmig 5 Füße mit Rollen 5 schrauben zur befestigung der Füße 5 unterlegscheiben zur befestigung der Füße 1 inbusschlüssel 6 3 Transport 6 3 1 ARTROMOT E2 zum Transport der ARTROMOT E2 müs sen sie folgende Einstellungen vornehmen 1 Aktivieren sie die Funktion Trans porteinstellung im Menü siehe auch 5 3 und starten sie die ARTROMOT E2 2 schalten sie die ARTROMOT E2 am hauptschal...

Страница 23: ...wieder fest siehe umbauschema 1 b c 6 ziehen sie den bolzen für das schwen ken der Oberarmschale 11 nach unten und schwenken sie die Oberarmschale um 180 nach innen Achtung lassen sie den bolzen 11 während des schwenkens los er rastet hörbar auf der anderen seite ein siehe umbauschema 2 d 7 lösen sie die klemmschraube zum schwenken des unterarmelements 12 und schwenken sie die unterarmaula ge mit ...

Страница 24: ... 5 cm 57 5 cm 58 0 cm 87 5 cm 57 5 cm 29 0 cm 6 4 2 Seitenumbau ARTROMOT E2 compact die ARTROMOT E2 compact ist für das linke und das rechte Ellenbogengelenk einsetzbar hierfür bedarf es jedoch eines umbaus dieser umbau ist mit wenigen handgrifen möglich 1 Aktivieren sie die Funktion Transport einstellung im Menü siehe auch 5 3 und starten sie die ARTROMOT E2 compact 2 lösen sie die Feststellbrems...

Страница 25: ...e 1 die ARTROMOT E2 E2 compact verwendet hF Energie ausschließ lich zu seiner inneren Funktion daher ist seine hF Aussendung sehr gering und es ist unwahrscheinlich dass benachbarte elektronische Geräte gestört werden hF Aussendungen nach CisPR 11 klasse b die ARTROMOT E2 E2 compact ist für den Gebrauch in allen Ein richtungen einschließlich denen im wohnbereich und solchen geeignet die unmittelba...

Страница 26: ...T E2 E2 compact b Über den Frequenzbereich von 150 khz bis 80 Mhz sollte die Feldstärke geringer als 3 V m sein Leitlinien und Herstellererklärung Elektromagnetische Störfestigkeit die ARTROMOT E2 E2 compact ist für den betrieb in der unten angegebenen Elektro magnetischen umgebung bestimmt der kunde oder Anwender der ARTROMOT E2 E2 compact sollte sicherstellen dass es in einer solchen umgebung be...

Страница 27: ...adurch helfen elektromagnetische störungen zu vermeiden indem er den Mindestabstand zwischen tragbaren und mobilen hF Telekommunikationsgeräten sendern und der ARTROMOT E2 E2 compact abhängig von der Ausgangsleistung des kommunikationsgerätes wie unten angegeben einhält Nennleistung des Senders W Schutzabstand abhängig von der Sendefrequenz m 150 kHz bis 80 MHz d 1 2 P 80 MHz bis 800 MHz d 1 2 P 8...

Страница 28: ...OT k2PRO ARTROMOT k2PRO Chip ARTROMOT k3 ARTROMOT k4 ARTROMOT sP2 ARTROMOT sP3 ARTROMOT E2 ARTROMOT E2 compact 47 11 1 Technische Hotline haben sie technische Fragen benötigen sie den technischen service Telefon 49 180 5 1 ormed de 49 180 5 1 67 63 33 Fax 49 180 5 3 ormed de 49 180 5 3 67 63 33 11 2 Versand Versenden sie das Gerät nur in der Origi nalverpackung um Transportschäden zu vermeiden Ver...

Страница 29: ...atory processes in the joints unless on the order of a physician spastic paralysis unstable osteosynthesis 1 How to use the CPM device Device description ARTROMOT E2 II Figures ARTROMOT E2 IV Symbol overview ARTROMOT E2 E2 compact V Figures ARTROMOT E2 compact VII Device description ARTROMOT E2 compact VIII 1 How to use the CPM device 49 1 1 Fields of application 49 1 2 Therapy objectives 49 1 3 i...

Страница 30: ...represent the current position of the CPM device pronation and extension values below 0 are marked with the symbol both on the display and in this document These are some of the outstanding ARTROMOT E2 E2 compact features anatomically correct setup physiological movements maximum possible ranges of motion programming unit for precise adjust ment of patient speciic therapy values chip card for stor...

Страница 31: ...ension pronation value here extension 2 3 2 Programming unit in MENU selection mode 2 3 3 Programming unit in ROM programming mode range of motion selected therapy protocol set extension value set lexion value plus key minus key set angle of motor b therapy timer set supination value parameter keys MEnu key sTART key sTOP key patient chip card set angle of motor A motor A selected direction of mot...

Страница 32: ... supination therapy documentation stretching in extension stretching in lexion stretching in pronation stretching in supination EROM repeat extension pronation EEROM repeat lexion supination transport setting new patient synchronized non synchronized mode service menu Also refer to symbol overview on page V 2 4 Explanation of symbols selected functions status of the selected function here speed 2 ...

Страница 33: ... of the assembled ARTROMOT E2 compact during transport choose the following settings 1 nicht zutrefend 2 0 3 90 4 0 5 0 alternating current for serial numbers 20 000 protection class i equipment The medical device must be connected to a system with protective earth conductor for serial numbers 20 000 protection class ii equipment The medical device has a double or reinforced insulation type b appl...

Страница 34: ... such as blankets cush ions or cables to get caught in the moving parts of the CPM device Always seat the patient on a chair with four legs and without armrests when using the ARTROMOT E2 compact m Warning Extreme caution should be taken when in use around small children and babies suicient distance to the device is mandatory for their safety never leave the device unattended when it is switched o...

Страница 35: ...e currents will not cause any hazard Please contact djO Global if you have questions in this matter do not use multiple portable socket outlets MPsO to connect the device to the power line The ARTROMOT E2 E2 compact must be connected to a properly installed wall outlet with a non fused earthed wire before connecting the power cord it must be completely unrolled and placed such that it will not get...

Страница 36: ...t the motion ele ment to the appropriate height Ensure that the entire upper arm lies on the support 5 The patient should sit up straight and be relaxed Tighten screw 4 now check the agreement of the axis of motor A and the elbow joint if required make a ine adjustment of the vertical orientation using locking pin 6 Note See device description on pages II III and VIII IX 4 1 Connecting the ARTROMO...

Страница 37: ...ing screws and clamping levers are tight Adjustment of the positioning angle Fig C m Caution Patient hazard equipment damage Hold motor B for this adjustment to secure the device hold the motion element at bracket 30 now open screw 7 and set the appro priate angle Tighten screw 7 Adjustment of the forearm length Fig D m Caution Patient hazard equipment damage Hold motor B for this adjustment to se...

Страница 38: ... as speci ied by the parameters stored on the chip card and stops Position the patient on the CPM device and press the START key to initiate therapy m Warning Patient hazard Before therapy a test run consist ing of several exercise cycles must be completed without the patient Then repeat the test run with the patient and check that the movement does not cause any pain Note See also 2 2 and 2 3 Not...

Страница 39: ...dduction 120 horizontal abduction 0 LEVEL 2 n Pauses Pauses occur at each programmed maximum value These are the two pause points maximum extension value and maxi mum pronation value maximum lexion value and maxi mum supination value Pauses are separately adjustable for mo tor A and motor b between 1 second and 60 minutes Pauses can be set in steps of 1 second to any value between 0 and 59 seconds...

Страница 40: ...he Follow these steps to program pauses Access menu level 2 then press the parameter key to select the special function The display shows the symbol for the special function and the selected pause durations The display shows the symbol for the special function and the selected pause durations top lexion supination pause bottom extension pronation pause The lexion supination pause duration appears ...

Страница 41: ...You can stop treatment with the sTOP key after the pro grammed therapy duration it will stop automatically Default disabled programmed maximum values for extension and lexion for three cycles and then stops in this phase motor b is disabled symbol for motor b OFF Then motor b will move to the pro grammed maximum values for prona tion and supination for one cycle and stops then the full cycle will ...

Страница 42: ...tching in lexion with the special stretching in lex ion function the joint will be gently stretched arm bending movement Only the extension lexion movement is treated here Motor b is automatically disabled The position of motor b cannot be changed once this special function has been activated starting at the middle position the car riage will irst move to the programmed extension limit and then to...

Страница 43: ...pronation supi nation values First of all the carriage moves simultaneously to the maximum lexion angle and to the maximum supi nation angle Then it moves simultane ously to the maximum extension angle and to the maximum pronation angle when the set extension pronation value has been reached the carriage reverses 10 toward lexion supination and then moves back again to the maximum ex tension prona...

Страница 44: ...additional options such as pause or speed 6 Press the MENU key on the program ming unit to access level 3 M3 7 Press the Motor B ON OFF parameter key to activate the parameter 8 deactivate motor b by pressing the parameter key Motor B ON OFF again or the minus key The check mark in the circle next to the symbol must have disappeared 9 save the settings with the STOP key set the carriage to the sta...

Страница 45: ...azard Allow the ARTROMOT E2 to reach room temperature before use if the device has been transported at tempe ratures below 0 C 32 F leave it to dry at room temperature for about 2 hours until any condensation has disappeared Technical inspections For safety the devices require regular maintenance To maintain the functional and operational safety check all compo nents for damage and loose connectio...

Страница 46: ...he posi tioning angle open the locking screw 1 and pull out the motion element 7 Open the locking screw for adjustment of the elbow angle adjustment 2 and separate the oval tube from the motion element 8 Open locking screw 24 on the un derside of the stand then remove the column with the electronics box from the star shaped stand 9 disassemble the stand by loosening the ive legs with the special t...

Страница 47: ...right elbow This symbol appears during con version of the CPM device 6 4 1 Reconiguration of the ARTROMOT E2 The ARTROMOT E2 can be used on the left and on the right elbow joint however the device must be converted irst This is done very quickly 1 Activate the transport setting function in the menu see also 5 3 and start the ARTROMOT E2 2 Adjust an angle of 90 for horizontal ad duction abduction i...

Страница 48: ...bient conditions operation Ambient temperature Relative humidity Atmospheric pressure 5 C to 40 C 15 to 93 700 hPa to 1060 hPa ____________________________________ subject to change without notice 10 2011 The product described in this operation manual must not be disposed of with unsorted household or municipal waste it requires separate disposal Please contact djO Global for information about the...

Страница 49: ...the equation applicable to the frequency of the transmitter Note UT is the a c mains voltage prior to application of the test level 9 2 Electromagnetic immunity 9 IEC 60601 1 2 2007 and IEC 60601 1 11 2010 The ARTROMOT E2 E2 compact is subject to particular precautions regard ing electromagnetic compatibility EMC The device must be installed and put into service strictly in compliance with the EMC...

Страница 50: ...act is intended for use in the electromagnetic environ ment speciied below it is the responsibility of the customer or user to ensure that the ARTROMOT E2 E2 compact is used in such an environment Immunity test IEC 60601 test level Compliance level Electromagnetic environment guidance Portable and mobile RF communica tions equipment are used no closer to any part of the ARTROMOT E2 E2 compact incl...

Страница 51: ...chip card 0 0034 048 2 Patient chip card protocol 0 0037 035 3 Marker pen for patient chip card 0 0031 006 11 Technical service 10 Contact we would be happy to answer any ques tions you may have about our products and services ARTROMOT International Please contact your local dealer the djO Global headquarters in the usA the djO Global international headquarters in England or djO Global in Germany ...

Страница 52: ...h reference to Rule 9 of the Directive 93 42 EEC the product is a device of risk class IIa notiied body dQs Medizinprodukte Gmbh August schanz straße 21 60433 Frankfurt am Main 0297 Freiburg 04 March 2012 QA Management Representative Bernhard Krohne This certiicate is valid until expiry of the certiicate referred to the certiicate can be downloaded from https de dqs ul com kunden kundendatenbank h...

Страница 53: ... des matières 1 1 Possibilités d utilisation L ARTROMOT E2 E2 compact est une attelle de mobilisation motorisée axée sur le mouvement passif continu Continuous Passive Motion CPM de l articulation du coude Conçu pour être utilisé en clinique cabinet médical ou chez un particu lier location cet appareil constitue un complément essentiel au traitement médico thérapeutique 1 2 Objectifs de la thérapi...

Страница 54: ...nt de l avant bras 13 Vis d arrêt pour le positionnement droit gauche 14 Appui bras pour le bras sain 15 unité de programmation 16 Compartiment de rangement pour l unité de programmation 17 Carte à puce patient 18 Raccord pour le branchement de l appareil 19 interrupteur principal Marche Arrêt 20 Fusible 21 Fiche pour l élément de mobilisation 22 Goupilles de sécurité 23 Courroie pour la coque de ...

Страница 55: ...bilisa tion en extension lexion ou pronation supination Valeur maximale ac tuelle programmé de l extension pronation ici l extension 2 3 2 Unité de programmation en mode de sélection MENU 2 3 3 Unité de programmation en mode programmation Amplitude de mouvement Programme de thé rapie programmé Valeur d extension programmée Valeur de lexion programmée Touche Touche Angle actuel Moteur b Aichage de ...

Страница 56: ...lation durée totale de la thérapie suivi du déroulement de la thérapie Extension Flexion suivi du déroulement de la thérapie Pronation supination Allongement de l extension Allongement de la lexion Allongement de la pronation Allongement de la supination Répétition de l extension pronation sur les derniers degrés Répétition de la lexion supination sur les derniers degrés Réglage pour le transport ...

Страница 57: ...Protéger de l humidité 2 5 Légende des symboles raccords et plaque signalétique IP21 la classiication iP indique le degré de protection et donc l aptitude de l appareil à être utilisé dans diférents environnements iP21 signiie 2 indique le degré de protection par rapport aux contacts et objets étrangers le 2 signiie Protection contre les contacts protégé contre le contact avec un doigt Protection ...

Страница 58: ...la longueur de l avant bras 5 Réglage des axes moteur A et moteur b 6 Réglage du dossier 7 Réglage des amplitudes de mouvement les réglages de 1 à 6 ne doivent être modiiés que quand aucun patient ne se trouve sur l attelle Pendant le mouvement le patient ne doit ressentir aucune douleur ni irritation Pendant l instruction et l utilisa tion de l attelle le patient doit être pleinement conscient le...

Страница 59: ... radio logiques tomographes installa tions radioélectriques téléphones portables etc peuvent perturber d autres appareils parce que comme cela est permis ils peuvent dégager des perturbations électromagné tiques plus importantes Gardez une distance suisante par rapport à ces appareils et contrôlez le fonctionne ment avant l utilisation les travaux d entretien et de remise en état doivent être réal...

Страница 60: ...lages suivants le patient ne doit pas encore avoir placé son bras sur l appui bras une fois que vous avez pré réglé l attelle en fonction des men surations du patient vous devez alors contrôler les réglages et procéder à un ajustage avec le bras du patient placé sur l appui bras les réglages sont numérotés de 1 à 5 Ces numéros sont apposés sur l attelle à des ins d orientation Procédez toujours au...

Страница 61: ...les leviers de blocage sont bien serrés 4 2 2 Réglage de l ARTROMOT E2 compact selon les mensurations du patient Remarque Pour une illustration des diférentes étapes voir page 133 Remarque Le numéro 1 pour le réglage de l ARTROMOT E2 compact n est pas afecté Réglage en hauteur ig A Avant de desserrer la vis de blocage 1 vous devez saisir et maintenir la partie mobile de l attelle ain qu elle ne to...

Страница 62: ...itement ramètres vous indiquent les paramètres ou fonctions qui leur sont alloués dès que vous sélectionnez un paramètre en appuyant sur la touche de paramètre correspondante le symbole aférent s aiche en grand la valeur actuellement réglée apparaît à l écran le symbole au dessus de la touche de paramètre est représenté sur fond sombre 4 Avec les touches vous modiiez la valeur elle change rapideme...

Страница 63: ...uche de paramètre aférente Vous modiiez les valeurs de traitement avec les touches Vous activez désactivez une fonction en pressant une nouvelle fois la touche de paramètre correspondante Vous enregistrez les réglages efectués en appuyant sur la touche STOP NIVEAU 1 n Extension Valeur maximale 5 degrés n Flexion Valeur maximale 140 degrés n Pronation Valeur maximale 90 degrés n Supination Valeur m...

Страница 64: ...atiquement au mode de fonctionnement normal si une durée de thérapie est activée la thérapie commence une fois cette du rée écoulée et après le redémarrage de l appareil à nouveau avec le programme d échaufement le mode d échaufement de l attelle est indiqué par le symbole dans le champ supérieur gauche de l écran Réglage par défaut désactivées NIVEAU 3 n Inversion de la charge du moteur A commuta...

Страница 65: ... spéciale est activée cercle coché n Durée totale de la thérapie Concernant les versions de l ARTROMOT E2 E2 compact avec carte à puce il est possible d appeler pour chaque patient la durée totale du traitement durée totale des diférentes séances de thérapie sous l option de menu durée totale de la thérapie Mise à zéro de la durée de la thérapie enregistrée Maintenez enfoncée la touche de paramètr...

Страница 66: ... recule de 5 degrés dans le sens de la supination revient très lentement sur l angle de supination pro grammé aichage puis encore plus lentement essaie d aller 5 degrés au delà de cette position aichage si la résistance contre les cinq degrés supplémentaires s avère trop forte l inversion de la charge est automati quement activée et l attelle se déplace dans le sens contraire Ce cycle d allongemen...

Страница 67: ...t En activant cette fonction l attelle se déplace sur une position optimale pour permettre l emballage Activez cette fonction et appuyez sur sTART le réglage pour le transport est efectué dans le champ supérieur gauche de l écran apparaît voir aussi le chapitre 6 Transport n Nouveau patient En activant cette fonction l attelle rejoint sa position de base Activez cette fonction et appuyez sur sTART...

Страница 68: ...s avez coniguré les amplitudes de mouvement vous pouvez programmer d autres options telles la pause la vitesse etc 6 Appuyez plusieurs fois sur la touche MENU de l unité de programmation ain d accéder au niveau 3 M3 7 Appuyez sur la touche de paramètre Moteur A Marche Arrêt pour activer le paramètre 8 désactivez le moteur A en pressant à nouveau la touche de paramètre Mo teur A Marche Arrêt ou la ...

Страница 69: ...oprié Fig 1 une fois les nouveaux fusibles mis en place remontez le porte fusible Fig 2 Veillez à ce qu il s enclenche correctement Fig 1 Fig 2 6 3 Transport 6 3 1 ARTROMOT E2 Avant le transport de l ARTROMOT E2 vous devez procéder aux réglages suivants 1 Activez la fonction Réglage pour le transport dans le menu voir aussi point 5 3 et démarrez l ARTROMOT E2 2 Arrêtez l ARTROMOT E2 en coupant l a...

Страница 70: ...oulissant 4 et le support sandwich de la main 13 14 Puis revissez la vis de blocage 7 dans le moteur b 11 Pour le transport vous devez impéra tivement utiliser l emballage d origine la société Ormed Gmbh se dégage de toute responsabilité en cas d endom magements occasionnés pendant le transport si l appareil n avait pas été placé dans son emballage d origine 12 déposez l unité de programmation 15 ...

Страница 71: ...s pivoter l appui de l avant bras autour du moteur b de 180 Resserrez la vis de blocage 12 voir schéma de montage 2 e 8 desserrez la vis de blocage pour le po sitionnement droit gauche 13 de deux tours déplacez la coque de l avant bras dans l évidement inférieur de la fente et pivotez la de 180 Puis ramenez la coque de l avant bras en position cen trale réglage 0 et serrez à fond la vis de blocage...

Страница 72: ...e réglage min max Réglage en hauteur ARTROMOT E2 mesurée depuis la surface d assise longueur de l avant bras de 35 à 71 cm de 29 à 46 cm Hauteur d assise ARTROMOT E2 48 cm Précision des valeurs mesurées Rapporteur d angle dans la plage de mesure de 90 à 90 en pronation supination Précision 5 Poids ARTROMOT E2 ARTROMOT E2 compact 25 kg 17 kg Matériaux bs POM delrin 100 PuR PA FR4 aluminium acier sp...

Страница 73: ...à CEi 61000 3 2 Conforme à la Classe A Variations de tension licker conformément à CEi 61000 3 3 conforme 9 1 Emission électromagnétique Lignes directrices et déclaration du fabricant Immunité électromagnétique l ARTROMOT E2 E2 compact est destinée à fonctionner dans l environnement électro magnétique indiqué ci dessous le client ou l utilisateur de l ARTROMOT E2 E2 compact doit s assurer qu elle ...

Страница 74: ...rmal de l ARTROMOT E2 E2 compact doit être vériié sur chaque lieu d utilisation si des fonctionnalités inhabituelles sont observées il peut être nécessaire d adopter des mesures supplémentaires telles la réorientation ou le changement de place de l ARTROMOT E2 E2 compact b dans la plage de fréquence de 150 khz à 80 Mhz l intensité de champ est inférieure à 3 V m 9 3 Distances de sécurité recommand...

Страница 75: ...Vous avez besoin du service technique Tél 49 180 5 1 ormed de 49 180 5 1 67 63 33 Fax 49 180 5 3 ormed de 49 180 5 3 67 63 33 11 2 Expédition Envoyez l appareil uniquement dans son emballage d origine ain d éviter qu il ne soit endommagé pendant le transport Vous pouvez également commander des cartons d expédition auprès de la société djO Global Avant de placer l attelle dans son embal lage vous d...

Страница 76: ...ar rapport à la règle 9 de la directive 93 43 CEE il s agit d un produit de la classe de risque IIa Organisme notiié dQs Medizinprodukte Gmbh August schanz straße 21 60433 Frankfurt am Main 0297 Fribourg le 04 03 2012 Responsable gestion de la qualité Bernhard Krohne Cette déclaration est valable jusqu à l expiration du certiicat de référence certiicat consultable sur https de dqs ul com kunden ku...

Страница 77: ...asos Enfermedades gravemente inlama torias de las articulaciones siempre y cuando el médico no lo haya prescrito explícitamente Parálisis espásticas Osteosíntesis inestables 1 Informaciones sobre el uso de la tablilla de movilización Descripción del aparato ARTROMOT E2 II Ilustraciones ARTROMOT E2 IV Cuadro de conjunto de pictogramas ARTROMOT E2 E2 compact V Ilustraciones ARTROMOT E2 compact VII D...

Страница 78: ...ros cambios Nota Para facilitar una representación clara de la posición actual de la tablilla de movilización los valores de pronación y extensión inferiores a 0 son marca dos tanto en la pantalla como en estas instrucciones de uso con el signo El aparato ARTROMOT E2 E2 compact se distingue entre otras cosas por las siguientes características Ajustes anatómicamente correctos desarrollos de movimie...

Страница 79: ...ción aquí Extensión 2 3 2 Unidad de programación en el modo de selección de MENÚS 2 3 3 Unidad de programación en el modo de programación Alcance del movimiento Programa de terapia programado Valor de extensión programado Valor de lexión programado Tecla Tecla Ángulo actual motor b indicación del tiempo de terapia Valor de supinación programado Teclas de parámetros Tecla MEnÚ Tecla sTART Tecla sTO...

Страница 80: ... Pronación supinación Estiramiento Extensión Estiramiento Flexión Estiramiento Pronación Estiramiento supinación Repetición en grados inales Extensión pronación Repetición en grados inales Flexión supinación Ajuste de transporte Paciente nuevo Modo de servicio síncrono asíncrono Menú de servicio técnico Véase también el cuadro sinóptico de pictogramas en la pág V 2 4 Explicación de los pictogramas...

Страница 81: ...n estado montado se tienen que efectuar los siguientes ajustes para evitar que vuelque 1 no procede 2 0 3 90 4 0 5 0 Corriente alterna Con número de serie 20 000 dispositivo de la clase de protección i Es necesario conectar el dispositivo médico a un sistema con puesta a tierra Con número de serie 20 000 dispositivo de la clase de protección ii El dispositivo médico dispone de un aislamiento de pr...

Страница 82: ...na silla con cuatro patas y sin apoyabrazos al apli car la tablilla de movilización ARTROMOT E2 compact m Advertencia hay que tener mucho cuidado ante la presencia de bebés y niños pequeños Asegúrese de que haya una distancia de seguridad adecuada entre el dis positivo y las personas nunca deje el dispositivo sin super visión si está encendido Apague el dispositivo y extraiga el enchufe de la toma...

Страница 83: ...iene que estar garantizado de que no pueda surgir ningún peligro a causa de la sumación de corrientes de fuga En caso de duda diríjase a la empresa djO Global Para la alimentación de corriente del aparato no se debe utilizar ningún cable alargador provisto de una caja de enchufe múltiple El aparato ARTROMOT E2 E2 compact sólo se debe conectar a una caja de enchufe con puesta a tierra que haya sido...

Страница 84: ...iculación del codo Presione el botón de ajuste 1 en direc ción opuesta Vuelva a apretar el tornillo de apriete 2 Nota Véase descripción del aparato en las pág II III y VIII IX 4 1 Conexión de ARTROMOT E2 E2 compact Prueba de funcionamiento El alcance de suministro del dispositivo abarca los siguientes componentes dispositivo básico silla soporte con rue das elemento de movilización unidad de progr...

Страница 85: ...ento de movimiento a la altura requerida Al hacerlo preste atención de que el brazo se apoye por completo en la respectiva bandeja 5 El paciente debe estar senta do en una posición recta y relajada Vuelva a apretar el tornillo de apriete 4 Ahora compruebe la exacta coincidencia de ejes entre el motor A y la articulación del codo si es necesario usted puede efectuar un ajuste ino en dirección verti...

Страница 86: ... al mismo tiempo En el modo asíncrono inmediatamente después de pulsar la tecla START ambos motores empiezan a funcionar de manera aleatoria y cambian su sentido de marcha cada vez que alcancen los valores máximos ajustados la velocidad programada es aplicada a ambos moto res Nota una descripción de los parámetros se encuentra en la sección 5 3 usted puede dejarse mostrar los parámetros ajustados ...

Страница 87: ...mo valor de extensión simul táneamente con el máximo valor de pronación Máximo valor de lexión simultá neamente con el máximo valor de supinación los datos almacenados en la tarjeta chip del paciente son borrados au tomáticamente al activar la función nuevo paciente Pulsando la tecla STOP al inalizar la programaci ón todos los ajustes también son almacenados automáticamente en la tarjeta chip del ...

Страница 88: ...irección de movimiento dirección opuesta en cuanto la resistencia carga ocasionada por el paciente excede el nivel ajustado niveles ajustables para la conmutación de inversión 1 25 En el nivel 1 sólo basta una ligera resistencia para activar la conmutación en el nivel 25 ya se requiere una enorme resistencia Ajuste estándar nivel 25 m Precaución Peligro para el paciente la inversión de carga ha si...

Страница 89: ...ente aislado los motores pueden ser conectados y desconectados individual mente El motor A efectúa los movi mientos de extensión y lexión el motor b los de pronación y supinación Para un movimiento de pronación supi nación aislado programar el motor A a la posición deseada extensión lexión y luego desactivarlo durante la terapia en el servicio normal de la tablilla el display muestra el símbolo OF...

Страница 90: ...ción especial Teniendo como punto de partida la posición central la tabilla se desplaza primero hacia el valor de pronación pro gramado y luego al valor de supinación programado NIVEL 5 n Estiramiento Extensión la función especial Estiramiento Ex tensión posibilita un suave estiramiento de la articulación en dirección de la extensión del brazo se trata exclusi vamente la extensión lexion el motor ...

Страница 91: ...a demasiado fuerte la inversión de carga se activa automá ticamente y la tablilla se desplaza en dirección contraria Este ciclo de estiramiento es repetido 10 veces A continuación la tablilla se desplaza al máximo valor de pronación programado para volver a empezar con un ciclo de estiramiento en dirección supinación En caso necesario este proceso se puede repetir cuantas veces uno quiera El trata...

Страница 92: ...amado el alcance de los movimientos usted puede programar otras opciones de programa como pausas velocidad etc 6 Pulse la tecla MENÚ de la unidad de programación para acceder al nivel 3 M1 7 Pulse la tecla de parámetros Motor A On Of para activar el parámetro 8 desactive el motor A volviendo a pulsar la tecla de parámetros Motor A On Of o la tecla El símbolo en forma de V dentro del círculo ya no ...

Страница 93: ...en utilizar fusibles del tipo T1A H250V C A desconecte el aparato ARTROMOT E2 E2 compact y extraiga el enchufe de red antes de cambiar los fusibles suelte el cierre de enclavamiento del soporte de fusibles 20 8 entre el interruptor de red 19 y el enchufe de red 18 empleando una herramienta adecuada ig 1 Vuelva a montar el soporte ig 2 después de haber sustituido los fusibles Cerciórese de que el s...

Страница 94: ...go debe empaque tar las siguientes piezas con suiciente material de acolchado bandeja del brazo Tubo ovalado del elemento de movimiento Montante con caja de piezas electrónicas Todo el estribo del antebrazo con carro deslizante y soporte tipo sand wich para la mano 14 En el cartón más corto debe empaque tar las siguientes piezas con suiciente material de acolchado 6 3 Transporte 6 3 1 ARTROMOT E2 ...

Страница 95: ...ajo y gire la bande ja del brazo por 180 hacia el interior Atención suelte el pasador 11 durante el movimiento de giro este encajará de forma audible en el otro lado véase el esquema de reequipamiento 2 d 7 suelte el tornillo de apriete para el giro del elemento del antebrazo 12 y gire el apoyabrazos con el motor b por 180 Vuelva a apretar el tornillo de apriete 12 véase el esquema de reequipamien...

Страница 96: ...ato ARTROMOT E2 compact hacia el lado del codo que se va a tratar 3 jale el pasador para el giro de la bandeja del brazo 5 hacia abajo y gire la bande ja del brazo por 180 hacia el interior Atención suelte el pasador 5 durante el movimiento de giro este encajará de forma audible en el otro lado véase el esquema de reequipamiento 1 a 4 suelte el tornillo de apriete para el giro del elemento del ant...

Страница 97: ... 1 1988 A1 1991 A2 1995 n de serie 20 000 iEC 60601 1 2005 n de serie 20 000 iEC 60601 1 6 2006 iEC 60601 1 9 2007 iEC 60601 1 11 2010 n de serie 20 000 iEC 62366 2007 iEC 62304 2006 En isO 14971 2007 Ansi ul 60601 1 n de serie 20 000 CAn CsA C22 2 no 601 1 M90 n de serie 20 000 Ansi AAMi Es 60601 1 1st Edition n de serie 20 000 CAn CsA 22 2 no 60601 1 08 n de serie 20 000 CEM compatibilidad elect...

Страница 98: ...as adicionales como p ej una orientación o un lugar de emplazamiento diferente de la tablilla de movilización ARTROMOT E2 E2 compact b En la gama de frecuencias de 150 khz a 80 Mhz la intensidad de campo debería ser infe rior a 3 V m Directrices y declaración del fabricante Inmunidad electromagnética la tablilla de movilización ARTROMOT E2 E2 compact ha sido concebida para el uso en un entorno ele...

Страница 99: ...ntroladas El cliente o usuario de ARTROMOT E2 E2 compact puede contribuir a evitar perturbaciones electromagnéticas respetando la distancia mínima entre apara tos de telecomunicación AF portátiles y móviles emisores y la tablilla de movilización ARTROMOT E2 E2 compact la cual depende de la potencia de salida del aparato de telecomunicación como se indica más abajo Potencia nominal del emisor W Dis...

Страница 100: ...ta chip del paciente 0 0034 048 2 Tarjeta chip del paciente protocolo 0 0037 035 3 Rotulador para la tarjeta chip de paciente 0 0031 006 11 Servicio técnico DECLARACIÓN DE CONFORMIDAD Declaración de conformidad según las disposiciones de la directiva comunitaria relativa a productos sanitarios 93 42 CEE del 14 06 1993 para productos sanitarios la empresa ORMED GmbH Merzhauser Strasse 112 D 79100 F...

Страница 101: ...erazioni iniammatorie acute dell arti colazione salvo diversa prescrizione del medico curante paralisi spastiche osteosintesi instabili 1 Informazioni sull impiego dell apparecchiatura per la mobilizzazione Descrizione dell apparecchiatura ARTROMOT E2 II Ilustraciones ARTROMOT E2 IV Compendio dei pittogrammi ARTROMOT E2 E2 compact V Ilustraciones ARTROMOT E2 compact VII Descrizione dell apparecchi...

Страница 102: ... supinazione 90 0 90 l apparecchiatura può essere impiegata su tutti e due i lati con l adattamento Nota Per consentire una chiara indicazione della posizione attuale dell apparecchia tura per la mobilizzazione i valori per la pronazione e l estensione inferiori a 0 sono contrassegnati sul display e nel prosieguo delle istruzioni per l uso con il segno L ARTROMOT E2 E2 compact si distingue fra l a...

Страница 103: ...one pronazione in questo caso Estensione 2 3 2 Unità di programmazione nella modalità di selezione del MENU 2 3 3 Unità di programmazione nella modalità di programmazione Ampiezza di movimento 2 3 Spiegazione dell unità di programmazione 2 3 1 Unità di programmazione nel funzionamento normale Programma terapeutico programmato Valore programmato dell estensione Valore programmato della lessione Tas...

Страница 104: ...corso terapeutico pronazione supinazione distensione estensione distensione lessione distensione pronazione distensione supinazione Oscillazione estensione pronazione Oscillazione lessione supinazione impostazione di trasporto nuovo paziente Modalità di funzionamento sincrono asincrono Menu Assistenza clienti Vedere anche il prospetto dei pittogrammi pag V 2 4 Spiegazione dei pittogrammi Funzioni ...

Страница 105: ...a seguente regolazione per evitarne il ribaltamento 1 non applicabile 2 0 3 90 4 0 5 0 Corrente alternata Per numero di serie 20 000 Apparecchio in classe di protezione i È necessario collegare il prodotto medicale a un sistema con conduttore di protezione Per numero di serie 20 000 Apparecchio in classe di protezione ii il prodotto medicale è munito di isolamento di protezione Parte applicativa t...

Страница 106: ...l autorizza zione scritta del costruttore Assicurarsi che il prodotto medicale sia in posizione stabile durante l utilizzo Fate attenzione che nessuna parte del corpo e nessun oggetto come coperte cuscini cavi ecc possano inire nelle parti mobili dell apparec chiatura per la mobilizzazione durante l utilizzo dell ARTROMOT E2 compact usate sempre una sedia con quattro gambe e senza braccioli Spiega...

Страница 107: ...iatura da parte dei gruppi menzionati badando che si avvicinino il meno possibile all apparecchiatura evitare la presen za di polvere e pelucchi si applicano le disposizioni di sicurezza indicate Tenere presente che le spine si pos sono inserire solo in una determi nata posizione e bloccare sempre il collegamento a connettore con il bloccaggio m Avvertimento Prestare particolare attenzione in pre ...

Страница 108: ... la parte mobile dell apparec chiatura in modo che non cada in basso il modo migliore è quello di tenerla per la doppia articolazione 3 Allentare la vite 4 e regolare l altez za dell elemento di mobilizzazione Assicurarsi che la parte superiore del braccio poggi interamente sull apposito appoggio avvolgente 5 il paziente Avvertenza Vedere descrizione dell apparecchiatura a pag II III e VIII IX 4 1...

Страница 109: ... vite 4 Veriicare quindi la coincidenza tra l asse del motore A e l articolazione del gomi to Eventualmente è possibile eseguire una regolazione ine nell orientamento verticale mediante il perno di arresto 6 Regolazione dell angolo di posizionamento Fig C m Attenzione Pericolo per il paziente danni all apparecchiatura Per la regolazione tenere fermo il motore B e issare in questo modo l apparecchi...

Страница 110: ...asto START Pazienti con chipcard già programmate Eseguire innanzitutto le regolazioni meccaniche inserire la chipcard il paziente non deve ancora trovarsi sull apparecchiatura per la mobilizzazione Premere il tasto START l apparecchia tura per la mobilizzazione si porta nella posizione iniziale dei parametri memo rizzati nella chipcard e si ferma m Avvertimento Pericolo per il paziente Prima d ini...

Страница 111: ...alori massimi programmati i due punti di pausa sono Valore massimo di estensione con temporaneamente a valore massimo di pronazione Valore massimo di lessione contem poraneamente a valore massimo di supinazione le pause possono essere impostate se paratamente per il motore A e il motore b da 1 secondo a 60 minuti l imposta zione si efettua in scatti da 1 secondo per un tempo che va da 0 a 59 secon...

Страница 112: ... Altrimenti alla pressione del tasto START sul display compare LIVELLO 4 n Programma di isolamento Con questa funzione speciale en Per programmare le pause procedere come segue scegliere nel livello menu 2 dei tasti parametri la funzione speciale sul display compare il simbolo della fun zione speciale e informazioni sulle pause impostate correnti sopra il tempo impostato per la pausa in lessione s...

Страница 113: ...o l apparecchia tura per la mobilizzazione si porta sul massimo valore programmato per la lessione per ricominciare con un ciclo di distensione estensione Questa fase può essere ripetuta ogni volta che si ritiene necessario il tratta mento termina premendo il tasto sTOP al termine della terapia programmata Impostazione standard disattivate trambi i motori sono messi in moto ma non eseguono mai i m...

Страница 114: ...to della distensione Qualora fosse attivata la funzione distensione estensione il motore b sarà disattivato automaticamente si attua quindi un esclusiva mobilizza zione di estensione lessione la funzione speciale distensione estensione non può essere attivata contemporaneamente a un altra funzione di distensione in modalità di funzionamento nella parte sinistra superiore del display appare il simb...

Страница 115: ...o per l estensione lessione e pronazione supinazione dapprima si raggiunge il valore dell an golo di lessione programmato come massimo insieme al valore dell angolo di supinazione programmato come massimo Quindi si raggiunge il valore dell angolo di estensione programmato come massimo insieme al valore dell an golo di pronazione programmato come massimo dopo il raggiungimento del valore di estensi...

Страница 116: ...tensione e impo stando i valori con i tasti 5 impostare allo stesso modo la lessione Nota Per la semplice estensione lessione il motore b per la rotazione deve essere disattivato come descritto ai seguenti Punti da 6 a 8 dopo aver programmato l ampiezza del movimento è possibile pro grammare altre opzioni come Pausa Velocità ecc 6 Premere più volte il tasto MENU dell unità di programmazione per ac...

Страница 117: ...sente si sarà asciugata Controlli tecnici solo apparecchi che sono sottoposti ad operazioni di manutenzione regolari hanno un funzionamento sicuro Per mantenere la sicurezza del funzionamento e dell eserci zio eseguire almeno una volta all anno dei controlli su tutti i componenti per verii care se vi sono danni oppure collegamenti allentati Questi controlli possono essere eseguiti solo da persone ...

Страница 118: ... dell angolo di posizionamento 27 allentare la vite di issaggio 1 ed estrarre l elemento di mobilizzazione 7 Allentare la vite di issaggio per la regolazione dell angolo del gomito 2 e staccate il tubo ovale dall elemento di mobilizzazione 8 Rimuovere il supporto con la scatola elettronica dalla base del supporto a forma di stella allentando la vite di is saggio 24 posta sul lato inferiore della b...

Страница 119: ...o simbolo compare durante la fase di adattamento dell appoggio avvolgente della parte superiore del braccio 6 4 1 Adattamento laterale dell ARTROMOT E2 l ARTROMOT E2 può essere utilizzata per l articolazione del gomito destra e sinistra A tale scopo è necessario però un adattamento Questo adattamento è possibile con poche manovre 1 Attivare la funzione impostazione di trasporto prevista nel menu v...

Страница 120: ... funzionamento Temperatura ambiente umidità atmosferica relativa Pressione atmosferica da 5 C ino a 40 C da 15 ino a 93 da 700 hPa ino a 1060 hPa ________________________________ Con riserva di modiiche tecniche 10 2011 il prodotto descritto in questo Manuale di istruzione non deve essere smaltito con i comuni riiuti domestici non suddivisi ma deve essere trattato separatamente Per ricevere delle ...

Страница 121: ...del livello di test 9 2 Immunità ai disturbi elettromagnetici 9 IEC 60601 1 2 2007 e IEC 60601 1 11 2010 l ARTROMOT E2 E2 compact è sottopo sta a provvedimenti precauzionali speciali in rapporto alla compatibilità elettroma gnetica CEM È consentito installare l ap parecchiatura e metterla in servizio solo in conformità alle direttive sulla compatibilità elettromagnetica contenute nei documen ti di...

Страница 122: ...ato il cliente o l utilizzatore dell ARTROMOT E2 E2 compact dovrebbero garantire che essa venga utilizzata in tale ambiente Test dell immunità da disturbi Livello di test IEC 60601 Livello di conformità Ambiente elettromagnetico Direttive Gli apparecchi radio portatili e mobili non devono essere utilizzati a una distanza dall ARTROMOT E2 E2 compresi i cavi minore della distanza di protezione racco...

Страница 123: ...tà minima per le parti di ricambio Pos Descrizione Cod art Quantità 1 Chipcard del paziente 0 0034 048 2 Chipcard del paziente protocollo 0 0037 035 3 Pennarello per pellicole per la chipcard del paziente 0 0031 006 11 Assistenza tecnica 10 Contatti siamo a vostra disposizione per informa zioni e per il servizio assistenza ARTROMOT International Contattate il vostro rivenditore locale la sede cent...

Страница 124: ...ella Direttiva 93 42 CEE si tratta di un prodotto della classe di rischio IIa Organismo notiicato dQs Medizinprodukte Gmbh August schanz straße 21 60433 Frankfurt am Main 0297 Freiburg il 4 marzo 2012 Responsabile Gestione Qualità Bernhard Krohne Questo certiicato è valido ino alla scadenza del certiicato cui fa riferimento i certiicati sono consultabili sul sito https de dqs ul com kunden kundend...

Страница 125: ...kelijk op voorschrift van de arts spastische verlammingen instabiele osteosynthesen 1 Informatie voor het gebruik van de bewegingsslede Beschrijving van het apparaat ARTROMOT E2 II Afbeeldingen ARTROMOT E2 IV Pictogrammenoverzicht ARTROMOT E2 E2 compact V Afbeeldingen ARTROMOT E2 compact VII Beschrijving van het apparaat ARTROMOT E2 compact VIII 1 Informatie voor het gebruik van de bewegingsslede ...

Страница 126: ...jk te maken worden de waarden voor pronatie en extensie kleiner dan 0 op het display en verder in de gebruiks aanwijzing aangegeven met voorteken De ARTROMOT E2 E2 compact on derscheidt zich onder andere door de volgende kenmerken anatomisch juiste instelbaarheid fysiologisch bewegingsverloop grootst mogelijke bewegingsomvang afstandsbediening voor het nauwkeurig instellen van alle behandelwaarden...

Страница 127: ...rammerde maximale waarde van de extensie of pronatie hier extensie 2 3 2 Afstandsbediening in MENU keuzemodus 2 3 3 Afstandsbediening in programmeermodus Bewegingsuitslag 2 3 De afstandsbediening 2 3 1 Afstandsbediening bij standaardgebruik Geprogrammeerd behandelprogramma Geprogrammeerde extensiewaarde Geprogrammeerde lexiewaarde knop knop Actuele hoek Motor b behandeltijd Geprogrammeerde supinat...

Страница 128: ...atie pronatie supinatie Rekking in extensierichting Rekking in lexierichting Rekking in pronatierichting Rekking in supinatierichting herhaling in extensie pronatie eindstand herhaling in lexie supinatie eindstand Transportinstelling nieuwe patiënt werking synchroon Asynchroon servicemenu zie ook het pictogrammenoverzicht op pagina V 2 4 Verklaring van de pictogrammen Geselecteerde functie Actuele...

Страница 129: ...ROMOT E2 compact m bij het transporteren van de ARTROMOT E2 compact in gemonteerde toestand moet om het omvallen van het apparaat te voorkomen de volgende instelling aangebracht te worden 1 niet van toepassing 2 0 3 90 4 0 5 0 wisselstroom bij serienummer 20 000 Apparaat van veiligheidsklasse i dit medische product moet altijd geaard worden bij serienummer 20 000 Apparaat van veiligheidsklasse ii ...

Страница 130: ...lede kunnen komen Maak bij de ARTROMOT E2 compact altijd gebruik van een stoel met vier poten en zonder armleuningen m Waarschuwing bijzondere voorzichtigheid is geboden in aanwezigheid van kleine kinderen en zuigelingen houd voldoende veiligheidsafstand van het apparaat in acht laat het apparaat nooit aan staan zonder toezicht schakel het ap paraat uit en trek de stekker uit het stopcontact sla h...

Страница 131: ...t gekoppeld wordt aan andere apparaten of een samen stelling van medische systemen dient gecontroleerd te worden dat geen gevaar kan optreden door de summe ring van afvoerstroom kan optreden u kunt zich voor meer informatie wenden tot djO Global Voor de aansluiting op de netstroom mag geen gebruik gemaakt worden van een verlengsnoer met een stek kerbox voor meerdere stekkers de ARTROMOT E2 E2 comp...

Страница 132: ...draai schroef 4 los en pas het bewe gingselement aan op hoogte let er daarbij op dat de bovenarm helemaal op de bovenarmschaal 5 ligt de patiënt moet een rechtopzittende en ontspan nen houding aannemen draai de schroef 4 weer vast Controleer nu of de as tussen Motor A en het ellebooggewricht overeenkomt in voorkomende gevallen kunt u een nauwkeuriger afstelling in verticale richting door middel va...

Страница 133: ...oeven goed vastgedraaid zijn en of alle klemhendels goed gesloten zijn Instellen van de opslaghoek Ab C m Voorzichtig Gevaar voor de patiënt beschadiging van het apparaat Voor de instelling Motor B vasthouden en zodoende het apparaat beveiligen hou het bewegingselement bij de beugel 30 vast draai nu de schroef 7 los en stel de gewenste hoek in draai de schroef 7 weer vast Instellen van de lengte v...

Страница 134: ... drukt Patiënten met geprogrammeerde chipkaart Voer eerst de mechanische instellingen uit steek de chipkaart in de afstandsbedie ning de patiënt mag zich nog niet op de bewegingsslede bevinden druk op de knop START de bewegings slede gaat naar de startpositie van de parameter die op de chipkaart is opge slagen en stopt m Waarschuwing Gevaar voor de patiënt Voor begonnen wordt met een behan deling ...

Страница 135: ...auzes de pauzes vinden telkens plaats in de geprogrammeerde maximaalwaarden de twee pauzepunten zijn de volgende Maximale extensiewaarde gelijktijdig met de maximale pronatiewaarde Maximale lexiewaarde gelijktijdig met de maximale supinatiewaarde de pauzes zijn voor Motor A en Motor b apart instelbaar van 1 seconde tot 60 minuten ze zijn instelbaar in stappen van 1 seconde van 0 tot 59 seconden en...

Страница 136: ...ngen de speciale functie verloopt als volgt u programmeert de pauzes als volgt selecteer in menuniveau 2 via de para meterknop de speciale functie Op het display verschijnt het symbool voor de speciale functie en de informatie over de actueel ingestelde pauzes boven de ingestelde tijd voor de pauze bij lexie supinatie Onder de ingestelde tijd voor de pauze bij extensie pronatie Een kadertje markee...

Страница 137: ...nodig kunt u deze procedure een willekeurig aantal keren herhalen u be eindigt de behandeling met behulp van de knop sTOP of door de geprogram meerde behandelduur te laten verlopen Standaardinstelling gedeactiveerd Eerst beweegt Motor A gedurende 3 cycli naar de geprogrammeerde maximale waarden voor extensie en lexie dan stopt hij Motor b is op dat moment gedeactiveerd indicatie Motor b OFF dan be...

Страница 138: ...t uitsluitend plaats in de zin van extensie lexie de speciale functie Rekking in exten sierichting kan niet tegelijkertijd met een andere rekkingsfunktie geacti veerd worden Tijdens de gebruiksmodus van de slede ziet u in het veld linksboven in het scherm het symbool n Rekking in lexierichting de speciale functie Rekking in lexie richting maakt een rustig verend rekken van het gewricht in de richt...

Страница 139: ...ximum ingestelde waarden voor extensie lexie en prona tie supinatie daarna wordt naar de als maximum geprogrammeerde lexiehoek gegaan en tegelijkertijd naar de als maximum geprogrammeerde supinatie hoek gegaan daarna wordt naar de als maximum geprogrammeerde extensie hoek gegaan en tegelijkertijd naar de als maximum geprogrammeerde pronatie hoek gegaan na het bereiken van de geprogram meerde exten...

Страница 140: ...tatie uitschake len zoals beschreven staat onder de volgende punten 6 tot 8 nadat u de bewegingsuitslagen hebt geprogrammeerd kunt u de overige programmaopties zoals pauze snel heid enz programmeren 6 druk meermalen op de knop MENU van de afstandsbediening om naar niveau 3 M3 te gaan 7 druk op de parameterknop Motor B aan uit om de parameter te activeren 8 deactiveer motor b door nogmaals op de pa...

Страница 141: ... uur opslaan bij kamer temperatuur tot eventueel aanwezig condensvocht is opgedroogd Technische controle uitsluitend apparatuur die regelmatig wordt onderhouden is bedrijfszeker Voor het behouden van de veiligheid van de functies en werking moet u minstens een maal per jaar alle onderdelen controleren op schade of losse verbindingen zijn uitsluitend personen mogen deze controle verrichten die door...

Страница 142: ...ag hoek 27 draai klembout 1 los en trek het bewegingselement eruit 7 draai de klemschroef voor de instel ling van de hoek van de elleboog 2 los en haal het ovalen buisje van het bewegingselement 8 haal de staander met het elektroni cakastje uit de stervormige statiefvoet door het losmaken van de schroef 24 aan de onderkant van de statiefvoet 9 demonteer de statiefvoet waarbij u de vijf pootjes met...

Страница 143: ... elleboog dit symbool verschijnt tijdens het ombouwen van de bovenarmschaal 6 4 1 ARTROMOT E2 ombouwen de ARTROMOT E2 kan gebruikt worden voor zowel de linker als de rechter elle boog hiervoor moet u het apparaat echter wel ombouwen dat kost echter slechts een paar handbewegingen 1 Activeer de functie Transportinstelling uit het menu zie ook 5 3 en start de ARTROMOT E2 2 stel de ante retrolexie ve...

Страница 144: ...gevingsvereisten in bedrijf Omgevingstemperatuur Relatieve luchtvochtigheid luchtdruk 5 C tot 40 C 15 tot 93 700 hPa tot 1060 hPa ______________________________________ Technische veranderingen voorbehouden 10 2011 u mag het in deze gebruiksaanwijzing beschreven product niet afvoeren met het gewone ongesorteerde huisvuil maar u moet het afzonderlijk aanbieden neem contact op met djO Global over in...

Страница 145: ...ng aangetrofen worden OPMERKING UT is de lichtnetwisselspanning vóór gebruik van het testniveau 9 2 Elektromagnetische stoorvastheid 9 IEC 60601 1 2 2007 en IEC 60601 1 11 2010 die ARTROMOT E2 E2 compact is voor zien van bijzondere voorzorgmaatregelen met betrekking tot de elektromagnetische verdraagzaamheid EMV u mag het toestel uitsluitend installeren en in gebruik nemen volgens de in de bijgevo...

Страница 146: ...klant of de gebruiker van de ARTROMOT E2 E2 compact moet ervoor zorgdragen dat het apparaat in een dergelijke omgeving gebruikt wordt Stoorvastheids testen IEC 60601 testniveau Overeenstem mingsniveau Elektromagnetische omgeving Richtlijnen draagbare en mobiele zendap paratuur mag niet dichterbij de ARTROMOT E2 E2 inclusief de kabels geplaatst worden dan de geadviseerde veiligheidafstand die u ber...

Страница 147: ...veelheden Plaats Beschrijving Art Nr Aantal 1 Patiënten chipkaart 0 0034 048 2 Patiënten chipkaart protocol 0 0037 035 3 Viltstift voor de patiënten chipkaart 0 0031 006 11 Technische service 10 Contact Voor vragen over product en service staan we graag voor u klaar ARTROMOT International neem contact op met uw plaatselijke vertegenwoordiger het hoofdkantoor van djO Global in de Verenigde staten h...

Страница 148: ...Met betrekking tot voorschrift 9 van de richtlijnen 93 42 EWG gaat het hier om producten van risicoklasse IIa Aangemelde instantie dQs Medizinprodukte Gmbh August schanz straße 21 60433 Frankfurt am Main 0297 Freiburg 4 maart 2012 Gevolmachtigde kwaliteitsmanagement QMB Bernhard Krohne dit certiicaat is geldig tot de vervaldatum van het verwijzende certiicaat het certiicaat vindt u onder https de ...

Страница 149: ...288 ...

Страница 150: ...l total therapy time abduction ad duction therapy documentation pronation supi nation therapy documentation EBENE 5 LEVEL 5 dehnung Extension dehnung Flexion dehnung Pronation dehnung supination stretching in extension stretching in lexion stretching in pronation stretching in supination EBENE 6 LEVEL 6 Endgradige wiederholung Endgradige wiederholung EROM repeat Extension Pronation EROM repeat Fle...

Страница 151: ...Vi Deutsch Vii Abbildungen ARTROMOT E2 compact A B C D Figures Illustrations Ilustraciones Illustrazioni ...

Страница 152: ...parato Descrizione dell apparecchiatura Beschrijving van het apparaat 2 4 14 13 21 20 26 9 16 8 18 19 22 22 22 Gerätebeschreibung ARTROMOT E2 compact 24 15 11 Device description Description de l appareil Descripción del aparato Descrizione dell apparecchiatura Beschrijving van het apparaat 1 10 25 17 5 23 3 6 27 7 12 ...

Страница 153: ......
Отзывы: