Chapter 30: Automation
713
Triangle
Draws a sawtooth pattern that repeats
at a rate based on the current Grid value. In au-
dio tracks, the pattern has a single breakpoint at
each extreme. In MIDI tracks, the controller
value changes in steps according to the resolu-
tion setting in the MIDI Preferences page. Am-
plitude is controlled by vertical movement of
the Pencil tool.
Square
Draws a square pattern that repeats at a
rate based on the current Grid value. Amplitude
is controlled by vertical movement of the Pencil
tool.
Random
Draws a random pattern of levels that
change at a rate based on the current Grid value.
Amplitude is controlled by vertical movement
of the Pencil tool.
Using Pencil Tool Shapes
You can draw automation for audio as well as
MIDI tracks. For example, use the Triangle pat-
tern to control continuous functions, or the
Square pattern to control switched functions
such as Mute or Bypass.
Since the Pencil tool draws these shapes using
the current Grid value, you can use it to perform
panning in tempo with a music track, or on
frame scene changes when working in post pro-
duction.
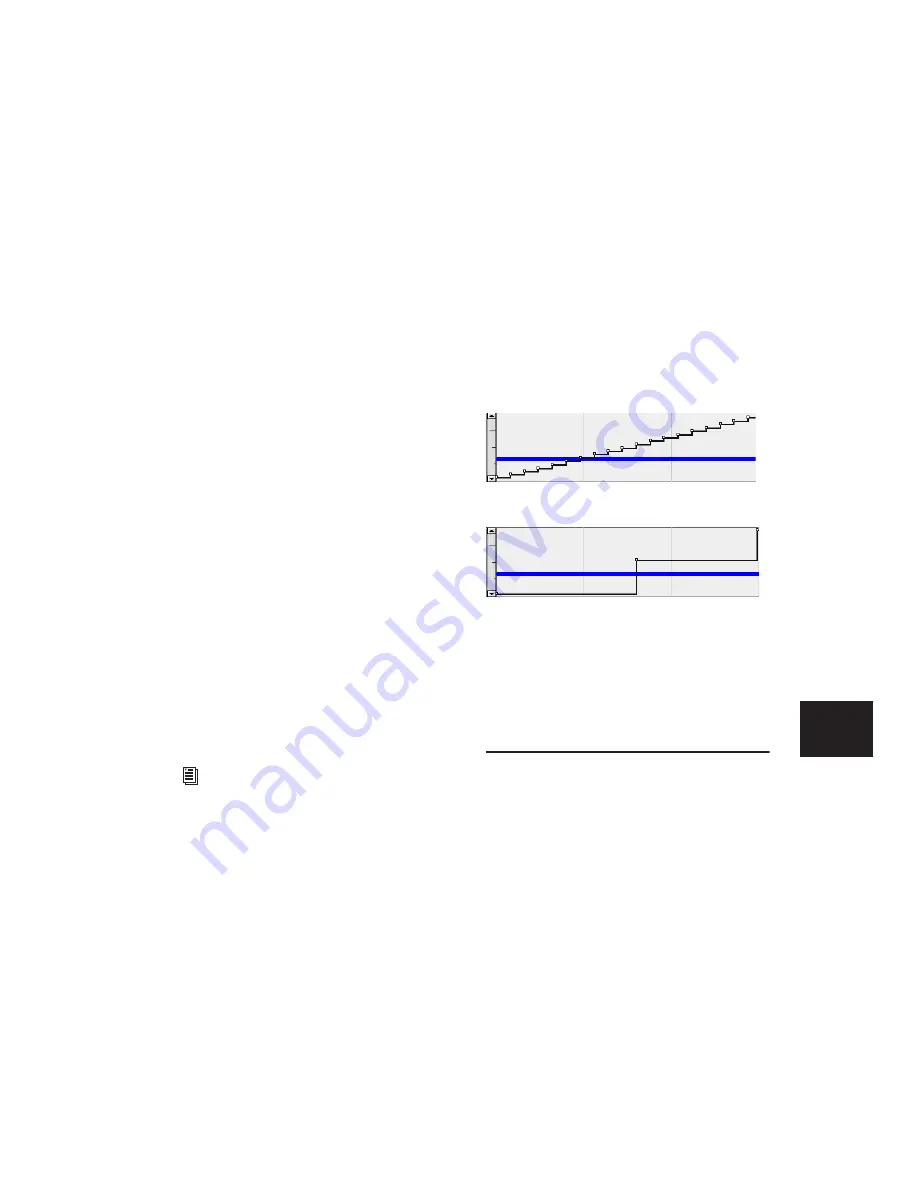
Resolution of MIDI Controller Data
When using the Pencil tool to draw MIDI auto-
mation, the data is drawn as a series of discrete
steps. You can control the resolution (or den-
sity) of these steps to help manage the amount
of MIDI data sent for a given MIDI controller
move.
To set the resolution for the Pencil tool:
1
Choose Setup > Preferences and click MIDI.
2
Enter a value for “Pencil Tool Resolution
When Drawing Controller Data.” The value can
range from 1 to 100 milliseconds.
3
Click OK to close the Preferences window.
The illustrations below show the same MIDI
controller automation drawn with different
Pencil tool resolution settings.
For better performance, consider selecting a
smaller value for MIDI controls that need higher
resolution (such as MIDI volume), and a larger
value for controls that may not require a high
resolution (such as Pan).
Editing Automation
Pro Tools provides several ways to edit automa-
tion data, including Trim automation if it has
not been coalesced., for any track in your ses-
sion. You can edit automation data graphically
by adjusting breakpoints in any automation
playlist. You can also cut, copy, and paste auto-
mation data in the same manner as audio and
MIDI data.
For more information on MIDI continuous
controller data, see “Continuous Controller
Events” on page 571.
MIDI Data drawn with resolution of 10 ms
MIDI Data drawn with resolution of 100 ms
Содержание Pro Tools
Страница 1: ...Pro Tools Reference Guide Version 7 3 ...
Страница 15: ...1 Part I Introduction ...
Страница 16: ...2 ...
Страница 33: ...19 Part II System Configuration ...
Страница 34: ...20 ...
Страница 44: ...Pro Tools Reference Guide 30 ...
Страница 94: ...Pro Tools Reference Guide 80 ...
Страница 95: ...81 Part III Sessions Tracks ...
Страница 96: ...82 ...
Страница 108: ...Pro Tools Reference Guide 94 ...
Страница 130: ...Pro Tools Reference Guide 116 ...
Страница 269: ...255 Part IV Recording ...
Страница 270: ...256 ...
Страница 310: ...Pro Tools Reference Guide 296 ...
Страница 345: ...331 Part V Editing ...
Страница 346: ...332 ...
Страница 402: ...Pro Tools Reference Guide 388 ...
Страница 496: ...Pro Tools Reference Guide 482 ...
Страница 548: ...Pro Tools Reference Guide 534 ...
Страница 571: ...557 Part VI MIDI Editing ...
Страница 572: ...558 ...
Страница 596: ...Pro Tools Reference Guide 582 ...
Страница 637: ...623 Part VII Mixing ...
Страница 638: ...624 ...
Страница 702: ...Pro Tools Reference Guide 688 ...
Страница 771: ...757 Part VIII Video Sync Surround ...
Страница 772: ...758 ...
Страница 792: ...Pro Tools Reference Guide 778 ...
Страница 806: ...Pro Tools Reference Guide 792 ...
Страница 856: ...Pro Tools Reference Guide 842 ...


