Chapter 23: Conductor Tracks and Memory Locations
531
To delete all Memory Locations, do one of the
following:
■
In the Memory Locations Window, choose
Delete All from the pop-up menu.
– or –
■
Alt-Shift-click (Windows) or Option-Shift-
click (Mac) any Memory Location in the Mem-
ory Locations window.
To delete a Marker from the Markers ruler:
■
While pressing Alt (Windows) or Option
(Mac), move the cursor over the Marker (where
the cursor changes to the Grabber with a “–”)
and click to remove it.
Copying Marker Memory Locations
To copy and paste a range of Markers:
1
If you want to constrain the selection to the
current Grid value, set the Edit mode to Grid.
2
Drag in the Tempo ruler to select the range of
measures that includes the Markers.
If the beginning of the selection includes a
Marker, press Control (Windows) or Command
(Mac) so the Selector tool appears.
3
Choose Edit > Copy.
4
Click in the Markers ruler at the point where
you want to paste the tempo events.
5
Choose Edit > Paste. The contents of the Clip-
board are pasted from the insertion point, re-
placing any existing Markers.
To extend an Edit selection in a track to the
Markers ruler:
1
Using the Selector or Time Grabber tool, select
a track range.
2
Shift-click in the Markers ruler.
Shift-click again in the Tempo ruler to remove it
from the selection.
To select all Markers in the Markers ruler:
■
Double-click with the Selector tool in the
Tempo ruler.
Memory Locations Window
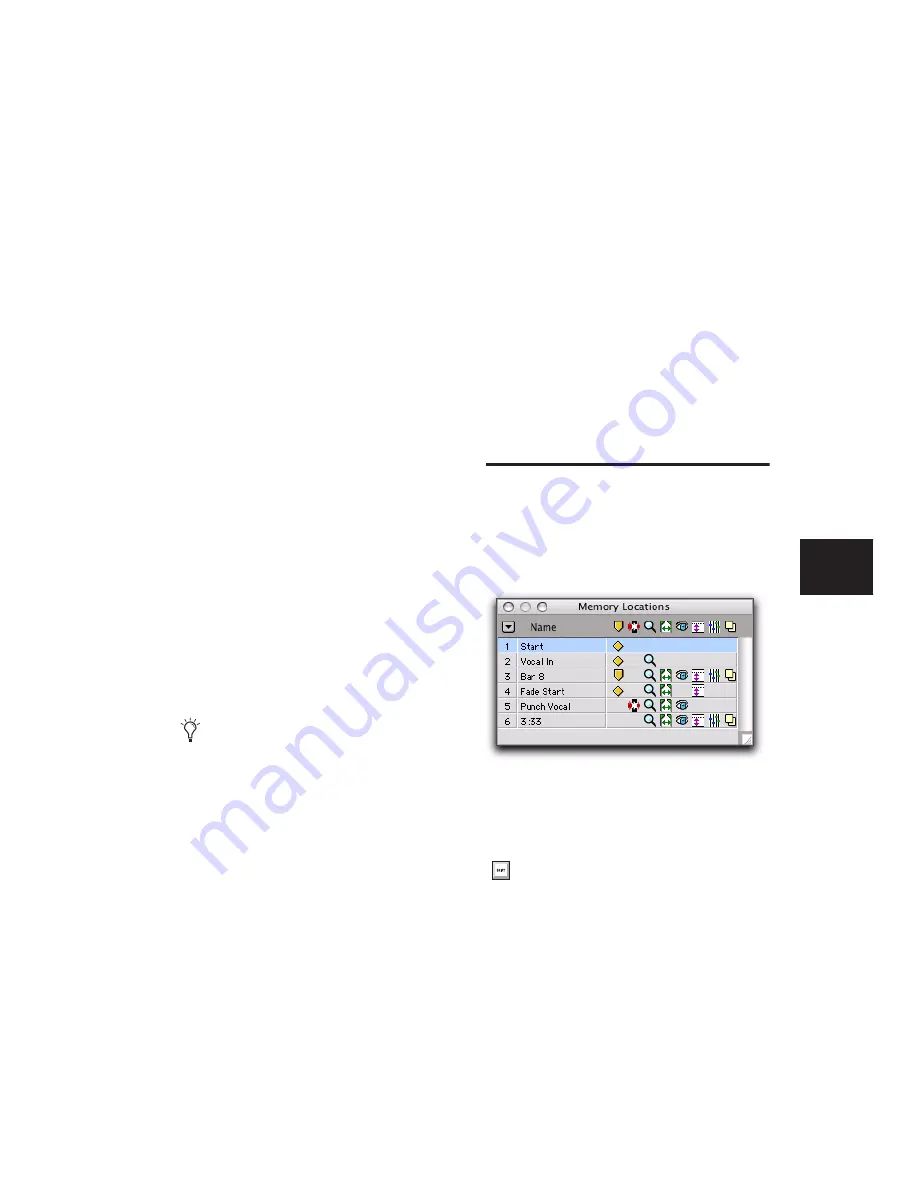
In the Memory Locations windows, Memory Lo-
cations are listed with assigned number, name,
and View Filter icons. Locations can be recalled
or edited from this window.
To recall a Memory Location from the Memory
Location window:
■
Click the Memory Location.
Press Alt (Windows) or Option (Mac) while
dragging to select across all Conductor
tracks.
Memory Locations window with View Filter icons
With the Numeric Keypad mode set to
Classic, press the Memory Location number
followed by Period (.). With the Numeric
Keypad mode set to Transport or Shuttle,
press Period (.), the Memory Location num-
ber, and Period (.) again.
Содержание Pro Tools
Страница 1: ...Pro Tools Reference Guide Version 7 3 ...
Страница 15: ...1 Part I Introduction ...
Страница 16: ...2 ...
Страница 33: ...19 Part II System Configuration ...
Страница 34: ...20 ...
Страница 44: ...Pro Tools Reference Guide 30 ...
Страница 94: ...Pro Tools Reference Guide 80 ...
Страница 95: ...81 Part III Sessions Tracks ...
Страница 96: ...82 ...
Страница 108: ...Pro Tools Reference Guide 94 ...
Страница 130: ...Pro Tools Reference Guide 116 ...
Страница 269: ...255 Part IV Recording ...
Страница 270: ...256 ...
Страница 310: ...Pro Tools Reference Guide 296 ...
Страница 345: ...331 Part V Editing ...
Страница 346: ...332 ...
Страница 402: ...Pro Tools Reference Guide 388 ...
Страница 496: ...Pro Tools Reference Guide 482 ...
Страница 548: ...Pro Tools Reference Guide 534 ...
Страница 571: ...557 Part VI MIDI Editing ...
Страница 572: ...558 ...
Страница 596: ...Pro Tools Reference Guide 582 ...
Страница 637: ...623 Part VII Mixing ...
Страница 638: ...624 ...
Страница 702: ...Pro Tools Reference Guide 688 ...
Страница 771: ...757 Part VIII Video Sync Surround ...
Страница 772: ...758 ...
Страница 792: ...Pro Tools Reference Guide 778 ...
Страница 806: ...Pro Tools Reference Guide 792 ...
Страница 856: ...Pro Tools Reference Guide 842 ...


