Chapter 19: Playing and Selecting Track Material
397
To link or unlink the Timeline and Edit selections,
do one of the following:
■
Select or deselect Options > Link Timeline and
Edit Selection.
– or –
■
In the upper left of the Edit window, click the
Link Timeline and Edit Selection button so it be-
comes highlighted (selected) or un-highlighted
(not selected).
If you are working on a film or video scene, you
may want to unlink the Timeline and Edit selec-
tions to find or audition material that is at a dif-
ferent location than the current Timeline selec-
tion. Edit selections can be played (choose Edit >
Selection > Play Edit) without disrupting the
current Timeline selection. Once you find the
material, you can then go back to the Timeline
selection and place it within the context of the
scene.
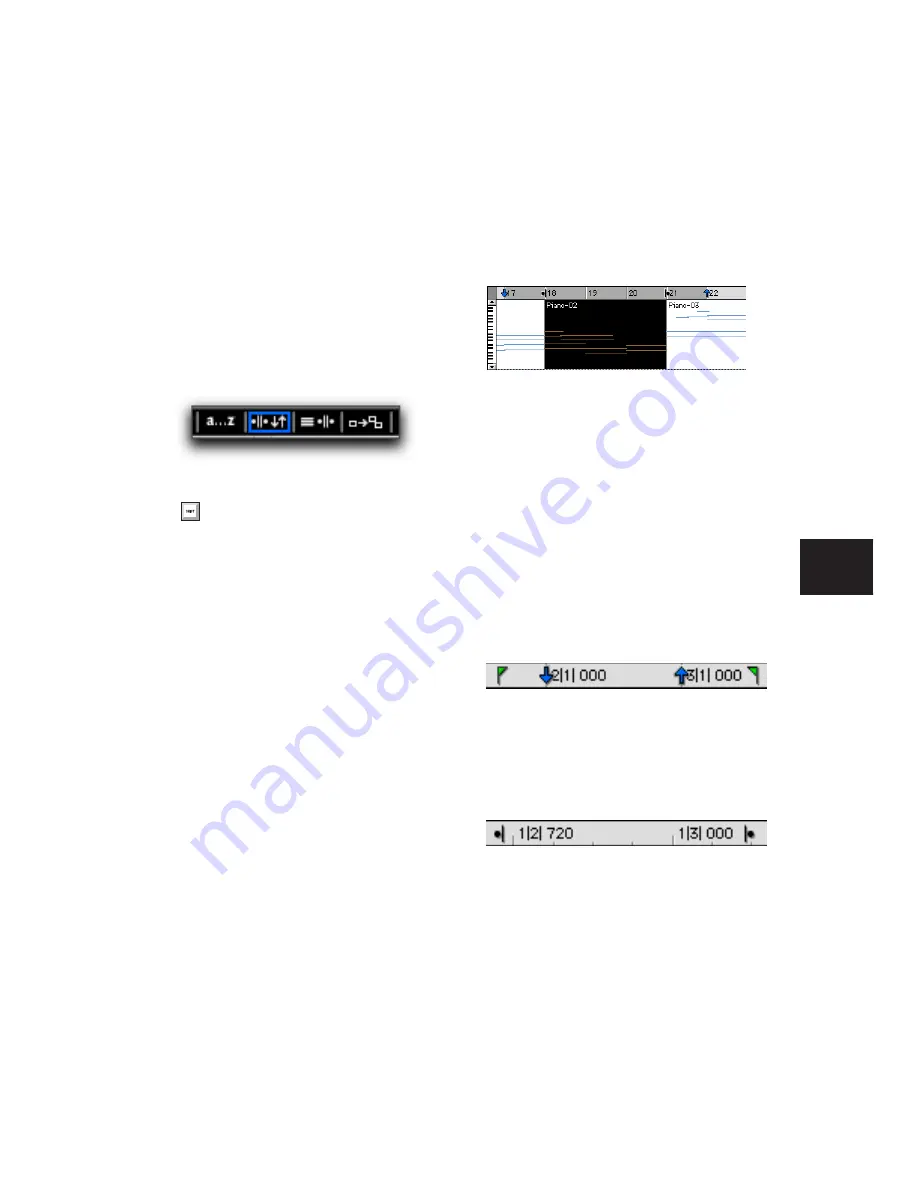
Figure 19 illustrates another reason why you
might want to unlink the Timeline and Edit se-
lections. In this example, the Timeline selection
sets a range to be looped on playback, while a
MIDI region (residing within the loop) is se-
lected for editing purposes. During playback,
the Edit selection can be nudged, quantized, or
transposed while the loop plays back com-
pletely independent and uninterrupted.
While you could theoretically do this with the
Timeline and Edit selections linked, as soon as
playback is stopped, the playback range would
then be updated to that of the more recent edit
range, or to a single note when editing MIDI.
Timeline and Edit Selection Markers
Timeline selections are displayed in the Main
Timebase ruler with
Timeline Selection Markers
,
which appear as blue arrows (red when record-
ing). In addition, there are
Pre- and Post-Roll
Flags
(which are green when enabled) indicating
the location for pre- and post-roll.
When the Timeline and Edit selections are un-
linked, Edit selections are displayed in the ruler
with
Edit Markers
, which appear as black brack-
ets.
If the Timeline and Edit selections are linked,
Edit selections are represented by the blue Time-
line Selection Markers.
Link Timeline and Edit Selection enabled
Press Shift+Forward Slash (/) to toggle Link
Timeline and Edit Selection on and off.
Figure 19. Timeline and Edit selections unlinked
Timeline Selection Markers with Pre- and Post-Roll
Flags
Figure 20. Edit Markers
Содержание Pro Tools
Страница 1: ...Pro Tools Reference Guide Version 7 3 ...
Страница 15: ...1 Part I Introduction ...
Страница 16: ...2 ...
Страница 33: ...19 Part II System Configuration ...
Страница 34: ...20 ...
Страница 44: ...Pro Tools Reference Guide 30 ...
Страница 94: ...Pro Tools Reference Guide 80 ...
Страница 95: ...81 Part III Sessions Tracks ...
Страница 96: ...82 ...
Страница 108: ...Pro Tools Reference Guide 94 ...
Страница 130: ...Pro Tools Reference Guide 116 ...
Страница 269: ...255 Part IV Recording ...
Страница 270: ...256 ...
Страница 310: ...Pro Tools Reference Guide 296 ...
Страница 345: ...331 Part V Editing ...
Страница 346: ...332 ...
Страница 402: ...Pro Tools Reference Guide 388 ...
Страница 496: ...Pro Tools Reference Guide 482 ...
Страница 548: ...Pro Tools Reference Guide 534 ...
Страница 571: ...557 Part VI MIDI Editing ...
Страница 572: ...558 ...
Страница 596: ...Pro Tools Reference Guide 582 ...
Страница 637: ...623 Part VII Mixing ...
Страница 638: ...624 ...
Страница 702: ...Pro Tools Reference Guide 688 ...
Страница 771: ...757 Part VIII Video Sync Surround ...
Страница 772: ...758 ...
Страница 792: ...Pro Tools Reference Guide 778 ...
Страница 806: ...Pro Tools Reference Guide 792 ...
Страница 856: ...Pro Tools Reference Guide 842 ...


