Solve specific media transport problems
Next to specific quality problems resulting in artefacts, you can also see media touches or a lower
print quality caused by media transport problems. Problems in media transport can usually be
observed through the top cover when you watch the media being transported over the platen.
Identify the problem and solve it step by step.
Bulging media
Introduction
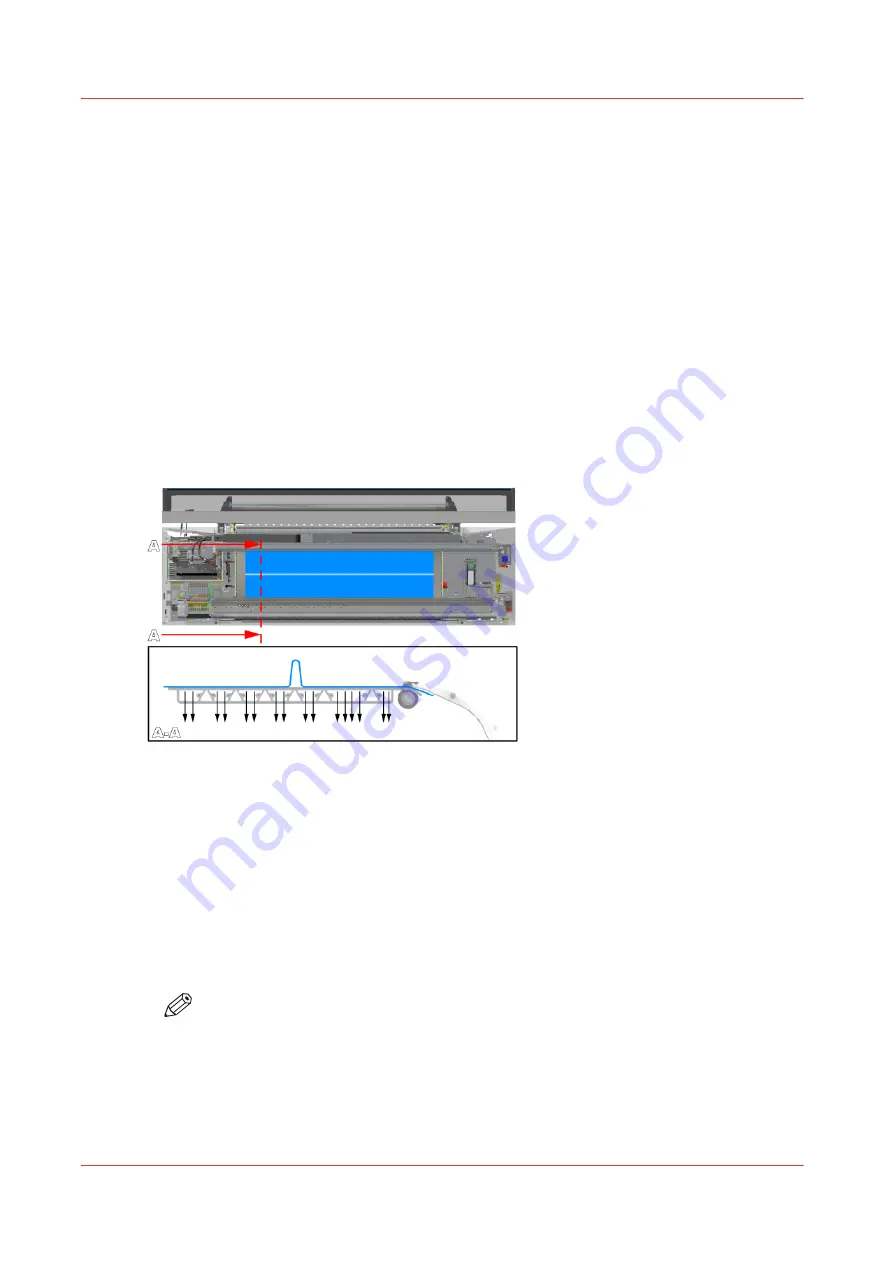
Solve media touches or print quality artefacts caused by the bulging of media. When media
experiences too much resistance when moving over the printer platen, the media can start to
bulge. A tapping sound from the media on the printer platen at every step can indicate the
problem. Many times you can also see the media moving like a caterpillar across the printer
platen. Follow the procedure below. You can stop at any time in the procedure when the problem
is solved.
Procedure
1.
Make sure the printer platen is clean.
2.
Decrease the [Vacuum power] settings in the RIP. First, decrease the vacuum power with steps of
10% until a minimum value of 10% for zones D and E. If this is not sufficient decrease the vacuum
power with steps of 10% until a minimum value of 30% for zones B and C. Do no decrease the
vacuum power of zone A.
For each step you decrease and have changed the setting: reload the media before you continue
printing. Observe the media movement on the platen first, before you decrease the vacuum
power again.
Change the media settings on page 76
NOTE
When you decrease the [Vacuum power] too much, media can come loose from the
printer platen resulting in media touches as well.
3.
Calibrate the media on page 120
.
4.
When the problem remains, use a different media.
Solve specific media transport problems
348
Chapter 9 - Troubleshooting and support
Содержание Colorado M Series
Страница 1: ...Colorado M series Extended operation guide 2023 Canon Production Printing ...
Страница 9: ...Chapter 1 Introduction ...
Страница 17: ...Instruction videos Available documentation Chapter 1 Introduction 17 ...
Страница 20: ...Optional features 20 Chapter 1 Introduction ...
Страница 21: ...Chapter 2 Safety information ...
Страница 32: ...Safety System 32 Chapter 2 Safety information ...
Страница 33: ...Chapter 3 Explore the system ...
Страница 40: ...The components of the printer top cover open 40 Chapter 3 Explore the system ...
Страница 41: ...Chapter 4 Handle the media ...
Страница 70: ...FLXfinish in the RIP 70 Chapter 4 Handle the media ...
Страница 165: ...Chapter 5 Print a job ...
Страница 174: ...Use the PRISMAsync Remote Control app 174 Chapter 5 Print a job ...
Страница 175: ...Chapter 6 Maintain the system ...
Страница 206: ...6 Unscrew the six green screws of the mirror boxes manually Clean the mirrors 206 Chapter 6 Maintain the system ...
Страница 249: ...Chapter 7 Improve quality ...
Страница 259: ...Chapter 8 Configure the network and security settings ...
Страница 290: ...Enable system installation from USB 290 Chapter 8 Configure the network and security settings ...
Страница 291: ...Chapter 9 Troubleshooting and support ...
Страница 309: ...Install a license via ORS Chapter 9 Troubleshooting and support 309 ...
Страница 313: ...Install a license received via e mail Chapter 9 Troubleshooting and support 313 ...
Страница 342: ...No gradual variation vertical banding Vertical banding 342 Chapter 9 Troubleshooting and support ...
Страница 363: ...Chapter 10 Regulation Notices ...
Страница 377: ......


