Maintain the printer
Refill ink
Introduction
You can refill ink easily without the risk of spilling ink.
A Colorado M-series M3/M3W configuration only allows use of 700 ml ink bottles.
A Colorado M-series M5/M5W configuration can use both 700 ml and 1000 ml ink bottles.
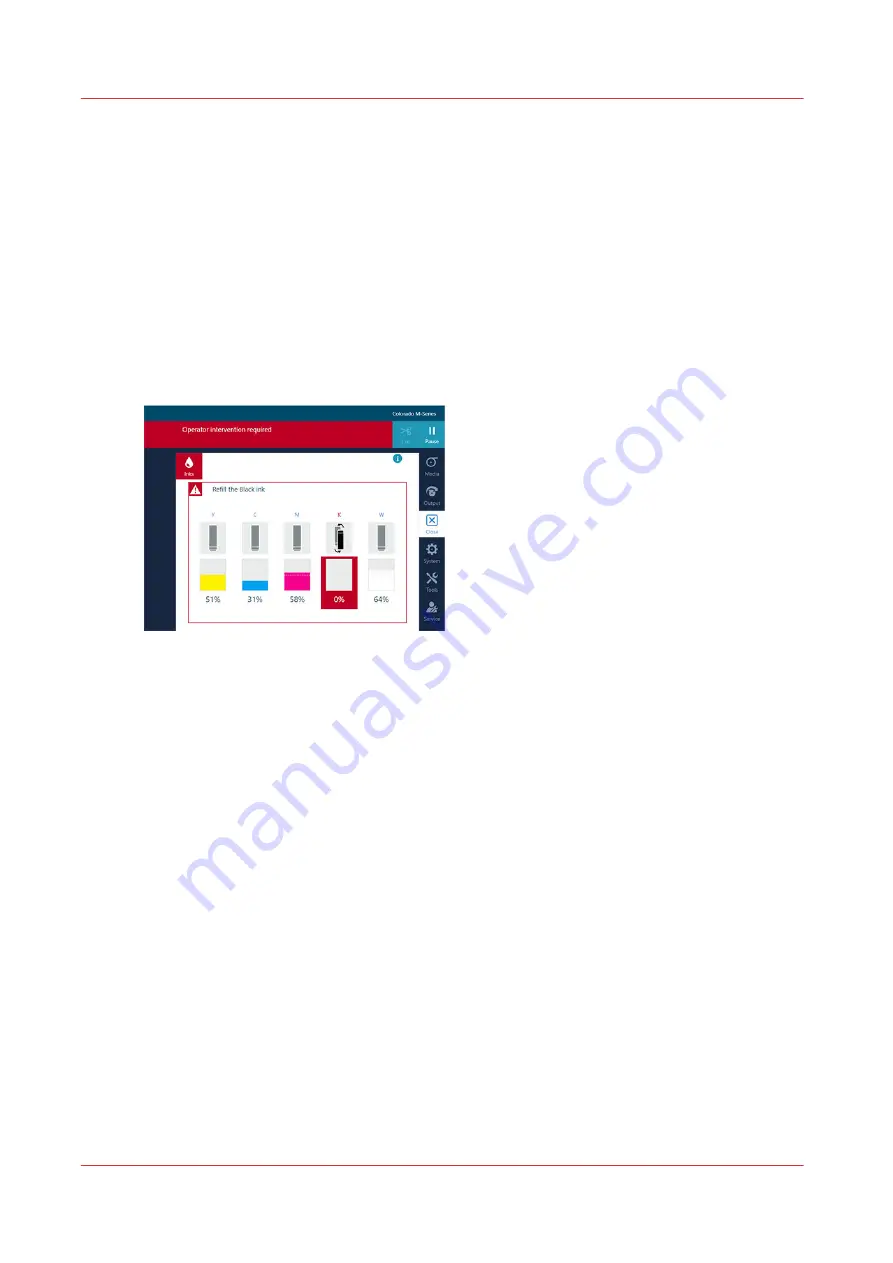
On the operator panel tap on the [Inks] icon on the right. You see an overview of the ink bottles
and levels of remaining ink:
• Read the messages above the ink bottles to understand the status of the ink level and the ink
bottles. The message indicates when ink is running out or is of the wrong color, bottles are not
present, wrong, invalid or expired.
• When the operator panel gives an orange warning, a bottle is not present, invalid, wrong or
expired, or it is advised to refill ink for a specific color as the ink is running out.
• When ink is about to expire within 28 days or is expired, the operator panel gives a red
warning and the operator is asked to confirm to continue printing. This will appear every day
until the ink status is not expired or almost expired.
The ink dialog contains instructions to make clear that printhead warranty is voided if expired
ink is used.
• When the operator panel gives a red warning for another reason, you must refill ink for a
specific color. The printing process is stopped until you have refilled the ink.
• For more detailed information on the status, tap the blue information icon at the top right hand
corner.
• When one of the LED lights located next to the bottles is on (not blinking), you can refill ink for
the related color.
• If the machine is not equipped with white ink, the order of the bottles from left to right is
YCMK.
• If the machine is equipped with white ink, the order of the bottles from left to right is YCMKW.
• When you see ink pollution, immediately clean the affected area. For more information, see
Clean the ink unit on page 203
.
Maintain the printer
210
Chapter 6 - Maintain the system
Содержание Colorado M Series
Страница 1: ...Colorado M series Extended operation guide 2023 Canon Production Printing ...
Страница 9: ...Chapter 1 Introduction ...
Страница 17: ...Instruction videos Available documentation Chapter 1 Introduction 17 ...
Страница 20: ...Optional features 20 Chapter 1 Introduction ...
Страница 21: ...Chapter 2 Safety information ...
Страница 32: ...Safety System 32 Chapter 2 Safety information ...
Страница 33: ...Chapter 3 Explore the system ...
Страница 40: ...The components of the printer top cover open 40 Chapter 3 Explore the system ...
Страница 41: ...Chapter 4 Handle the media ...
Страница 70: ...FLXfinish in the RIP 70 Chapter 4 Handle the media ...
Страница 165: ...Chapter 5 Print a job ...
Страница 174: ...Use the PRISMAsync Remote Control app 174 Chapter 5 Print a job ...
Страница 175: ...Chapter 6 Maintain the system ...
Страница 206: ...6 Unscrew the six green screws of the mirror boxes manually Clean the mirrors 206 Chapter 6 Maintain the system ...
Страница 249: ...Chapter 7 Improve quality ...
Страница 259: ...Chapter 8 Configure the network and security settings ...
Страница 290: ...Enable system installation from USB 290 Chapter 8 Configure the network and security settings ...
Страница 291: ...Chapter 9 Troubleshooting and support ...
Страница 309: ...Install a license via ORS Chapter 9 Troubleshooting and support 309 ...
Страница 313: ...Install a license received via e mail Chapter 9 Troubleshooting and support 313 ...
Страница 342: ...No gradual variation vertical banding Vertical banding 342 Chapter 9 Troubleshooting and support ...
Страница 363: ...Chapter 10 Regulation Notices ...
Страница 377: ......


