NOTE
It is strongly advised to secure the communication between the controller and the mail
server, in order to avoid anyone to intercept the password recovery email.
7.
In case of a secure connection, fill in the username under [Username].
If you do not know the username, ask your IT administrator.
8.
In case of a secure connection, fill in the password under [Password].
If you do not know the username, ask your IT administrator.
9.
Under [Sender] fill in the name that will be used in the "From" box in your email application.
NOTE
This is not your email address.
10.
Click on [Ok].
11.
Click on [Connection test].
NOTE
The result has to be [Ok] before you can continue to the email address configuration.
When the result is not [Ok], check the error to troubleshoot. For more information, see
Troubleshoot the mail server configuration on page 272
12.
Click on [Configuration]
→
[Users] to configure the email address.
13.
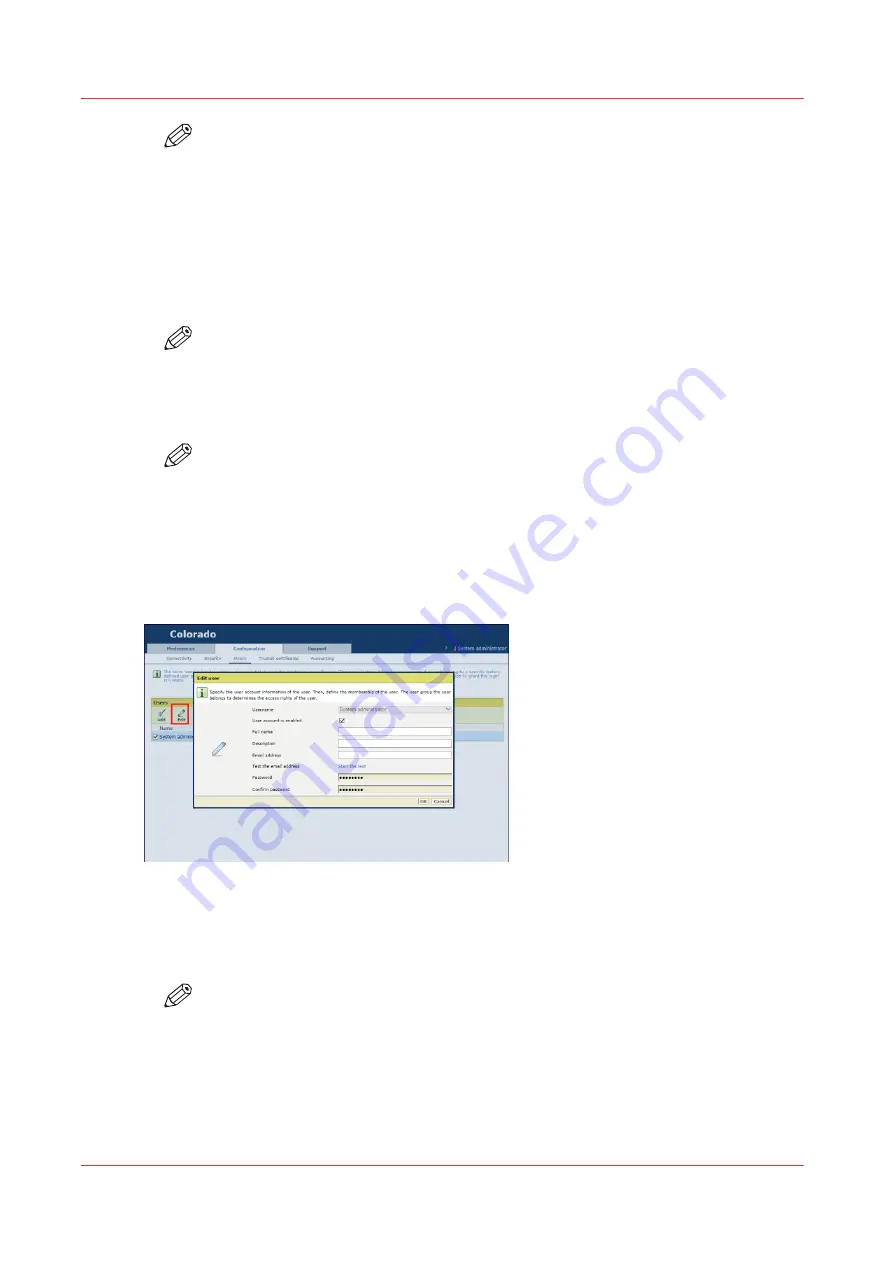
Check the box in front of [System administrator] and click on the [Edit] icon above.
A window opens.
14.
Fill in the [Email address] you want to use for password recovery.
15.
Click on [Start the test].
16.
Check that [Result of email test ] shows [Test successful].
NOTE
When the result is not successful, check the error to troubleshoot. If you cannot solve
the problem, ask you IT administrator.
17.
Open the email in your email application and check if you have received a test email.
The email is sent by 'noreply@<colorado_hostname>' or by the name filled in under [Sender].
Configure a mail server for password recovery and notifications
270
Chapter 8 - Configure the network and security settings
Содержание Colorado M Series
Страница 1: ...Colorado M series Extended operation guide 2023 Canon Production Printing ...
Страница 9: ...Chapter 1 Introduction ...
Страница 17: ...Instruction videos Available documentation Chapter 1 Introduction 17 ...
Страница 20: ...Optional features 20 Chapter 1 Introduction ...
Страница 21: ...Chapter 2 Safety information ...
Страница 32: ...Safety System 32 Chapter 2 Safety information ...
Страница 33: ...Chapter 3 Explore the system ...
Страница 40: ...The components of the printer top cover open 40 Chapter 3 Explore the system ...
Страница 41: ...Chapter 4 Handle the media ...
Страница 70: ...FLXfinish in the RIP 70 Chapter 4 Handle the media ...
Страница 165: ...Chapter 5 Print a job ...
Страница 174: ...Use the PRISMAsync Remote Control app 174 Chapter 5 Print a job ...
Страница 175: ...Chapter 6 Maintain the system ...
Страница 206: ...6 Unscrew the six green screws of the mirror boxes manually Clean the mirrors 206 Chapter 6 Maintain the system ...
Страница 249: ...Chapter 7 Improve quality ...
Страница 259: ...Chapter 8 Configure the network and security settings ...
Страница 290: ...Enable system installation from USB 290 Chapter 8 Configure the network and security settings ...
Страница 291: ...Chapter 9 Troubleshooting and support ...
Страница 309: ...Install a license via ORS Chapter 9 Troubleshooting and support 309 ...
Страница 313: ...Install a license received via e mail Chapter 9 Troubleshooting and support 313 ...
Страница 342: ...No gradual variation vertical banding Vertical banding 342 Chapter 9 Troubleshooting and support ...
Страница 363: ...Chapter 10 Regulation Notices ...
Страница 377: ......


