


59
12345678901234567890123456789012123456789012345678
12345678901234567890123456789012123456789012345678
12345678901234567890123456789012123456789012345678
12345678901234567890123456789012123456789012345678
12345678901234567890123456789012123456789012345678
12345678901234567890123456789012123456789012345678
12345678901234567890123456789012123456789012345678
12345678901234567890123456789012123456789012345678
12345678901234567890123456789012123456789012345678
12345678901234567890123456789012123456789012345678
12345678901234567890123456789012123456789012345678
12345678901234567890123456789012123456789012345678
12345678901234567890123456789012123456789012345678
12345678901234567890123456789012123456789012345678
PRO FARMER TRIPLEX
PRO FARMER TRIPLEX
PRO FARMER TRIPLEX
PRO FARMER TRIPLEX
PRO FARMER TRIPLEX
PRO FARMER / TS • GENIUS
PRO FARMER / TS • GENIUS
PRO FARMER / TS • GENIUS
PRO FARMER / TS • GENIUS
PRO FARMER / TS • GENIUS
STANDARD FOX
STANDARD FOX
STANDARD FOX
STANDARD FOX
STANDARD FOX
USO E MANUTENZIONE
USO E MANUTENZIONE
USO E MANUTENZIONE
USO E MANUTENZIONE
USO E MANUTENZIONE
OPERATING AND SERVICE
OPERATING AND SERVICE
OPERATING AND SERVICE
OPERATING AND SERVICE
OPERATING AND SERVICE
Rev. 02
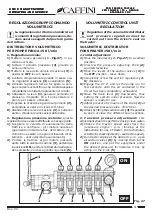
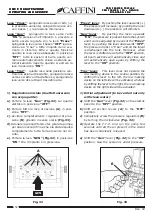
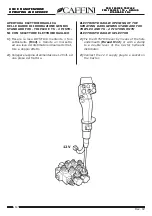
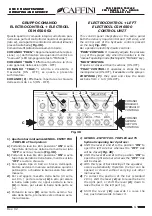
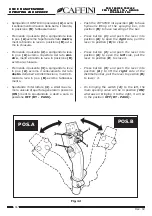
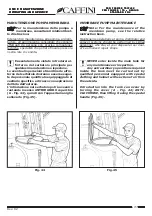
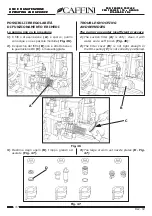
1) Barra idraulica PRO FARMER/TS 4 pistoni
(con comando meccanico manuale)
a)
In questo caso, la barra sarà equipaggiata di
bloccaggio idraulico, quindi prima di operare
manovre di apertura/chiusura sulla barra, è
obbligatorio bloccare l’equilibratore portando
il pulsante
7
in posizione
“ON”
.
b)
Portando la leva
2
in posizione
“ON”
si avrà
l’apertura del lato sx della barra mentre sul
lato
“OFF”
si avrà la chiusura
(Fig. 37)
.
c)
Portando la leva
3
in posizione
“ON”
si avrà
l’apertura del lato dx della barra, mentre sul
lato
“OFF”
si avrà la chiusura.
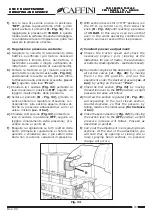
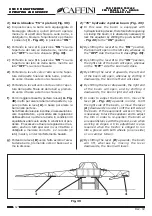
d)
Per correggiere l’assetto, portare la leva
6
in alto per alzare la barra nella parte sx, op-
pure portare la leva
6
in basso per alzare la
barra nella parte dx. Se l’attrezzatura lavora
in collina, é necessario bloccare l’equilibratore,
e procedere alla regolazione dell’assetto per
riportare la barra in condizioni di equidistanza
dal suolo anche in condizioni di pendenza. E’
necessario attuare la regolazione di assetto,
anche in tutti quei casi in cui il trattore é ob-
bligato a marciare con tutte e 2 le ruote (di
lato) in solco, o in terreni fortemente baulati.
e)
Portando la leva
5
verso l’alto avremo l’alzata
della barra, portando la leva verso il basso
avremo la discesa.
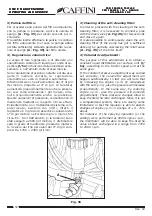
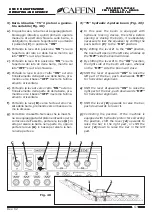
f)
Portando la leva
1
verso l’alto avremo l’aper-
tura della parte finale sx della barra, portando
la leva verso il basso avremo la chiusura.
g)
Portando la leva
4
verso l’alto avremo l’aper-
tura della parte finale dx della barra, portando
la leva verso il basso avremo la chiusura.
Fig. 37
1) PRO FARMER/TS hydraulic 4-piston boom
(with mechanical hand control)
a)
In this case the boom is equipped with
hydraulic locking device, therefore before
opening or closing the boom, it is absolutely
necessary to lock the equalizer by shifting the
push-button
7
to the
“ON”
position.
b)
By shifting the lever
2
to the
“ON”
position,
the boom will open on the left side, whereas on
the
“OFF”
side the boom will close
(Fig. 37)
.
c)
By shifting the lever
3
to the
“ON”
position,
the right side of the boom will open, whereas
on the
“OFF”
side the boom will close.
d)
In order to adjust the boom trim, move the
lever
6
upwards in order to lift the left side of
the boom, or move the lever
6
downwards in
order to lift the right side of the boom. If the
equipment works on hills, it is necessary to
lock the equalizer and to adjust the trim in
order to re-position the boom at an equal
distance with the ground, even when working
on slopes. A trim adjustment is also required
when the tractor is obliged to run into a groove
with both wheels (on one side) or on camber
terrain.
e)
By shifting the lever
5
upwards, the boom will
lift, whereas by moving the lever downwards,
the boom will lower.
f)
By shifting the lever
1
upwards, the left end
of the boom will open, whereas by shifting it
downwards, the boom left end will close.
g)
By shifting the lever
4
upwards, the right end
of the boom will open, and by shifting it
downwards, the boom right end will close.
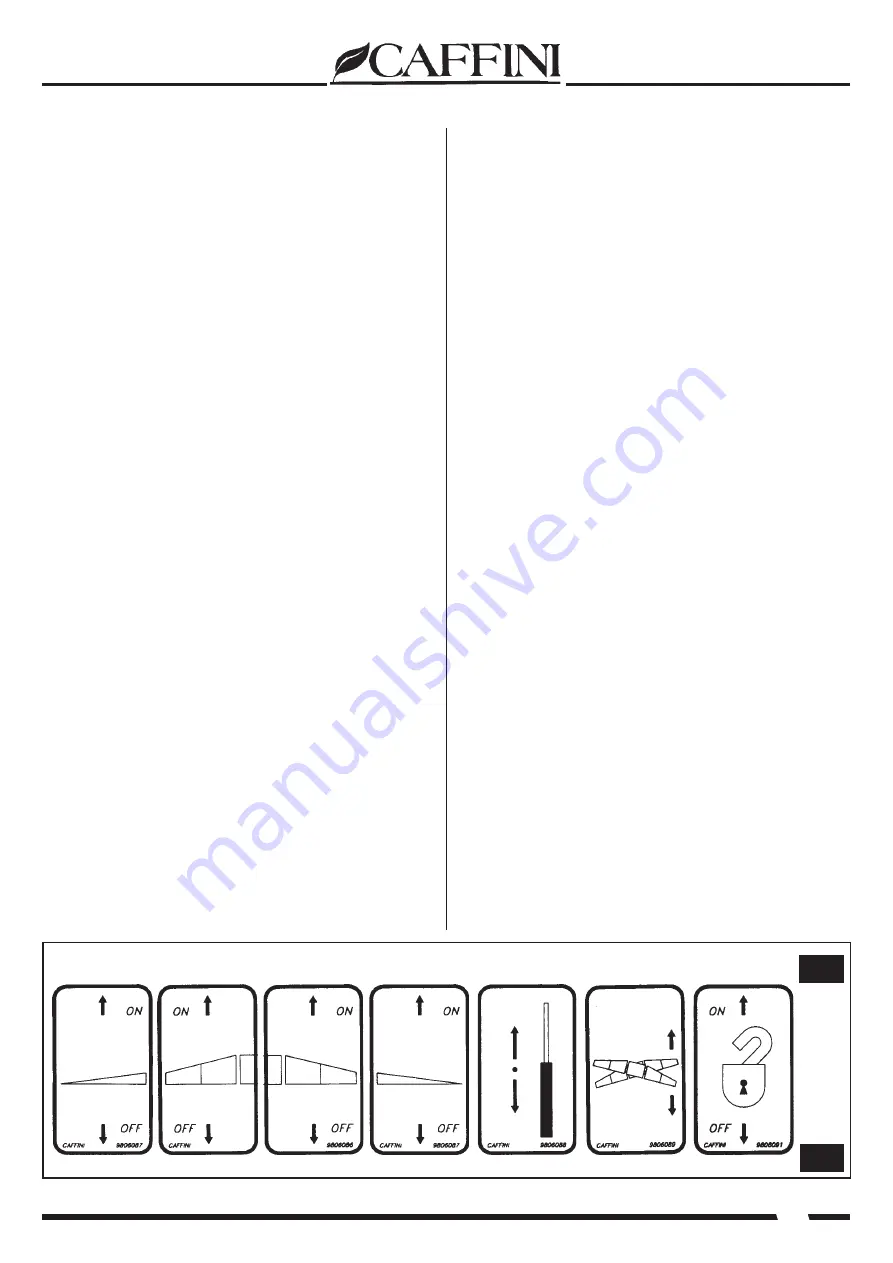
1
2
3
4
5
6
7
ON
OFF


