2
- 17
OPERACIONES DE MANTENIMIENTO PERIÓDICO Y DE
PUESTA A PUNTO
PERIODIC SERVICE AND SETTING UP OPERATIONS
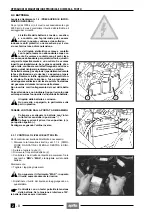
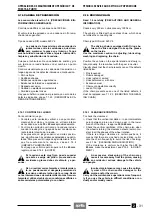
2.7 CARBURADORES
Controle tras los primeros 1000 km (o 4 meses) y sucesi-
vamente, cada 6000 km (o 8 meses).
Para más informaciones, véase 4.5 (CARBURADO-
RES).
2.8 TUBERÍAS DEL COMBUSTIBLE
Controle cada 6000 km (u 8 meses).
Susbtituya cada 4 años.
Para más informaciones, véase 4.0 (SISTEMA DE
ALIMENTACIÓN).
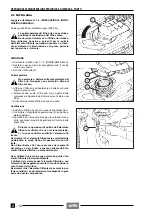
2.9 CABLE DEL ACELERADOR
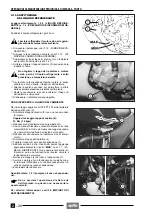
2.9.1 AJUSTE MANDO ACCELERADOR
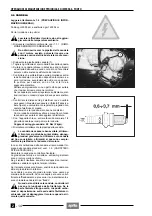
El juego en vacío del puño de mando del acelerador,
debe ser de 2 ÷ 3 mm, medida en el borde del puño mis-
mo. Si ésto no es así, realice lo siguiente:
◆
Apoye el vehículo sobre el soporte.
◆
Extraiga la envoltura de protección (1).
◆
Afloje la contratuerca (2).
◆
Gire el tensor (3) hasta alcanzar el valor indicado.
◆
Luego del ajuste, apriete la contratuerca (2) y controle
nuevamente el juego en vacío.
◆
Coloque nuevamente la envoltura de protección (1).
Tras haber finalizado el ajuste, controle que la
rotación del manillar no modifique el régimen
del ralentí del motor, y que al soltar el puño de
mando del acelerador, éste vuelva suave y automáti-
camente a la posición de reposo.
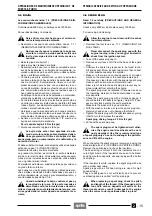
2.9.2 AJUSTE DEL RÉGIMEN DEL RALENTÍ
Ajuste el ralentí cada vez que resulte irregular.
Para realizar esta operación:
◆
Recorra algunos kilómetros hasta alcanzar la tempe-
ratura normal de funcionamiento.
◆
Mantenga el vehículo en posición vertical.
◆
Controle en el cuentarrevoluciones el régimen de rota-
ción mínimo del motor.
El régimen de rotación mínimo del motor tendrá que
ser de unas 1400
±
100 rpm.
Si es necesario:
◆
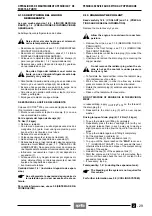
Actúe sobre el pomo de regulación (1), lado izquierdo
del vehículo.
ATORNILLANDO (en sentido horario) aumenta el nú-
mero de las revoluciones.
DESTORNILLANDO (en sentido antihorario) disminu-
ye el número de las revoluciones.
◆
Actuando sobre el puño de gas, acelere y decelere al-
gunas veces para controlar el funcionamiento correcto
y si el ralentí queda estable.
◆
★
Si resulta necesario actúe sobre el tornillo aire (5)
utilizando el destornillador correspondiente a 90˚,
véase 1.8 (EQUIPOS ESPECIALES).
a
2.7 CARBURETTORS
Check the carburettor after the first 1000 km (or 4
months) and then after every 6000 km (or 8 months).
F o r F U R T H E R I N F O R M A T I O N ,
see 4.5 (CARBURETTORS).
2.8 FUEL TUBING
Check every 6000 km (or 8 months).
Replace every 4 years.
For further information see 4.0 (FUEL SUPPLY SYS-
TEM).
2.9 ACCELERATOR CABLE
2.9.1 ADJUSTING THE ACCELERATOR CONTROL
The idle stroke of the accelerator control handgrip should
be 2 to 3 mm, measured on the edge of the handgrip it-
self. If this is not confirmed, proceed as follows:
◆
Position the vehicle on stand.
◆
Remove the protection guard (1)
◆
Loosen the lock nut (2)
◆
Rotate the adjuster (3) so as to return to the prescribed
value.
◆
After this adjustment, tighten the lock nut (2) and
check the idle stroke again.
◆
Put the protection guard in place again (1)
After completing the adjustment, check that
the rotation of the handlebar does not modify
the idling rpm of the engine and that the accel-
erator handgrip returns smoothly and automatically
into a rest position when released.
2.9.2 ADJUSTMENT OF IDLING RPM
Adjust the idling every time it is irregular.
To carry out this operation, proceed as follows:
◆
Ride for a few miles until reaching the normal running
temperature.
◆
Keep the vehicle in vertical position.
◆
Check the engine idling rpm on the revolution counter.
The engine idling speed must be about 1400
±
100
rpm.
If necessary:
◆
Adjust the knob (1) positioned on the left side of the ve-
hicle.
By SCREWING IT (clockwise), you increase the en-
gine rpm.
By UNSCREWING IT (anticlockwise), you decrease
the engine rpm.
◆
Twist the throttle grip, accelerating and decelerating a
few times to make sure that it functions correctly and
to check if the idling speed is constant.
◆
★
If necessary, adjust the air screw (5) by means of the
apposite 90˚ screwdriver, see 1.8 (SPECIAL TOOLS).
a
Содержание Pegaso 650
Страница 1: ......
Страница 3: ...0 4 NOTE NOTES ANMERKUNGEN ...
Страница 4: ...1 1 1 2 3 4 5 6 7 8 INFORMAZIONI GENERALI INFORMACIONES GENERALES GENERAL INFORMATION ...
Страница 42: ......
Страница 69: ...3 1 1 2 3 4 5 6 7 8 MOTORE MOTOR ENGINE ...
Страница 90: ...3 22 MOTORE NOTE NOTAS NOTES ...
Страница 91: ...4 1 1 2 3 4 5 SISTEMA DI ALIMENTAZIONE SISTEMA DE ALIMENTACIÓN FUEL SYSTEM ...
Страница 116: ...4 26 SISTEMA DI ALIMENTAZIONE NOTE NOTAS NOTES ...
Страница 117: ...5 1 1 2 3 4 5 6 7 8 IMPIANTO DI RAFFREDDAMENTO SISTEMA DE REFRIGERACIÓN COOLING SYSTEM ...
Страница 130: ...5 14 IMPIANTO DI RAFFREDDAMENTO SISTEMA DE REFRIGERACIÓN COOLING SYSTEM NOTE NOTAS NOTES ...
Страница 131: ...6 1 6 1 2 3 4 5 6 7 8 IMPIANTO ELETTRICO INSTALACIÓN ELÉCTRICA ELECTRICAL SYSTEM ...
Страница 176: ...IMPIANTO ELETTRICO INSTALACIÓN ELÉCTRICA ELECTRICAL SYSTEM 6 46 NOTE NOTAS NOTES ...
Страница 177: ...7 1 1 2 3 4 5 6 7 8 CICLISTICA PARTE CICLO CHASSIS PARTS ...
Страница 226: ... 67 3 57 2 66 6 3 576 7 50 5827 3267 5 25 58 75 6 5 5 5 ...
Страница 242: ... 67 3 57 2 66 6 3 576 7 66 5 12 17 5 25 5 12 17 52 5217 5 ...
Страница 246: ... 67 3 57 2 66 6 3 576 7 70 5 12 3267 5 25 5 12 75 6 52 5 5 5 ...
Страница 272: ... 67 3 57 2 66 6 3 576 7 96 NOTE NOTAS NOTES ...
Страница 273: ...8 1 1 2 3 4 5 6 7 8 INFORMAZIONI PER LE RIPARAZIONI INFORMACIONES PARA LAS REPARACIONES REPAIRS ...
Страница 301: ...INFORMAZIONI PER LE RIPARAZIONI INFORMACIONES PARA LAS REPARACIONES REPAIRS 8 29 E F E F G H G H ...
Страница 302: ...INFORMAZIONI PER LE RIPARAZIONI INFORMACIONES PARA LAS REPARACIONES REPAIRS 8 30 I L I M L N M N ...
Страница 303: ...INFORMAZIONI PER LE RIPARAZIONI INFORMACIONES PARA LAS REPARACIONES REPAIRS 8 31 O P Q P O R Q R ...
Страница 310: ...INFORMAZIONI PER LE RIPARAZIONI INFORMACIONES PARA LAS REPARACIONES REPAIRS 8 38 NOTE NOTAS NOTES ...
Страница 311: ...INFORMAZIONI PER LE RIPARAZIONI INFORMACIONES PARA LAS REPARACIONES REPAIRS 8 39 ...

